Importing HAR files and HAR files from RDC or VDC
If you have an HTTP Archive (HAR) file or you have tested using Real Device Cloud (RDC) or Virtual Device Cloud (VDC), you can import it directly into API Testing on Sauce Labs and use it to generate tests.
What You'll Need
- A Sauce Labs account (Log in or sign up for a free trial license).
- An existing API Testing Project. For details on how to create one, see API Testing Quickstart.
- A HAR file or a HAR file from RDC/VDC.
Looking to import from a spec file? See Building a Test from a Spec File.
Importing a HAR File
You can import a HAR (HTTP Archive) file into API Testing to automatically generate a functional test.
To import a HAR file:
-
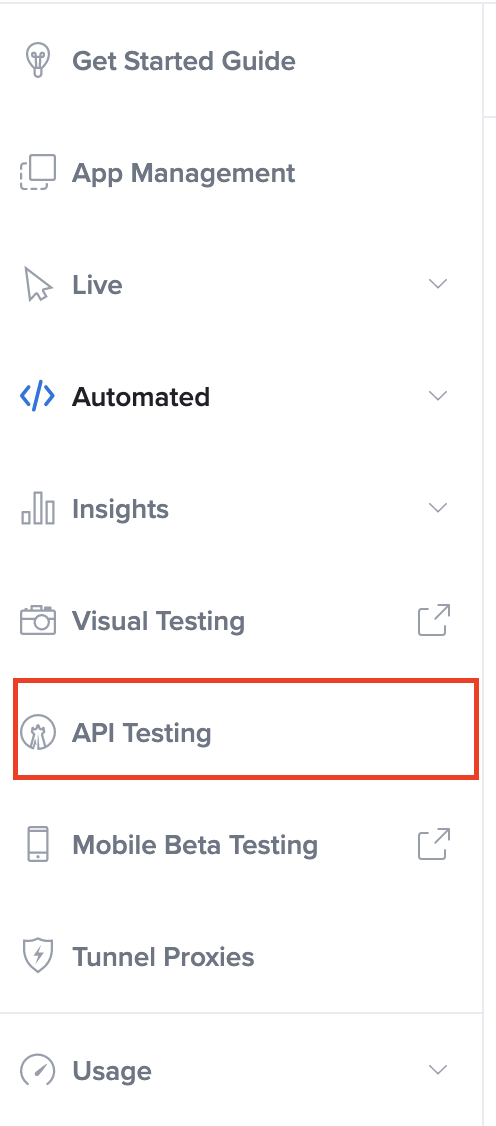
In Sauce Labs, click API Testing.
-
On the Projects page, under the project, you want to import the file to, click HTTP Client.

-
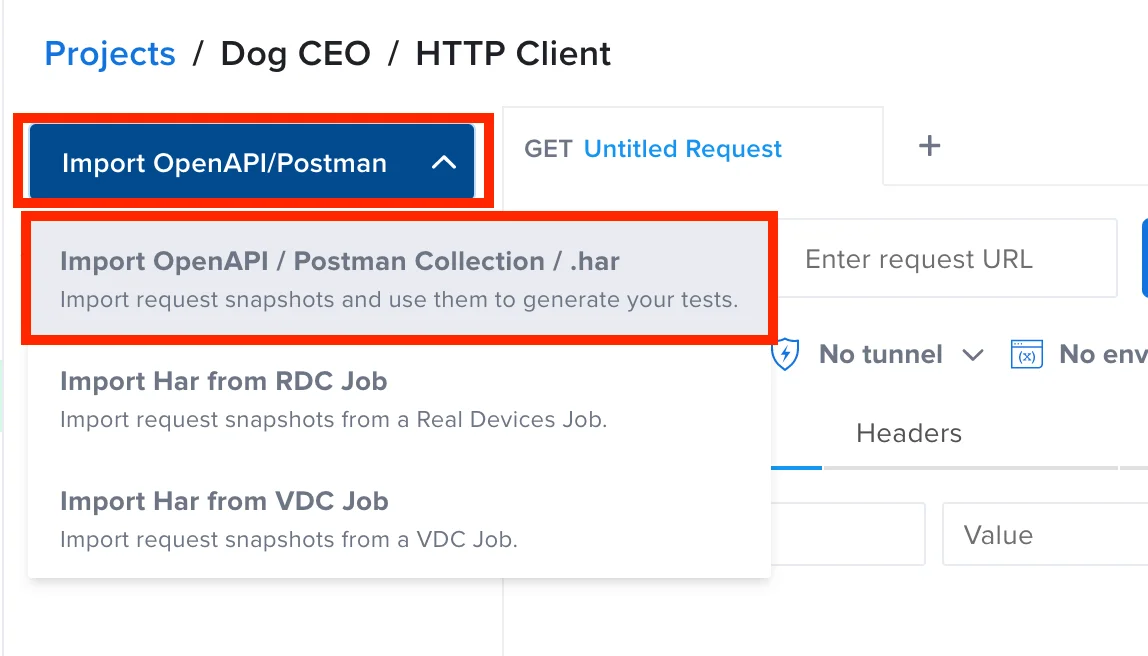
On the HTTP Client page, click Import OpenAPI/Postman, then click Import OpenAPI/Postman Collection/.har and then, select and upload your HAR file from your local machine.
-
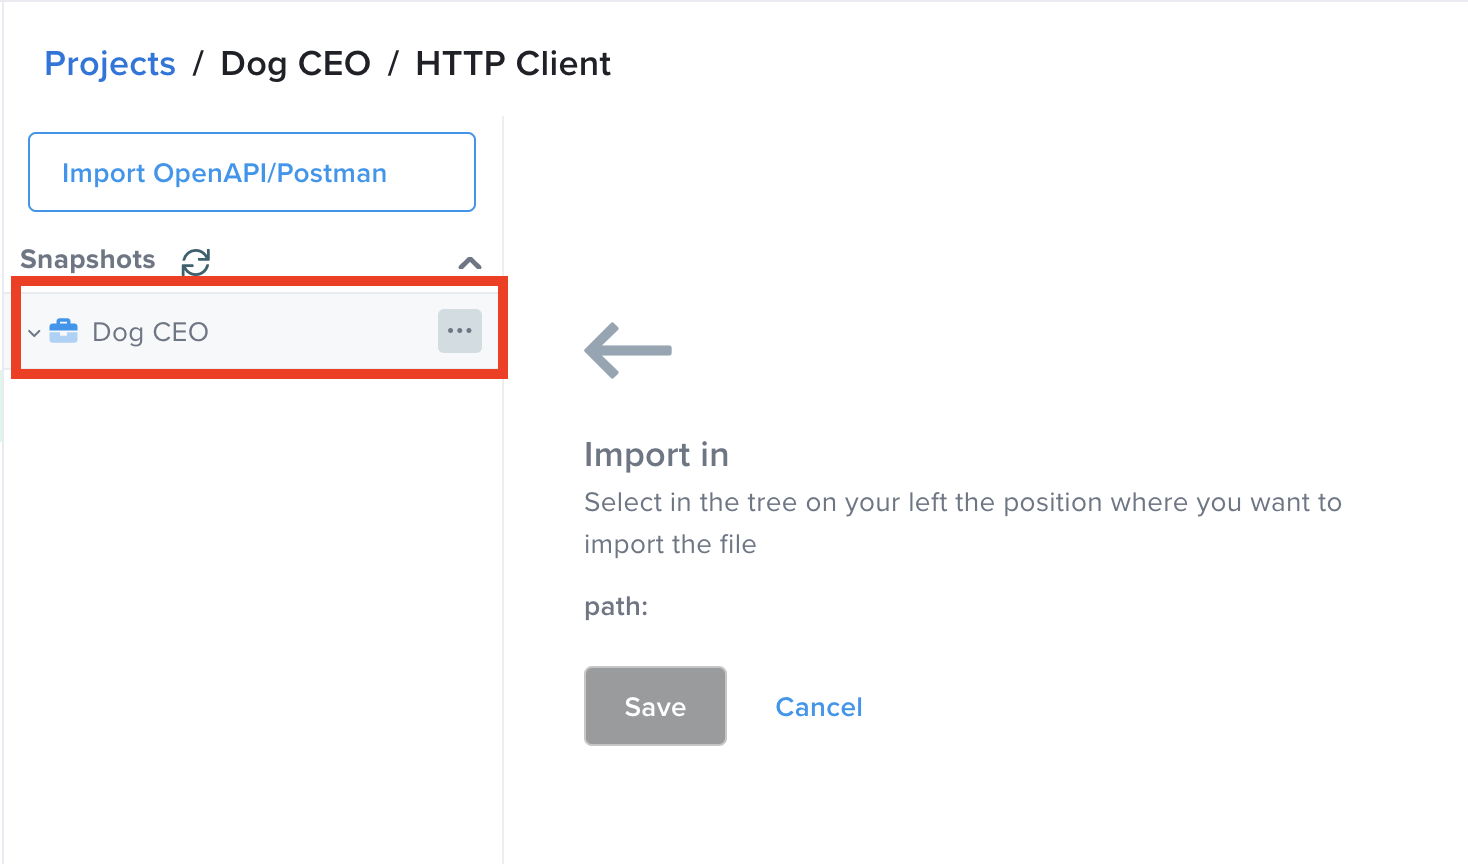
Click the folder in your Snapshots tree where you'd like to save your file.
-
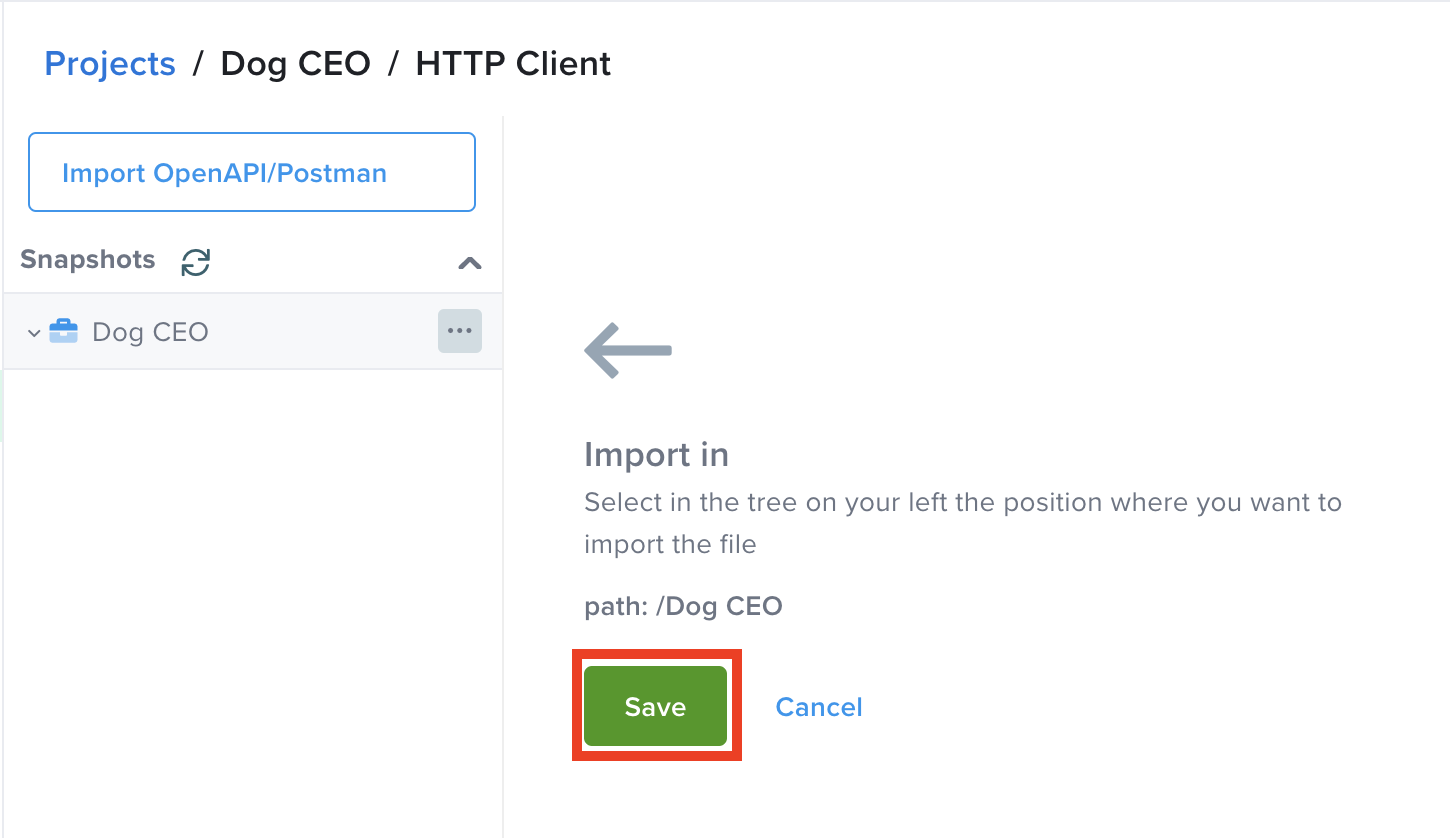
Click Save.
-
The routes from your file will now show in the list of saved requests.
-
In the folder, click on a snapshot to view its details in the response panel.
-
To create a test based on the imported file, click Generate Test. For more information about creating a test, see Create a Test.
Importing a HAR File from RDC and VDC
You can import a HAR (HTTP Archive) file into API Testing to automatically generate a functional test from RDC or VDC. Network Traffic Capture and Extended Debugging must be enabled to use this feature. See Network Traffic Capture and Enabling Extended Debugging for more information.
To import a HAR file:
-
In Sauce Labs, click API Testing.

-
On the Projects page, under the project, you want to import the file to, click HTTP Client.

-
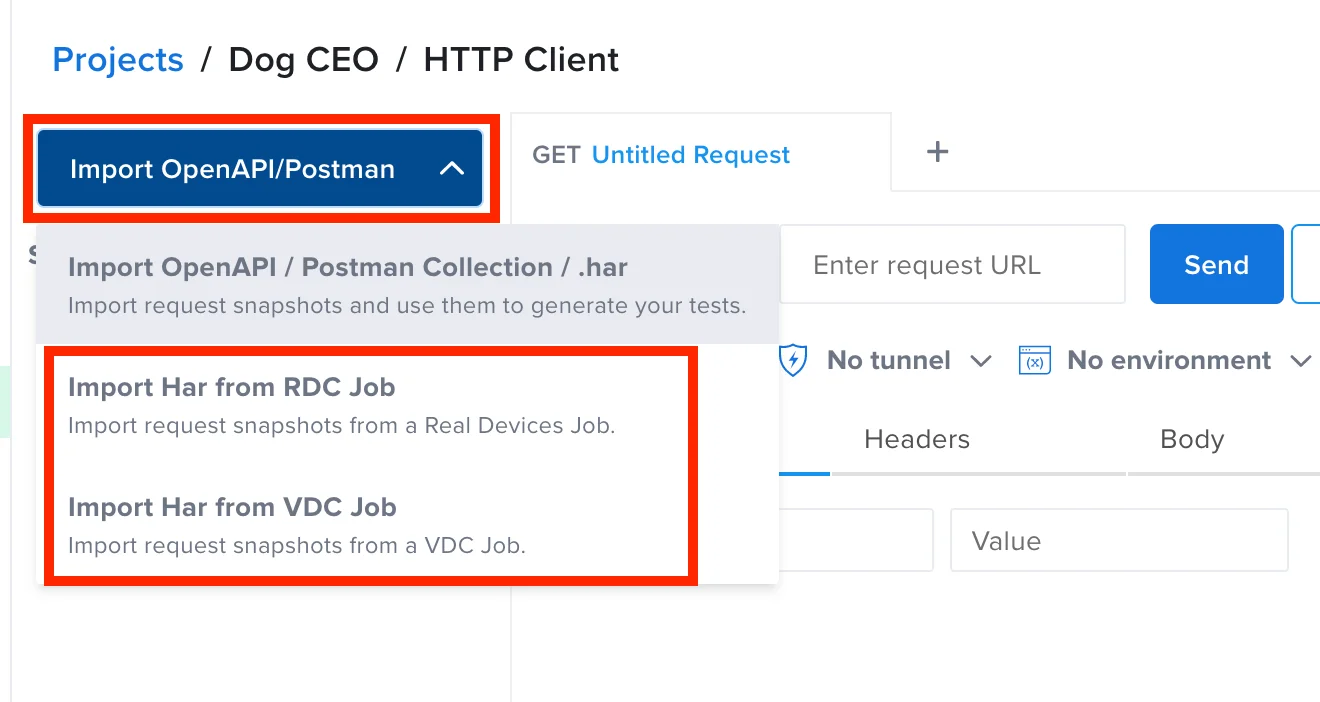
On the HTTP Client page, click Import OpenAPI/Postman, and then click Import Har from RDC Job or Import Har from VDC Job.
-
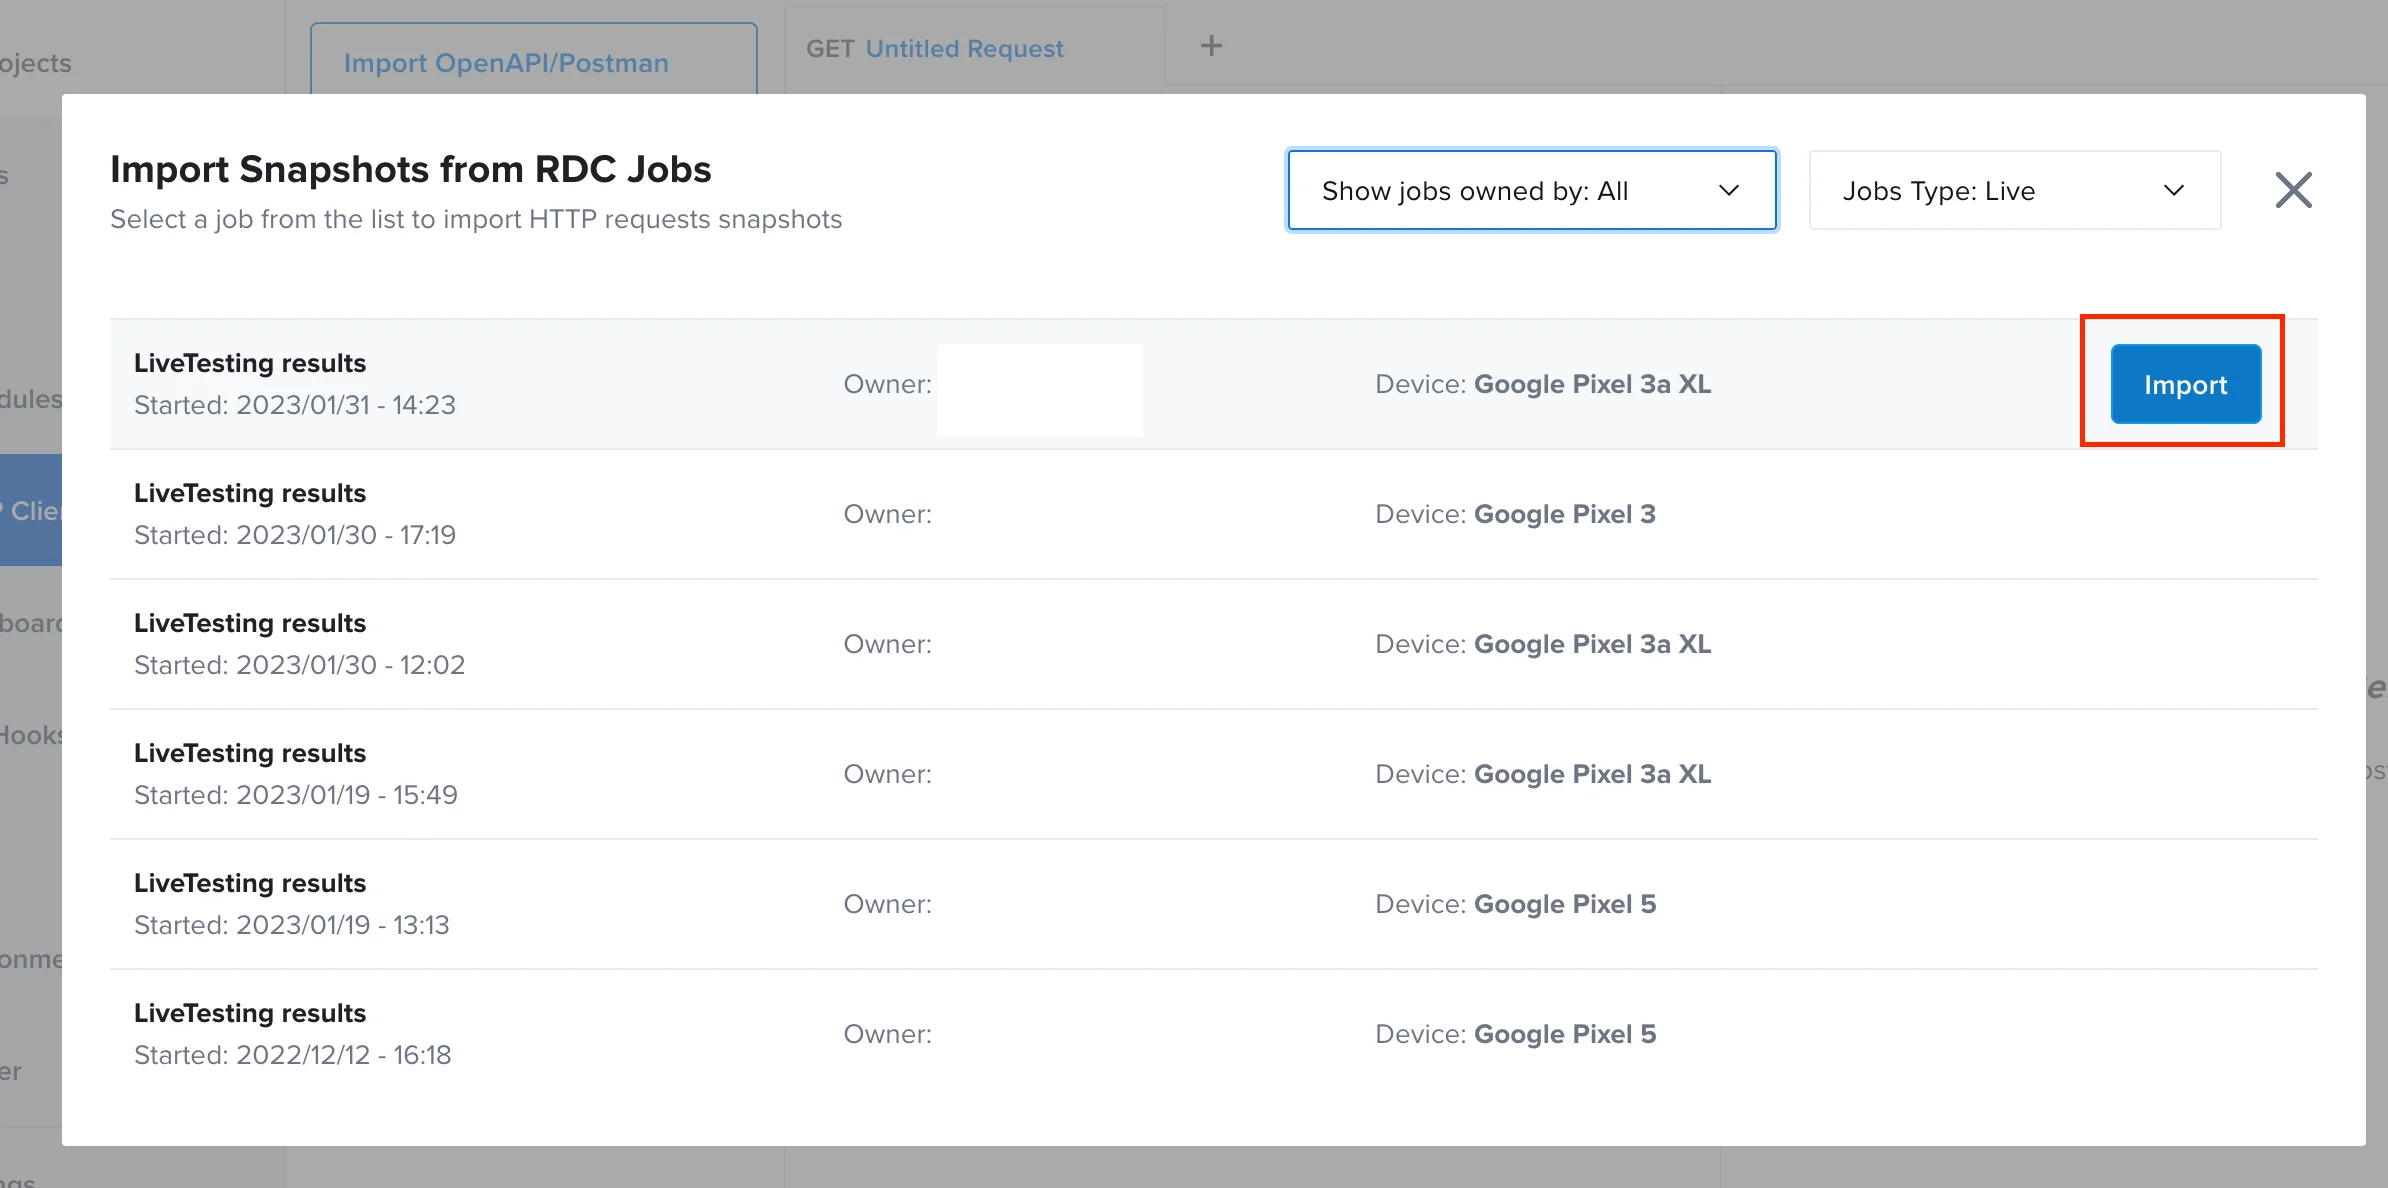
In the Import Snapshots window, click a test in the list and then click Import. You can filter this list by job owner or job type.
-
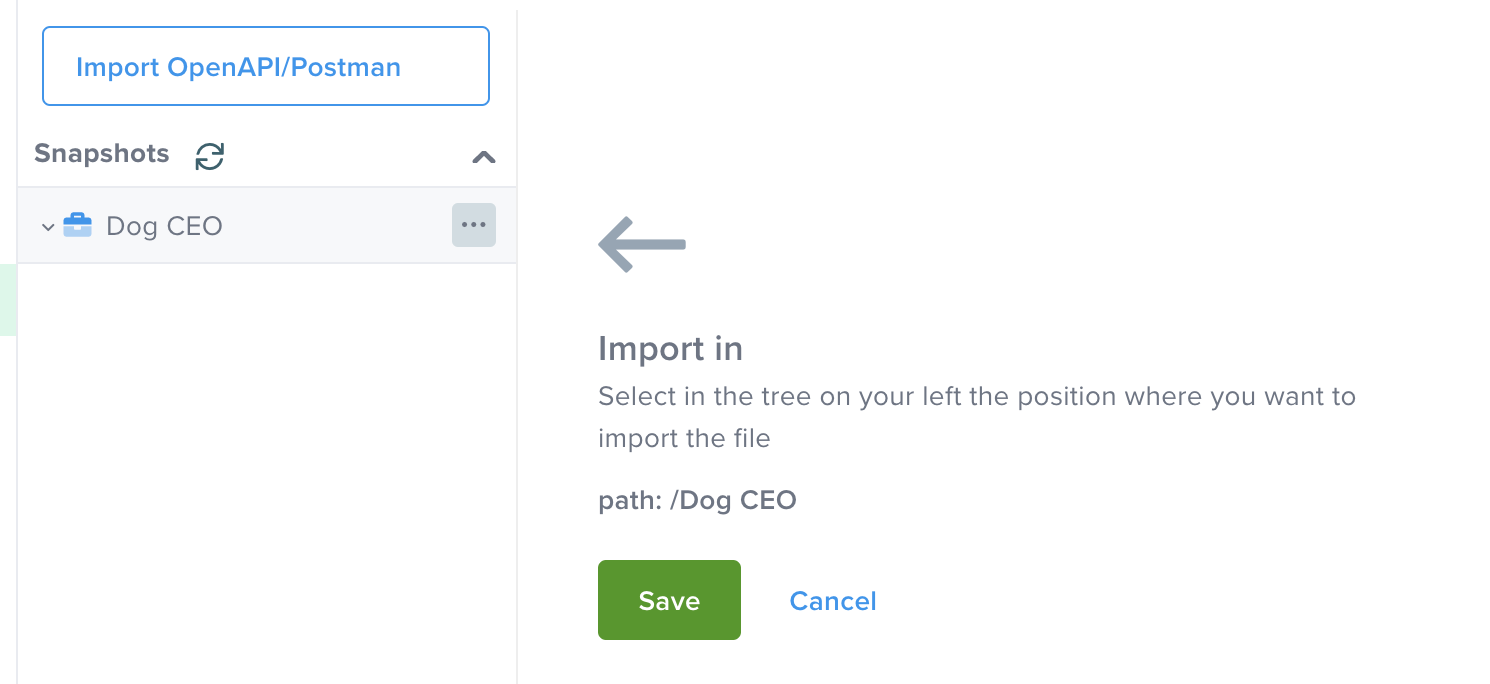
In the Snapshots panel, navigate to a folder and then click Save.
-
When the import is complete, in the Snapshots panel, open the folder you imported the files to.
-
In the folder, click on a snapshot to view its details in the response panel.

-
To create a test based on the imported file, click Generate Test. For more information about creating a test, see Create a Test.