Dealing with Authentication (Simple, OAuth, etc.)
Legacy Documentation
You're viewing legacy documentation for API Fortress (deployed via an on-premises container). To view documentation for the new SaaS version of API Fortress — now known as Sauce Labs API Testing and Monitoring (with Sauce Connect tunnels) — see API Testing on the Sauce Labs Cloud.
Overview
API Fortress can handle nearly any authorization scheme. Below, we provide some guides on simple ways to work with the most common authorization methods. If it requires usage of a long lasting token, see here for more information.
Simple Authorization
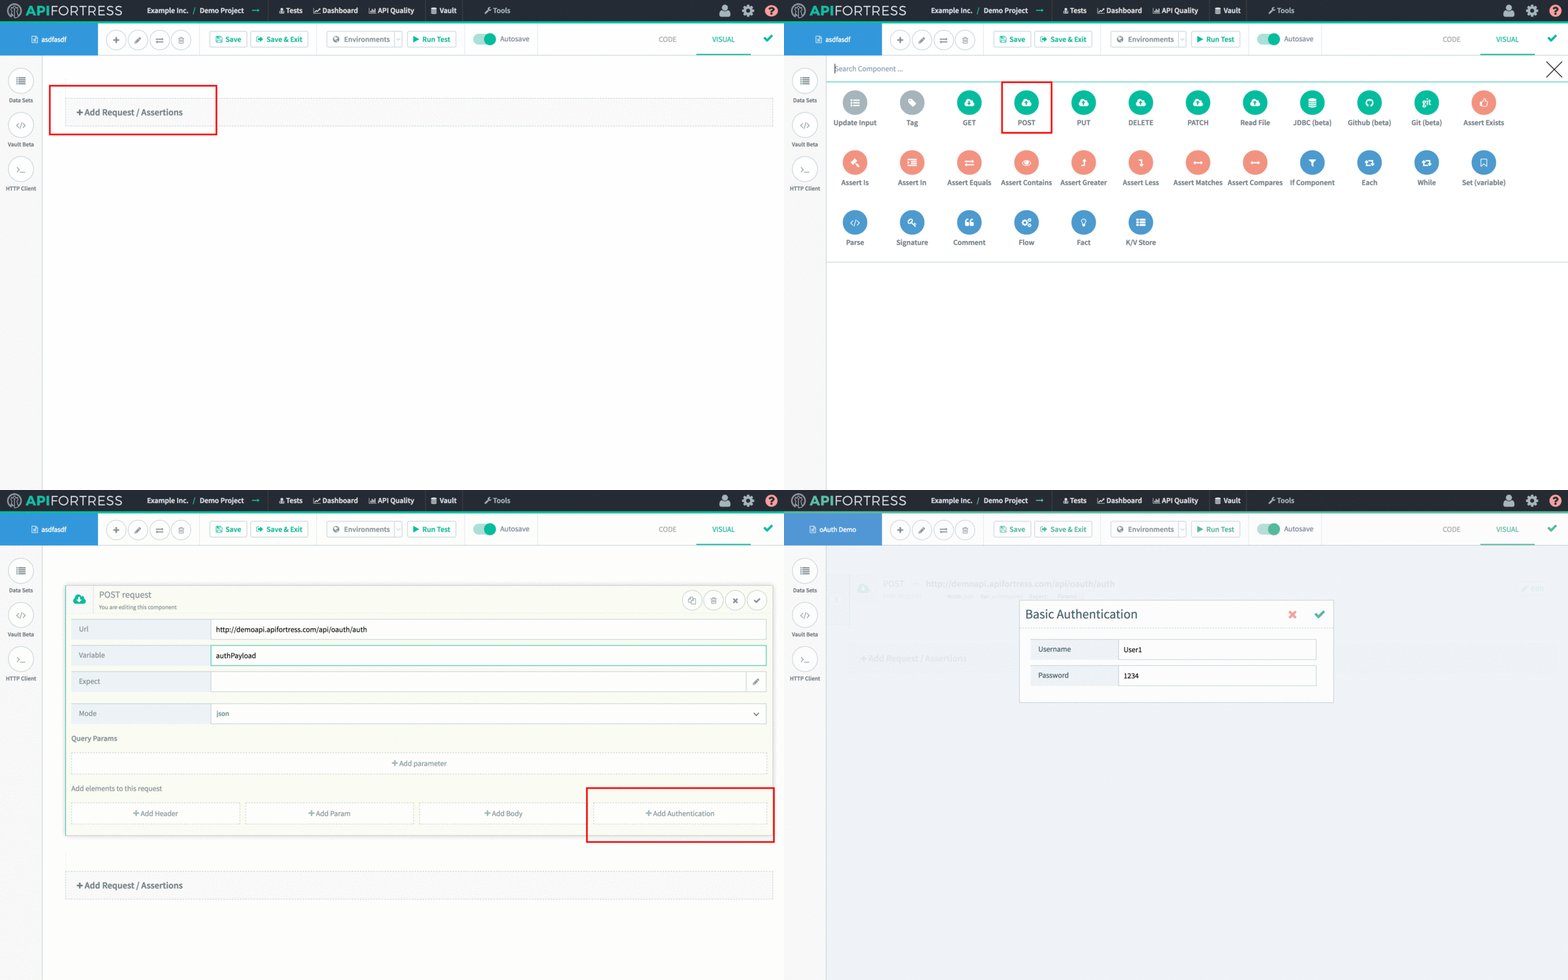
- Enter the visual composer
- Click Add Component
- Click
POST(or whatever REST method the authentication server is expecting) - Enter details and then click Add Authentication
- Choose Basic
- Enter the Username and Password

The header information is automatically encoded and entered for you!

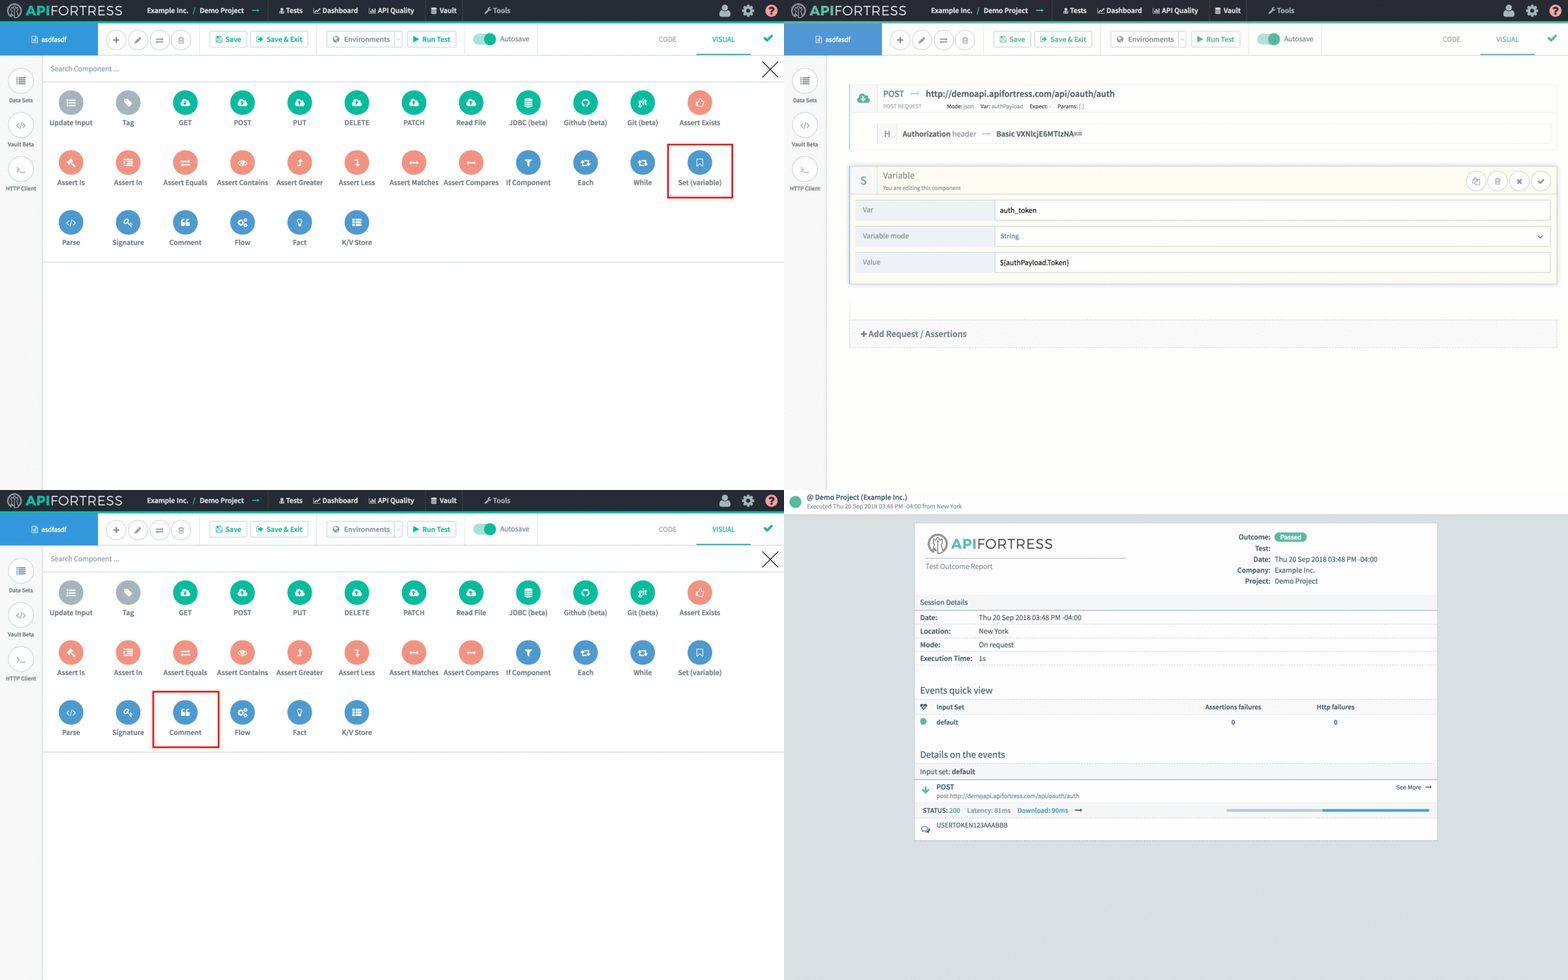
Next, we parameterize the token that we receive in the response.
- First, select the Set (variable) component
- Next, enter the name that you would like to use for the variable as Var
- Enter the value of the token itself as Value
- Add aComment component with the previously set variable as the Value to see the token logged!
From here, we can use the token in follow-on prompts by referencing its variable name.

Video Demonstration
Simple Authorization from the HTTP Client
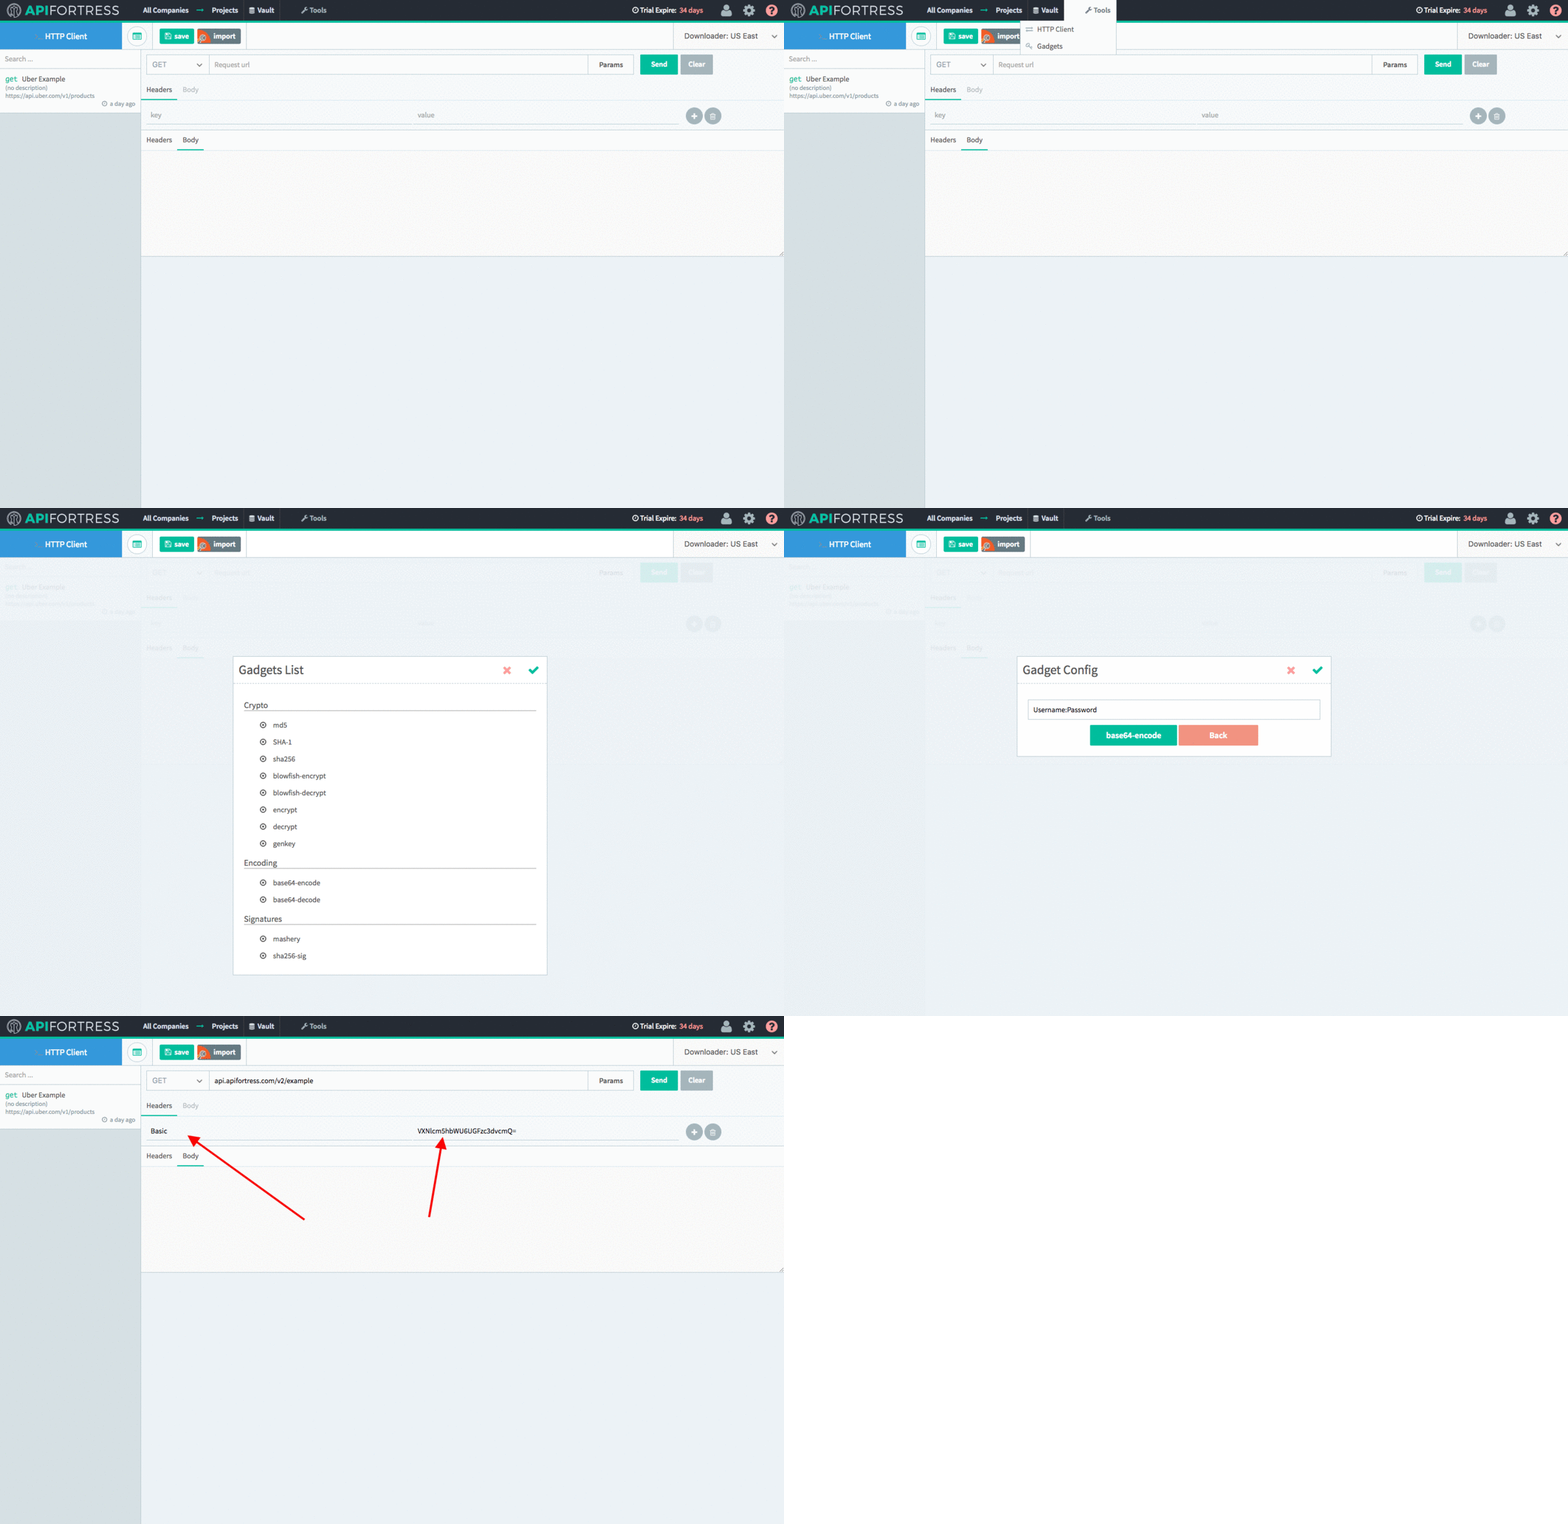
Using the HTTP composer requires encoding the Username and Password yourself.
- Click on Tools > HTTP Client
- Click on Tools > Gadgets
- Choose base64-encode
- Type in the username and password like this with the semicolon "username:password"
- Click encode
- Copy the generated code (our example is VXNlcm5hbWU6UGFzc3dvcmQ=)
- Now use that generated code in your call. Specifically as a Header, and use the word "Basic" under key, and the generated code (VXNlcm5hbWU6UGFzc3dvcmQ=) for value.

That's it! The call should work now. If not feel free to send us a message at support@apifortress.com!
OAuth/Token Exchange
-
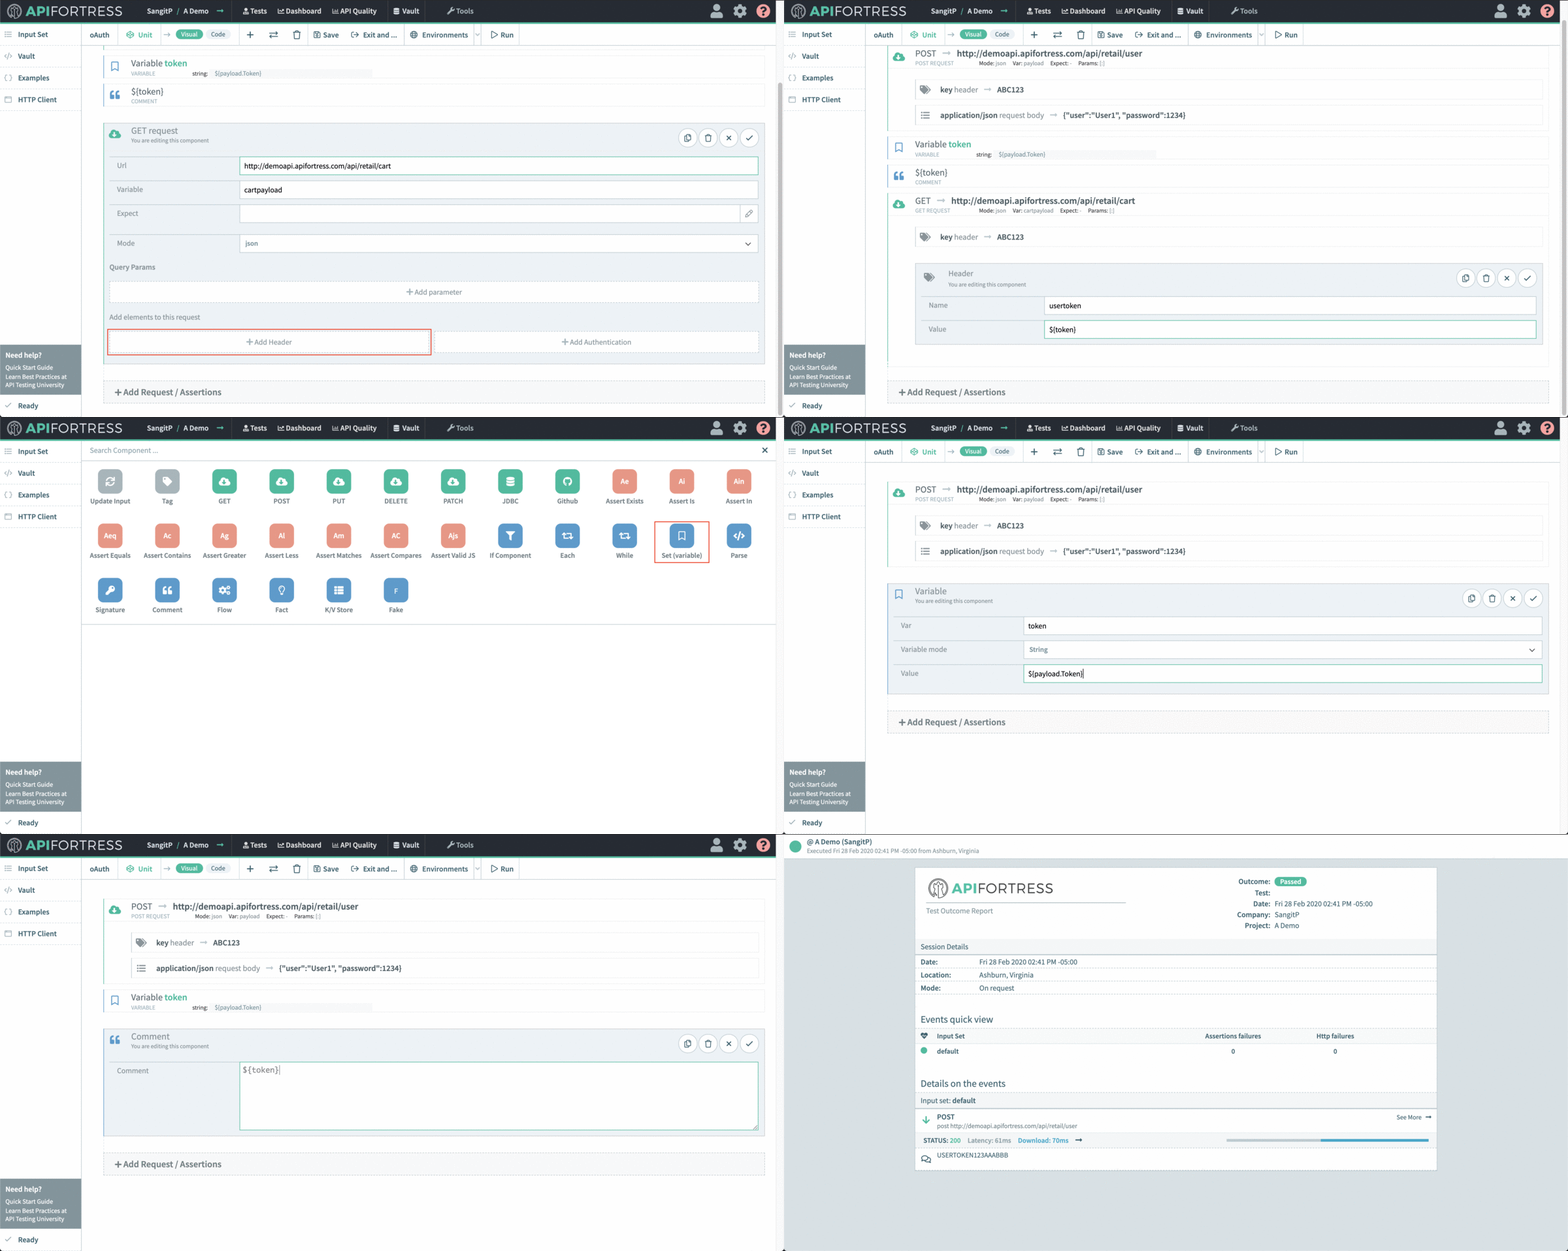
Enter the visual composer
-
Click Add Component
-
Click POST (or whatever REST method the authentication server is expecting)
-
Enter details and add parameters or POST body
-
In our example its a POST body with username and password

Next, we parameterize the token that we receive in the response.
- First, select the Set (variable) component
- Next, enter the name that you would like to use for the variable as Var
- Enter the reference to the token from the previous payload as Value
- Add a Comment component with the previously set variable as the Value to see the token logged!
- From here, we can use the token in subsequent API calls by referencing its variable name.
