Introduction to Integration Testing
Legacy Documentation
You're viewing legacy documentation for API Fortress (deployed via an on-premises container). To view documentation for the new SaaS version of API Fortress — now known as Sauce Labs API Testing and Monitoring (with Sauce Connect tunnels) — see API Testing on the Sauce Labs Cloud.
Integration testing is a core feature of the API Fortress platform. Watch our video about how to write an Integration Test.
Follow along with the demo video in the API Fortress platform here: Quick Integration Demo.
Integration testing is critical to creating a strong API testing strategy. Microservices are built to work together, and an integration test allows you to create end-to-end tests that resemble common user flows. While only testing individual endpoints is a good start, this method will miss a large number of problems that occur when all services need to work together.
Let’s consider an example that only a proper integration test could solve: Company A has an authentication server. This server, when given the proper user credentials, returns an authentication token. This token is required for all other calls throughout the platform’s API environment. Without this first API call, none of the other API calls can work. API Fortress makes it easy to validate the integration, capturing the entire API flow from end to end.
Getting Our Token
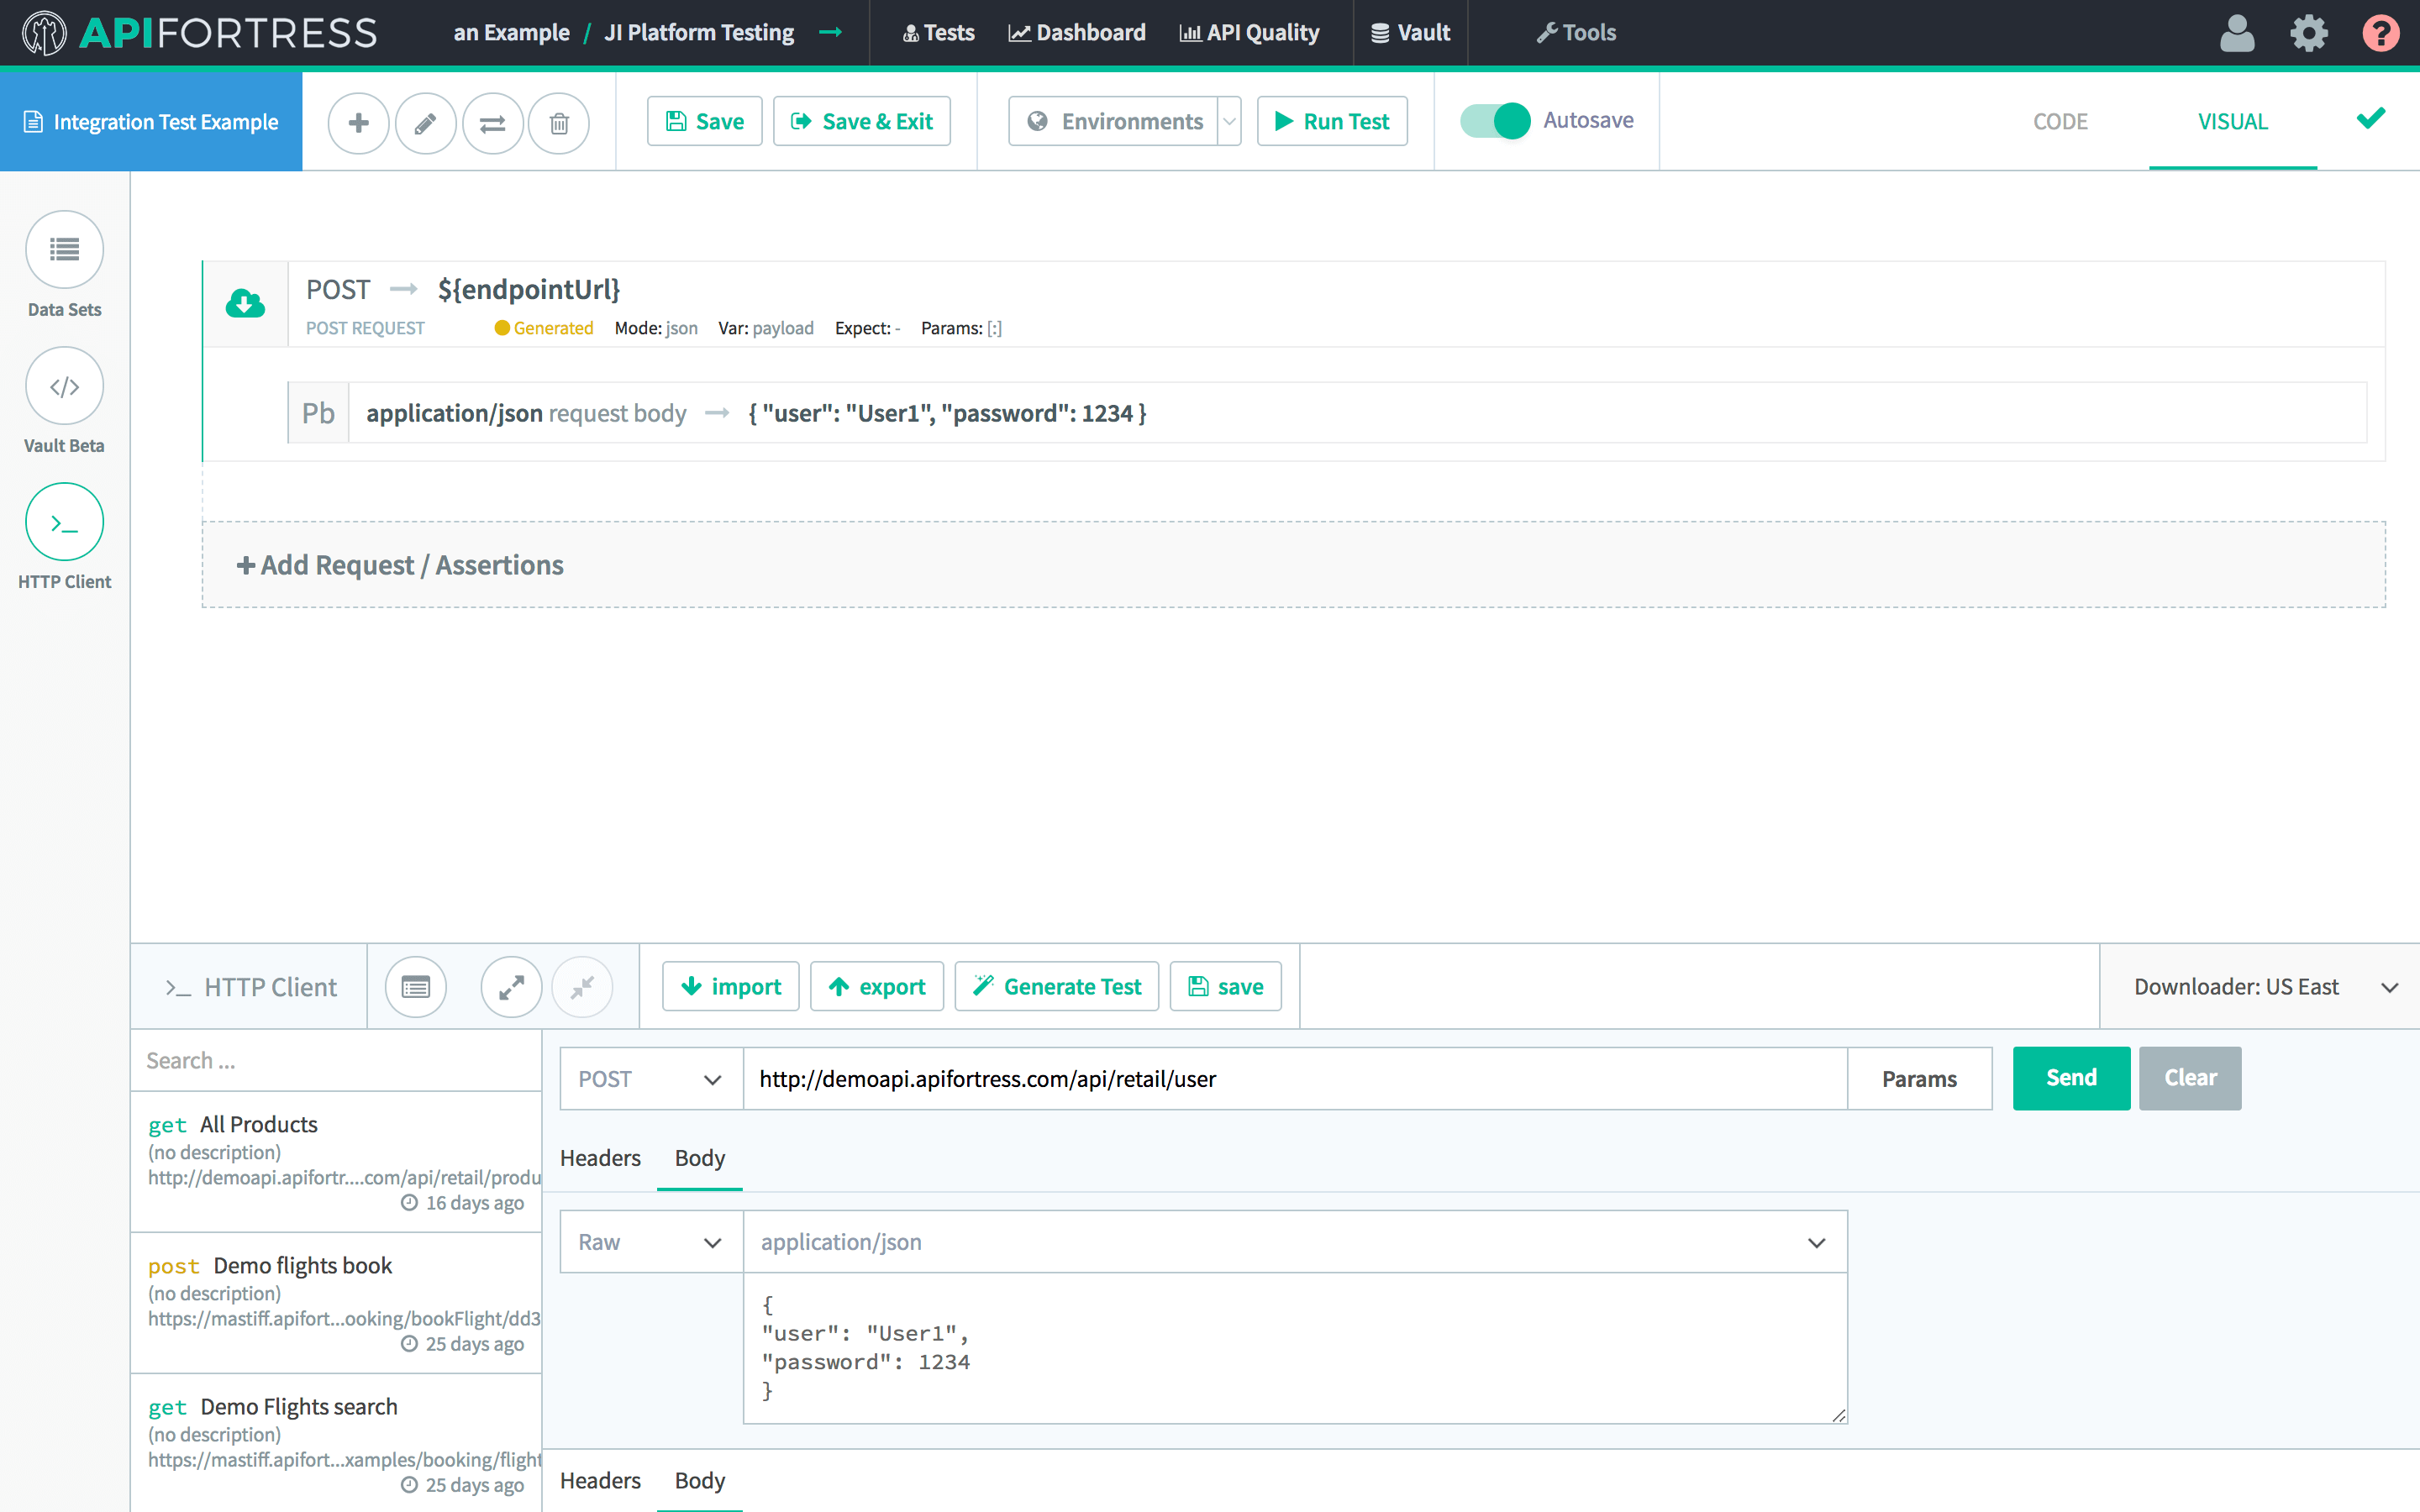
First, we need to make our POST call to the authorization server.

In this case, the request body is the username and password. Given proper credentials, the authentication server will return a user token.
Next, we need to use this token to make further calls to the application.
Setting a Variable
First, we need to assign the token to a variable. Variables are used to store data temporarily for a test. You can use the API Fortress Vault for more permanent variables (learn more about variables here).
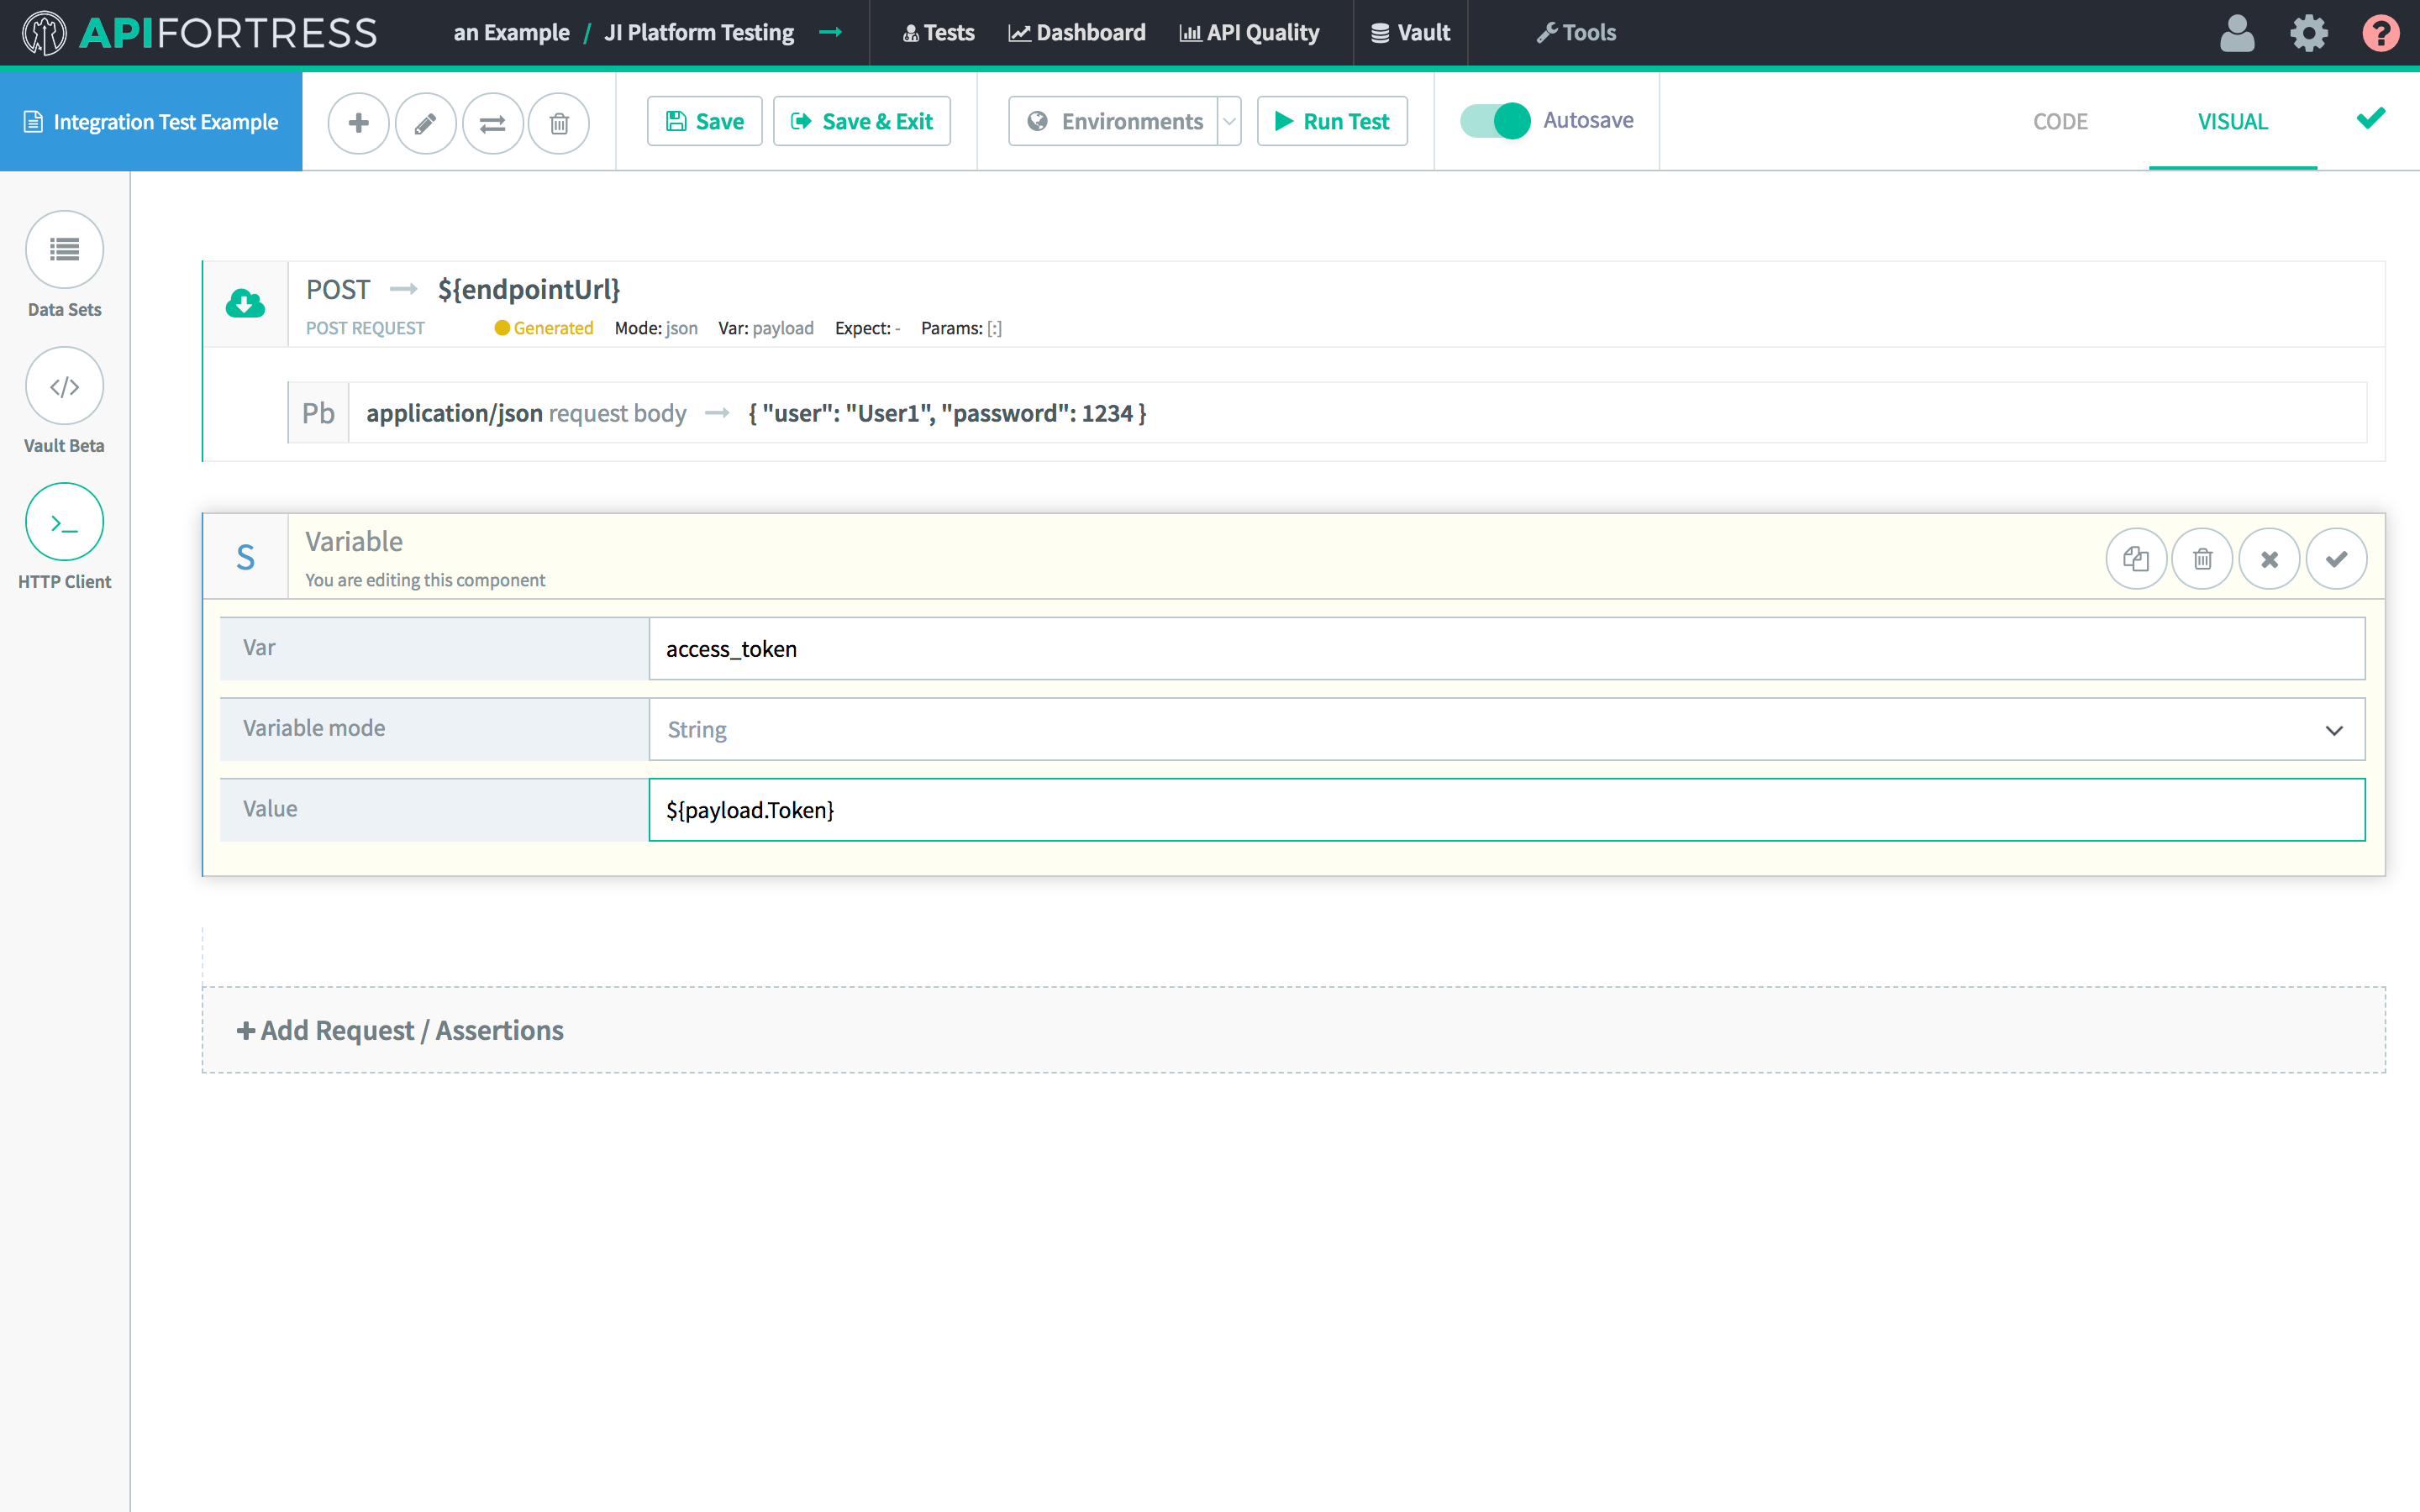
We do this so we don’t have to manually invoke or set a variable every time it is needed. Next, add a “Set” component, and enter the information as seen in the image below.

Now, call the variable “access_token” and assign the value to ${payload.Token}. The response body from the original post call was saved to a variable called “payload.” The key to access the token is named “Token”, so you may find it by calling “payloadToken”. Be sure to wrap this all in ${} so that API Fortress knows to interpret what’s between the brackets instead of using it literally.
Making Follow-up Calls
We’re nearly there. We’ve made our authentication POST call, and then we’ve saved the token to a dynamic variable named “access_token.” Now it is time for the third, and for this example, final step.
This API has a cart function that requires a user token in order to add items to a cart or view items currently in the cart. Use the access token granted by the authentication server to add items to a cart.

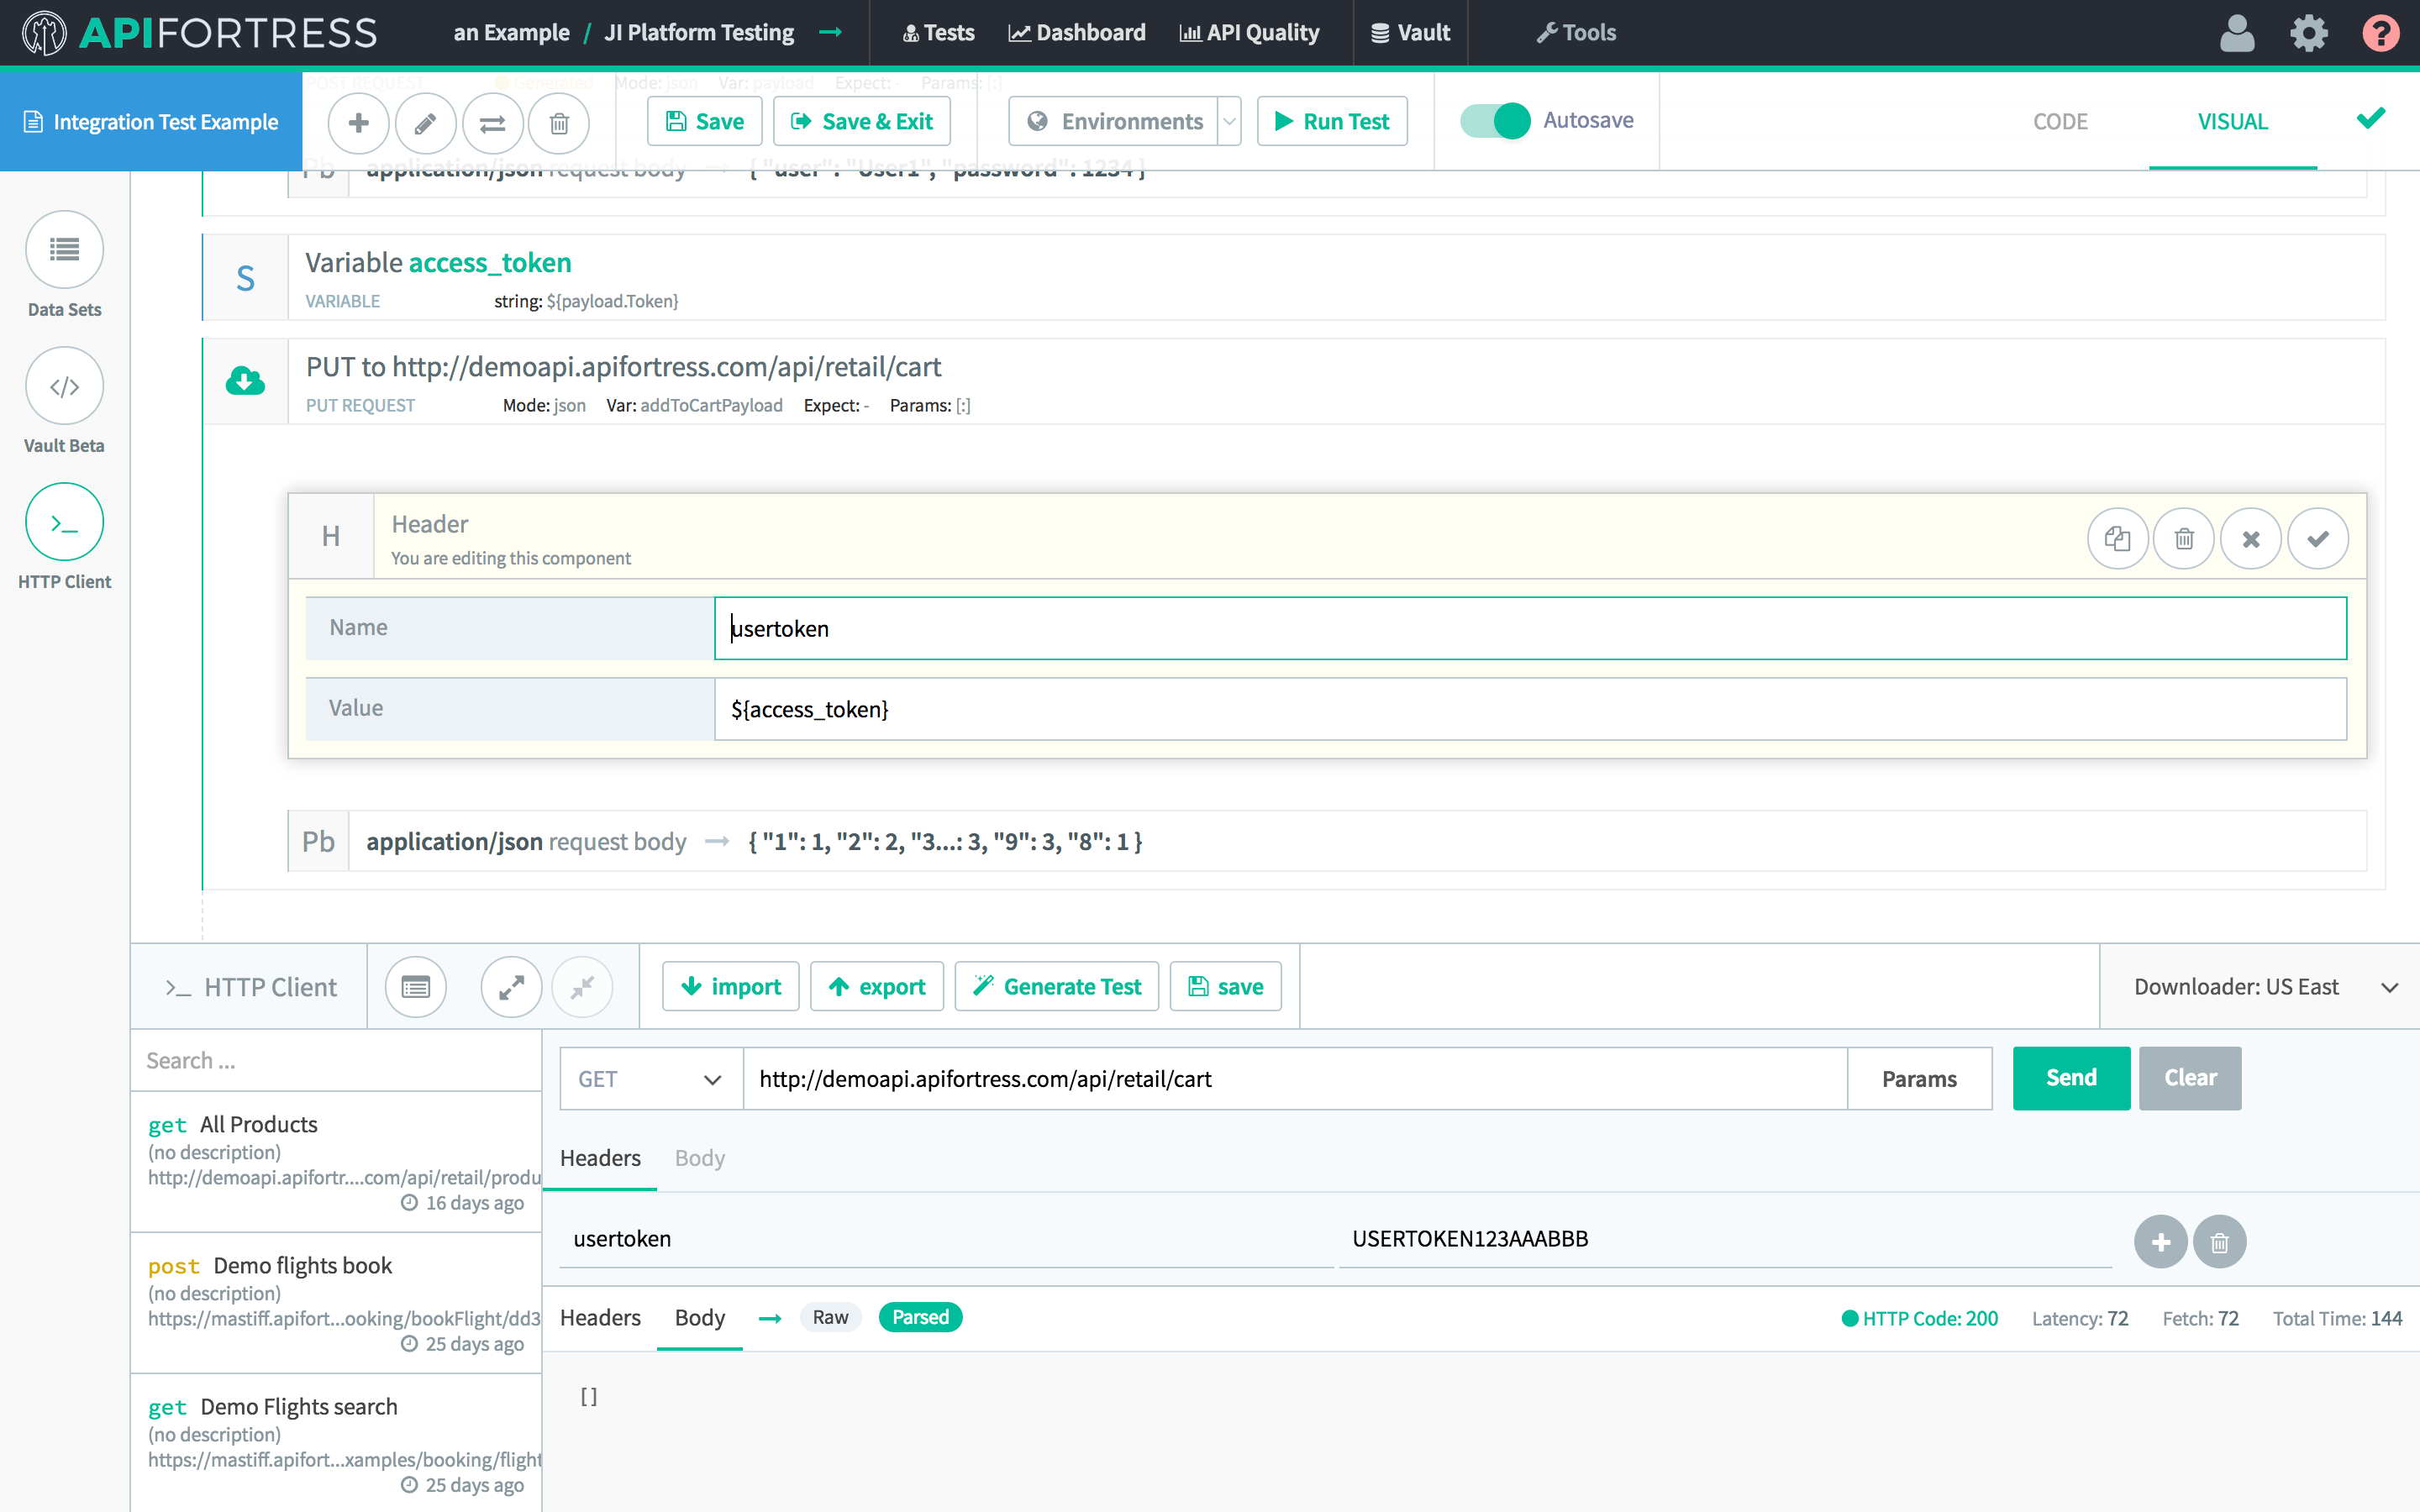
Use a PUT request to the cart endpoint to update the cart. Set the “usertoken” header to ${access_token}. This is the same notation as before. The request body is a JSON object that the server will recognize as items and quantities. That part isn’t important for the purposes of this demonstration.
Further Explanation
As we stated at the start, it is imperative to not just exercise endpoints, but validate that an entire series of microservices are working. It’s best to do that by writing tests that emulate common and uncommon user flows. A critical part of that work involves creating reusable variables to allow the test to work at any time, with any data.
By making a request for a fresh token at the beginning of the sequence, and then assigning it to a variable, you will know that any time you run this test, you’re doing so with a valid access token, which is automatically being passed to all follow-up calls.
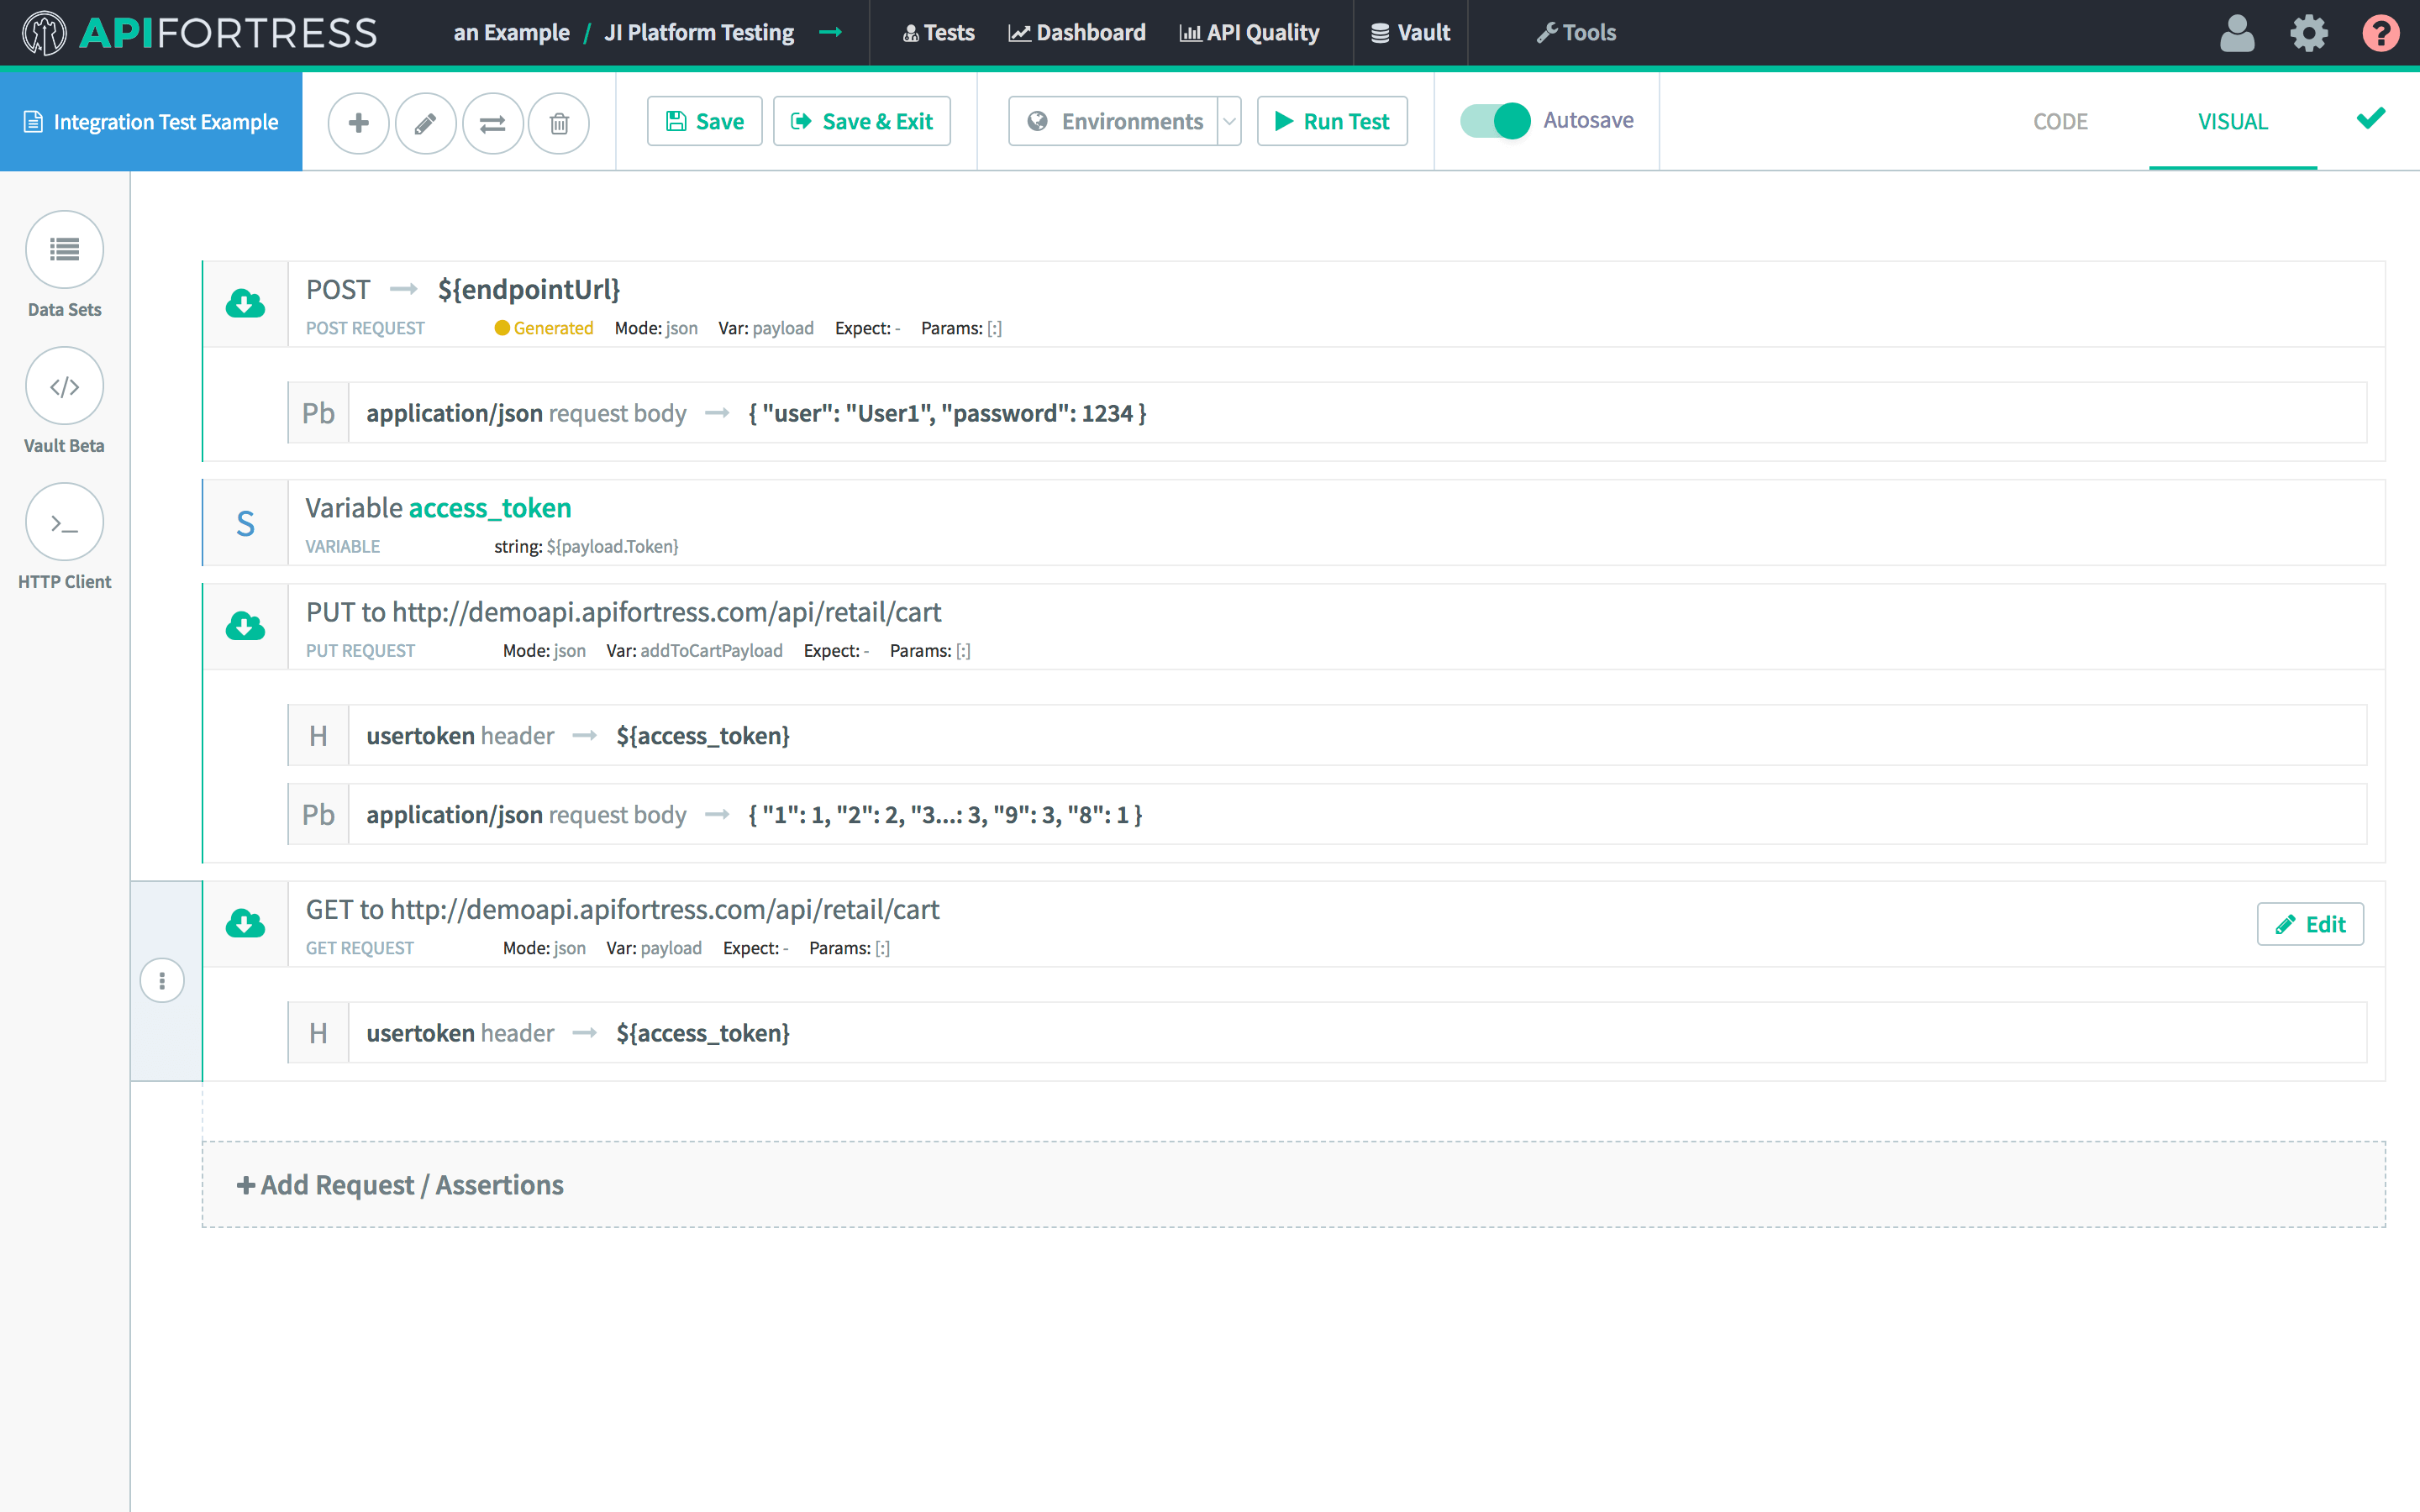
Feel free to keep using the same access token over and over as seen below.

Please feel free to reach out to us should you have any questions, or take a look at the Examples project that contains other examples.