Load Testing
Legacy Documentation
You're viewing legacy documentation for API Fortress (deployed via an on-premises container). To view documentation for the new SaaS version of API Fortress — now known as Sauce Labs API Testing and Monitoring (with Sauce Connect tunnels) — see API Testing on the Sauce Labs Cloud.
API Fortress Load Testing is more than stress testing, it’s functional load testing.
Rather than simply overburdening a server with requests, API Fortress Load Testing directs properly formatted requests to the appropriate endpoints and records failures at an API endpoint level.
Step 1: Access Load Testing Control Panel
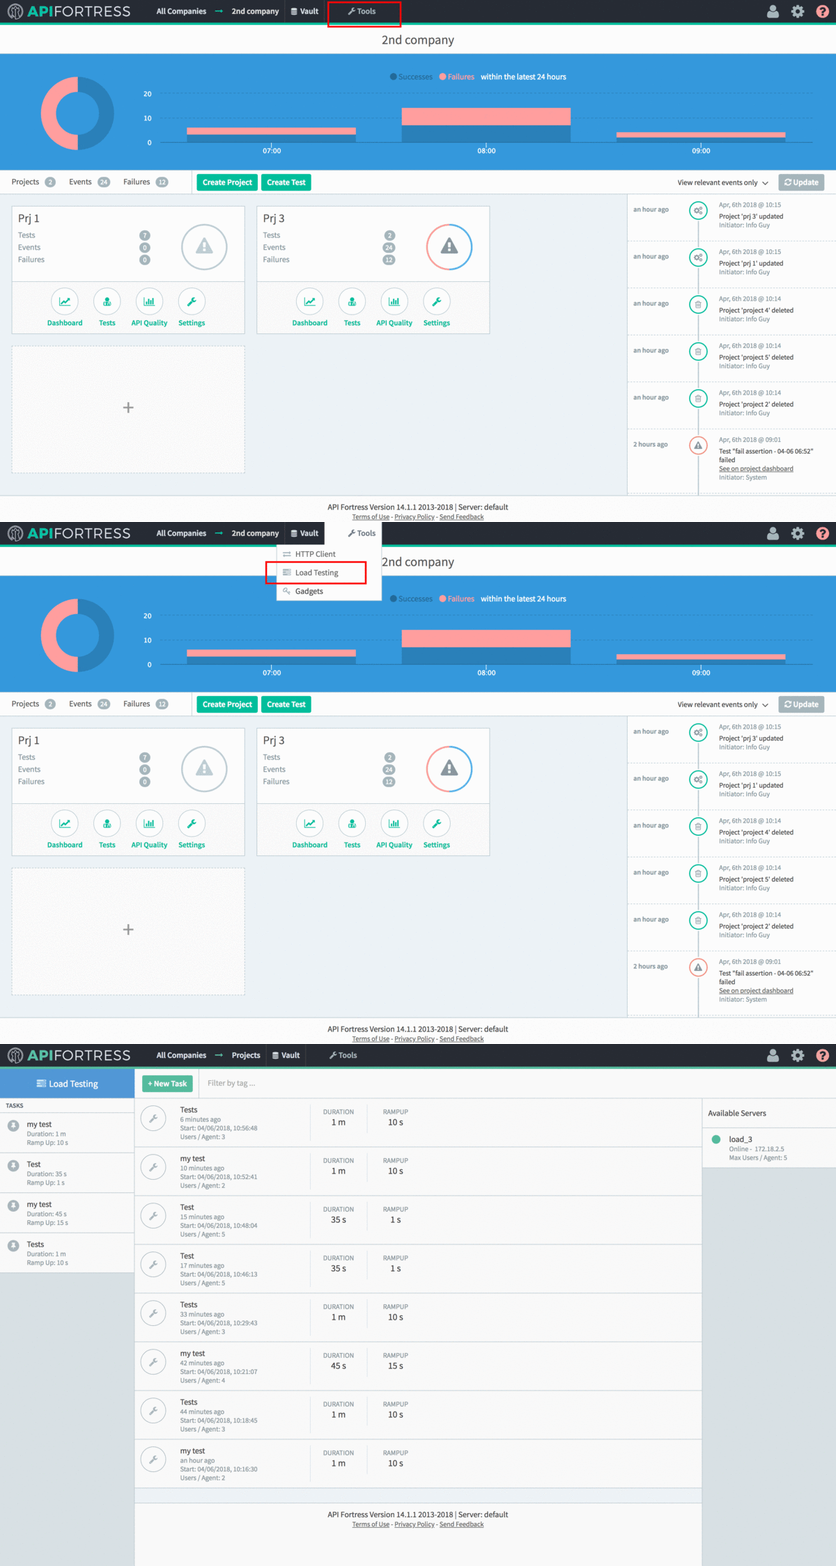
To access Load Testing from the main page. click on the “Tools” button, and then “Load Testing”.

Step 2: Create a Task
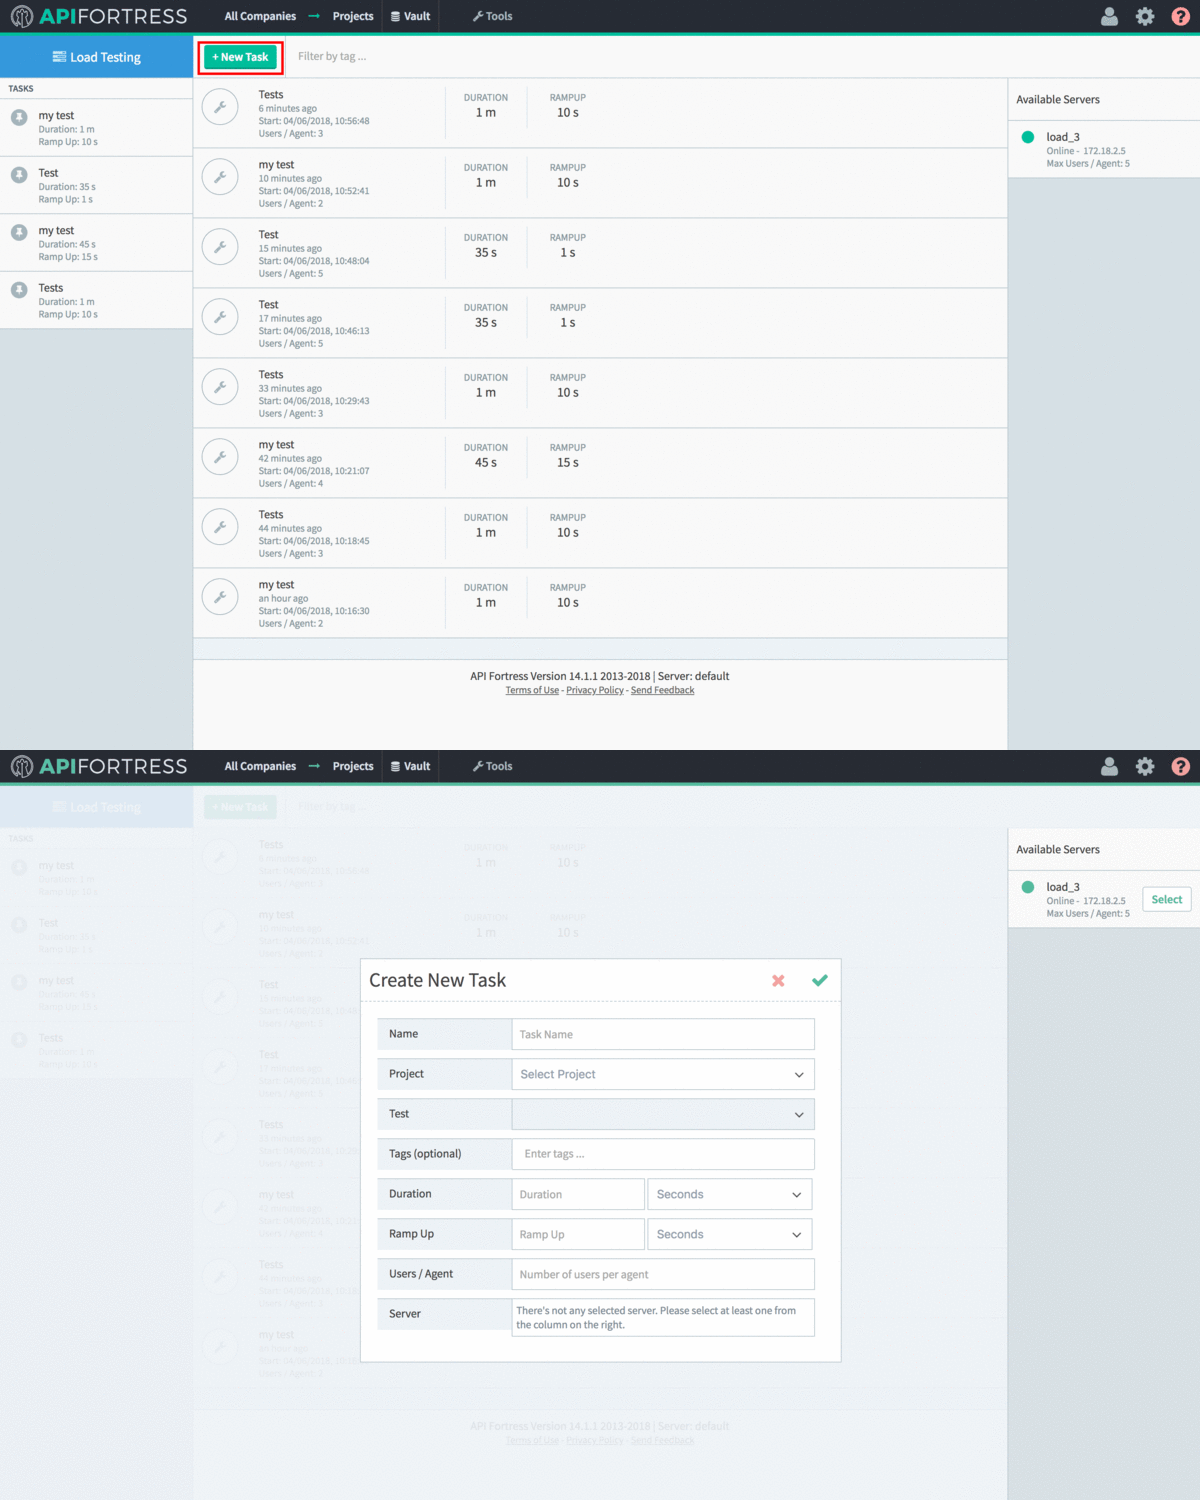
This is the main Load Testing screen. From here, you can create and run a new task. You can also run, modify or delete a saved task. To create a new task, click “+New Task”.

The “Create New Task” screen allows you to set the parameters for the new test.
- Name - The name that you give to the test.
- Project - A drop-down menu of all of the projects available to your current Company (Team).
- Test - Allows you to select a test from the selected project.
- Tags - Allow you to tag the test for later use.
- Duration - How long, in seconds or minutes, the test will last.
- Ramp Up - A warm-up period, during which the load test will make requests of the server, but at a much lower rate.
- Users/Agent - Defines how many users will be simulated per load testing agent.
- Server - Allows you to select servers from the column on the right to behave as agents for the load test. Click the “Select” button to select a server.
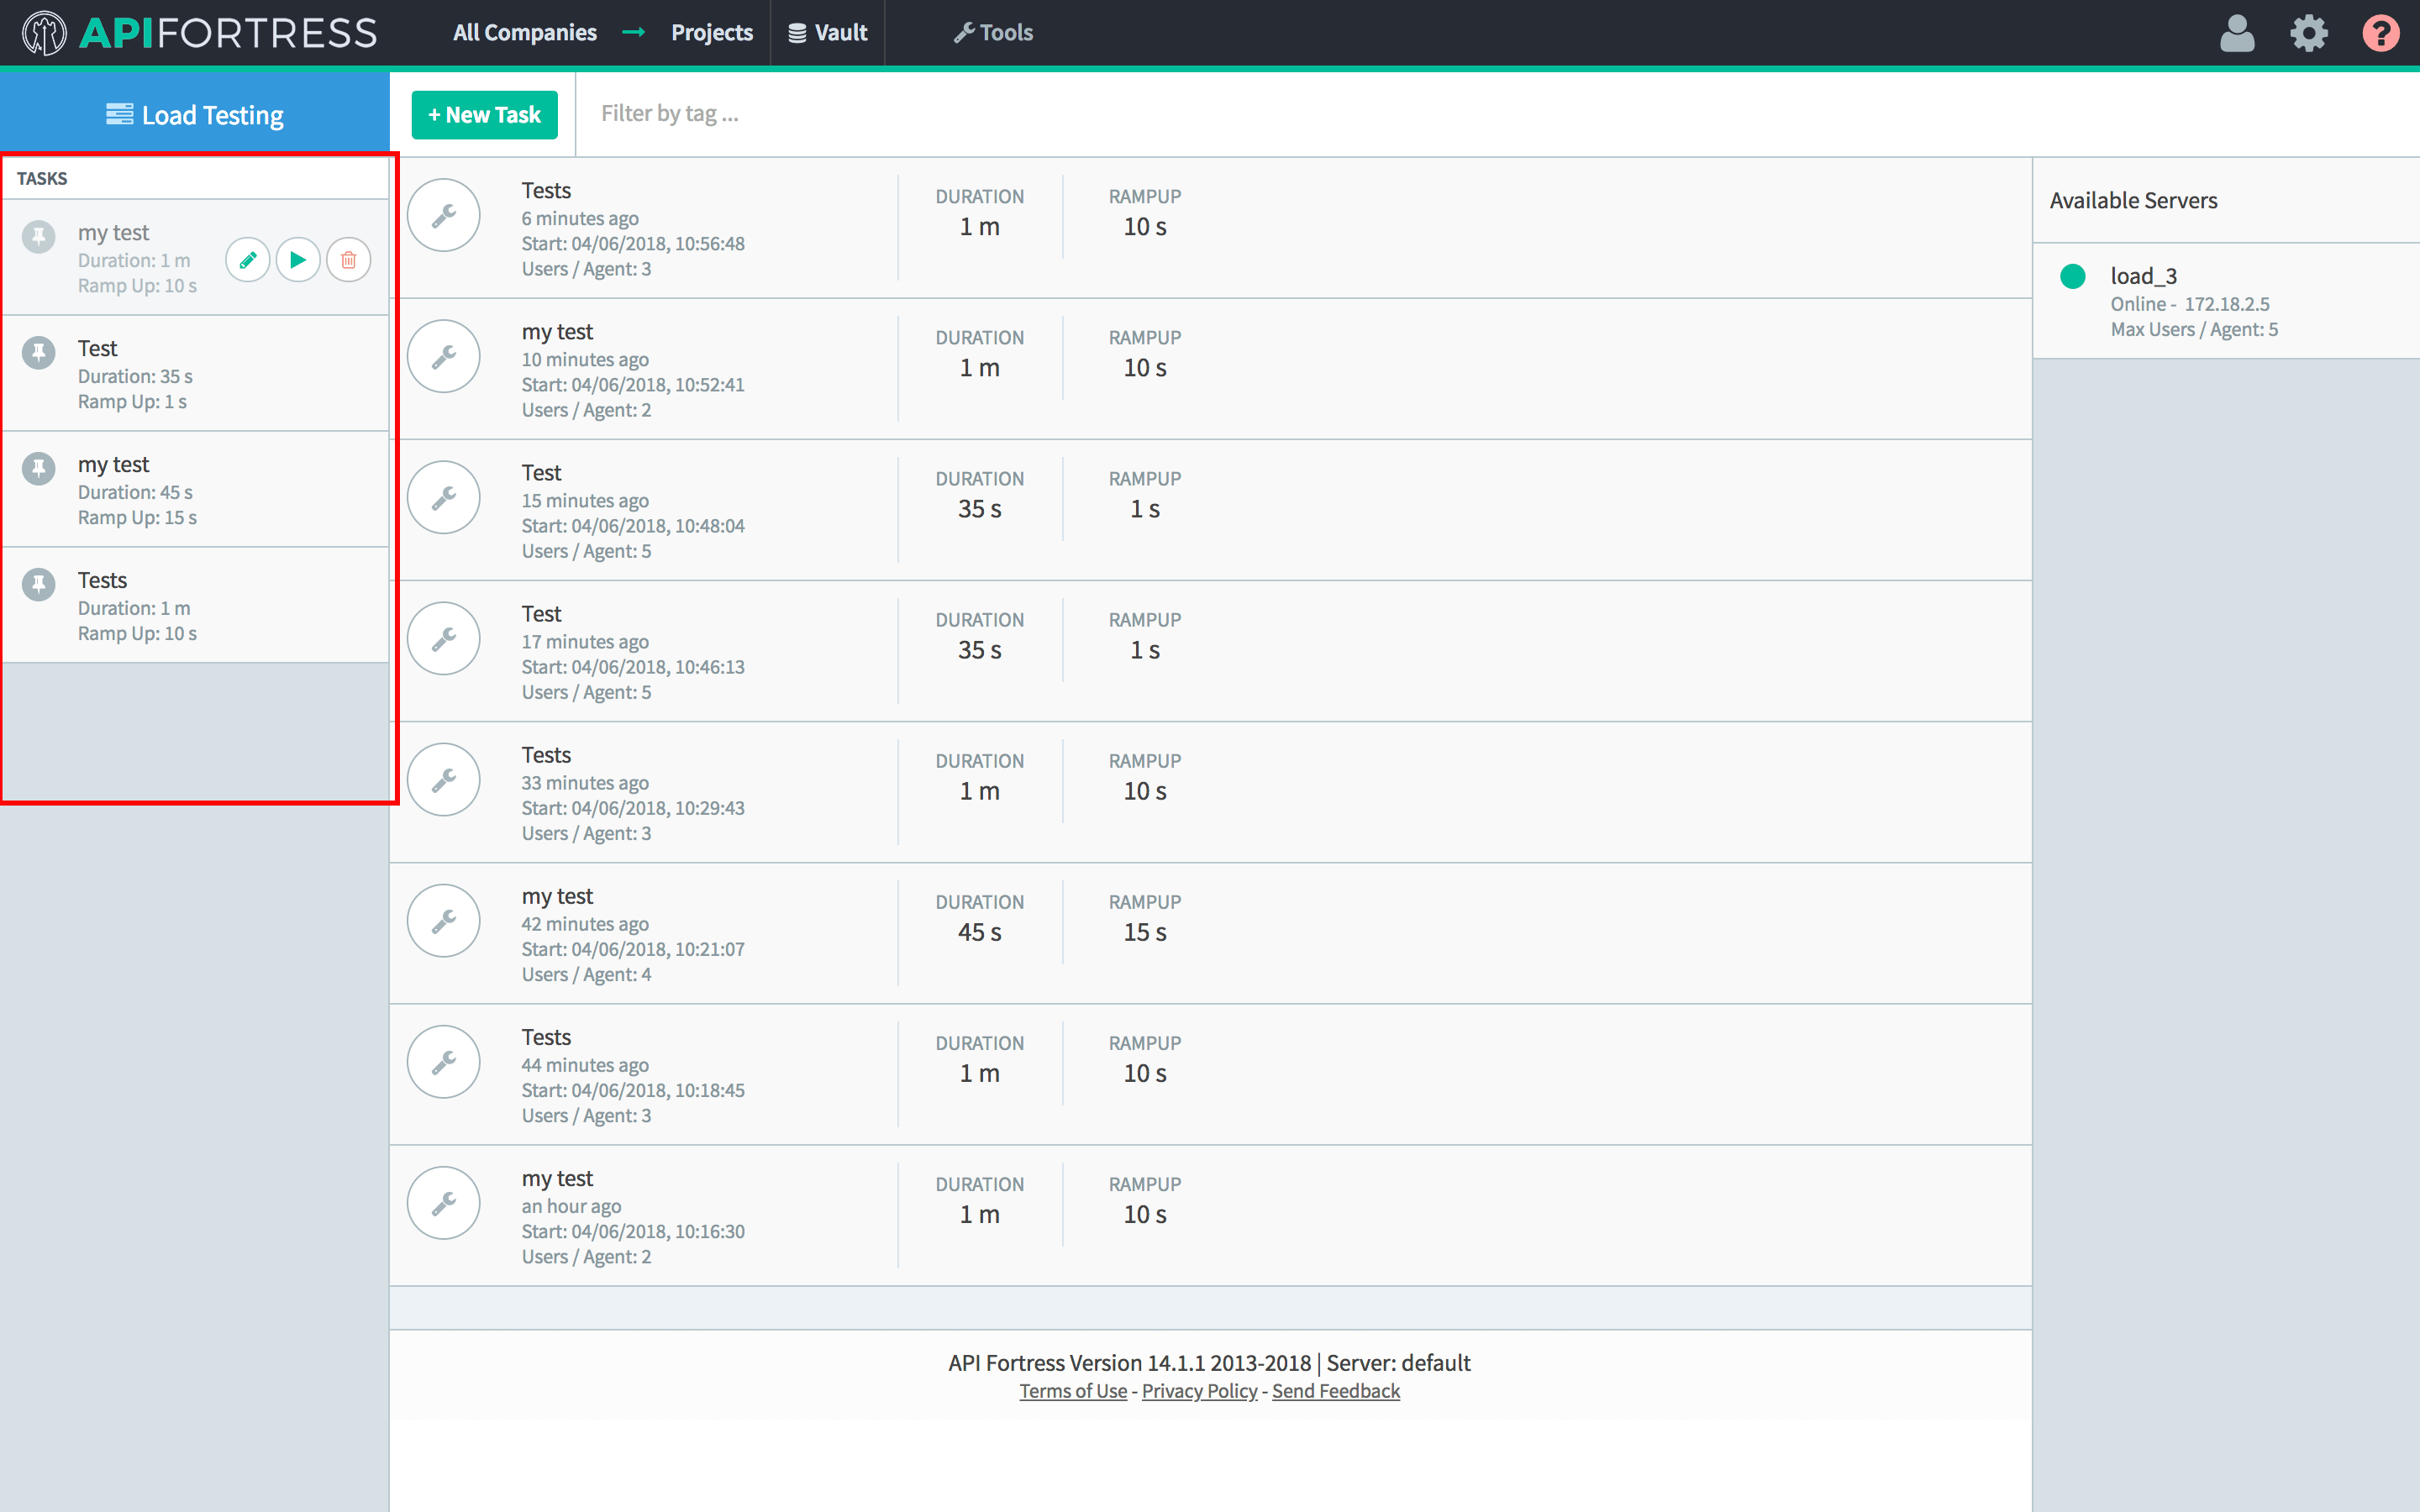
Once you have successfully created a test, it will appear in the column on the left side of the screen.

Step 3: Run the Task
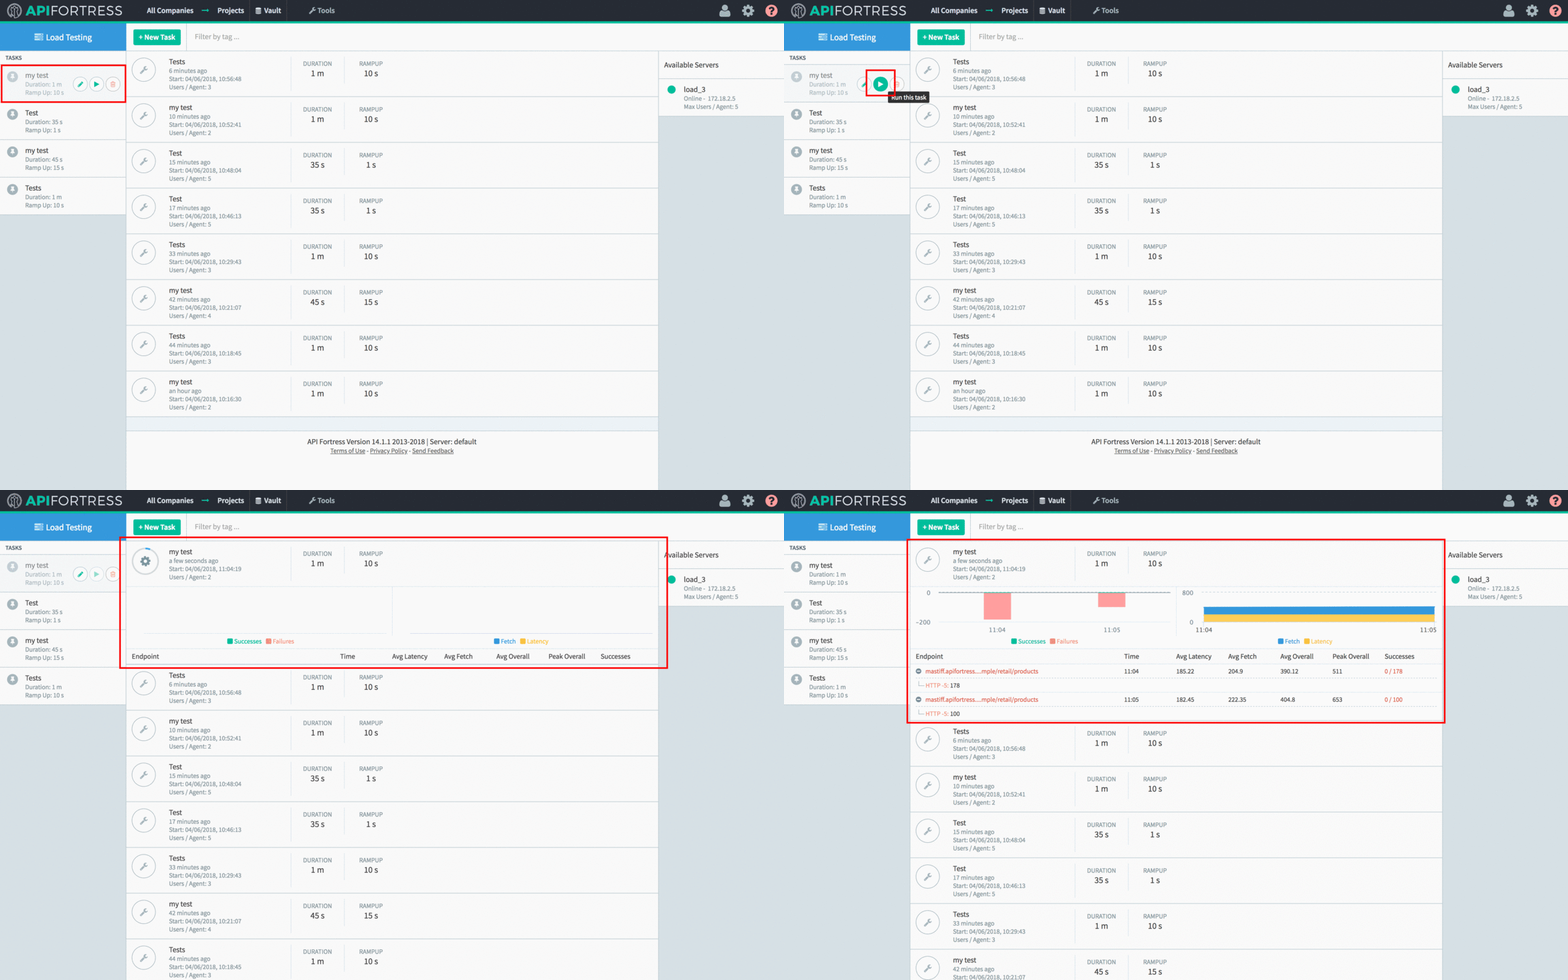
You can run the task by hovering over it and clicking the “Play” button. The test will now run at the top of the queue in the middle of the screen. Once it is complete, it will display a summary of the test performance.
