Exchanging Token between API calls
A part of a good testing strategy is to create end-to-end tests that resemble common user flows. Consider a scenario where a company has an authentication server. This server, when given the proper user credentials, returns an authentication token. This token is required for all other calls throughout the company's API environment. Without this first API call, none of the other API calls can work.
What You'll Need
- A Sauce Labs account (Log in or sign up for a free trial license).
- An existing API Testing Project. For details on how to create one, see API Testing Quickstart.
Step 1: Make the Authorization Call
First, make the call to retrieve the token.
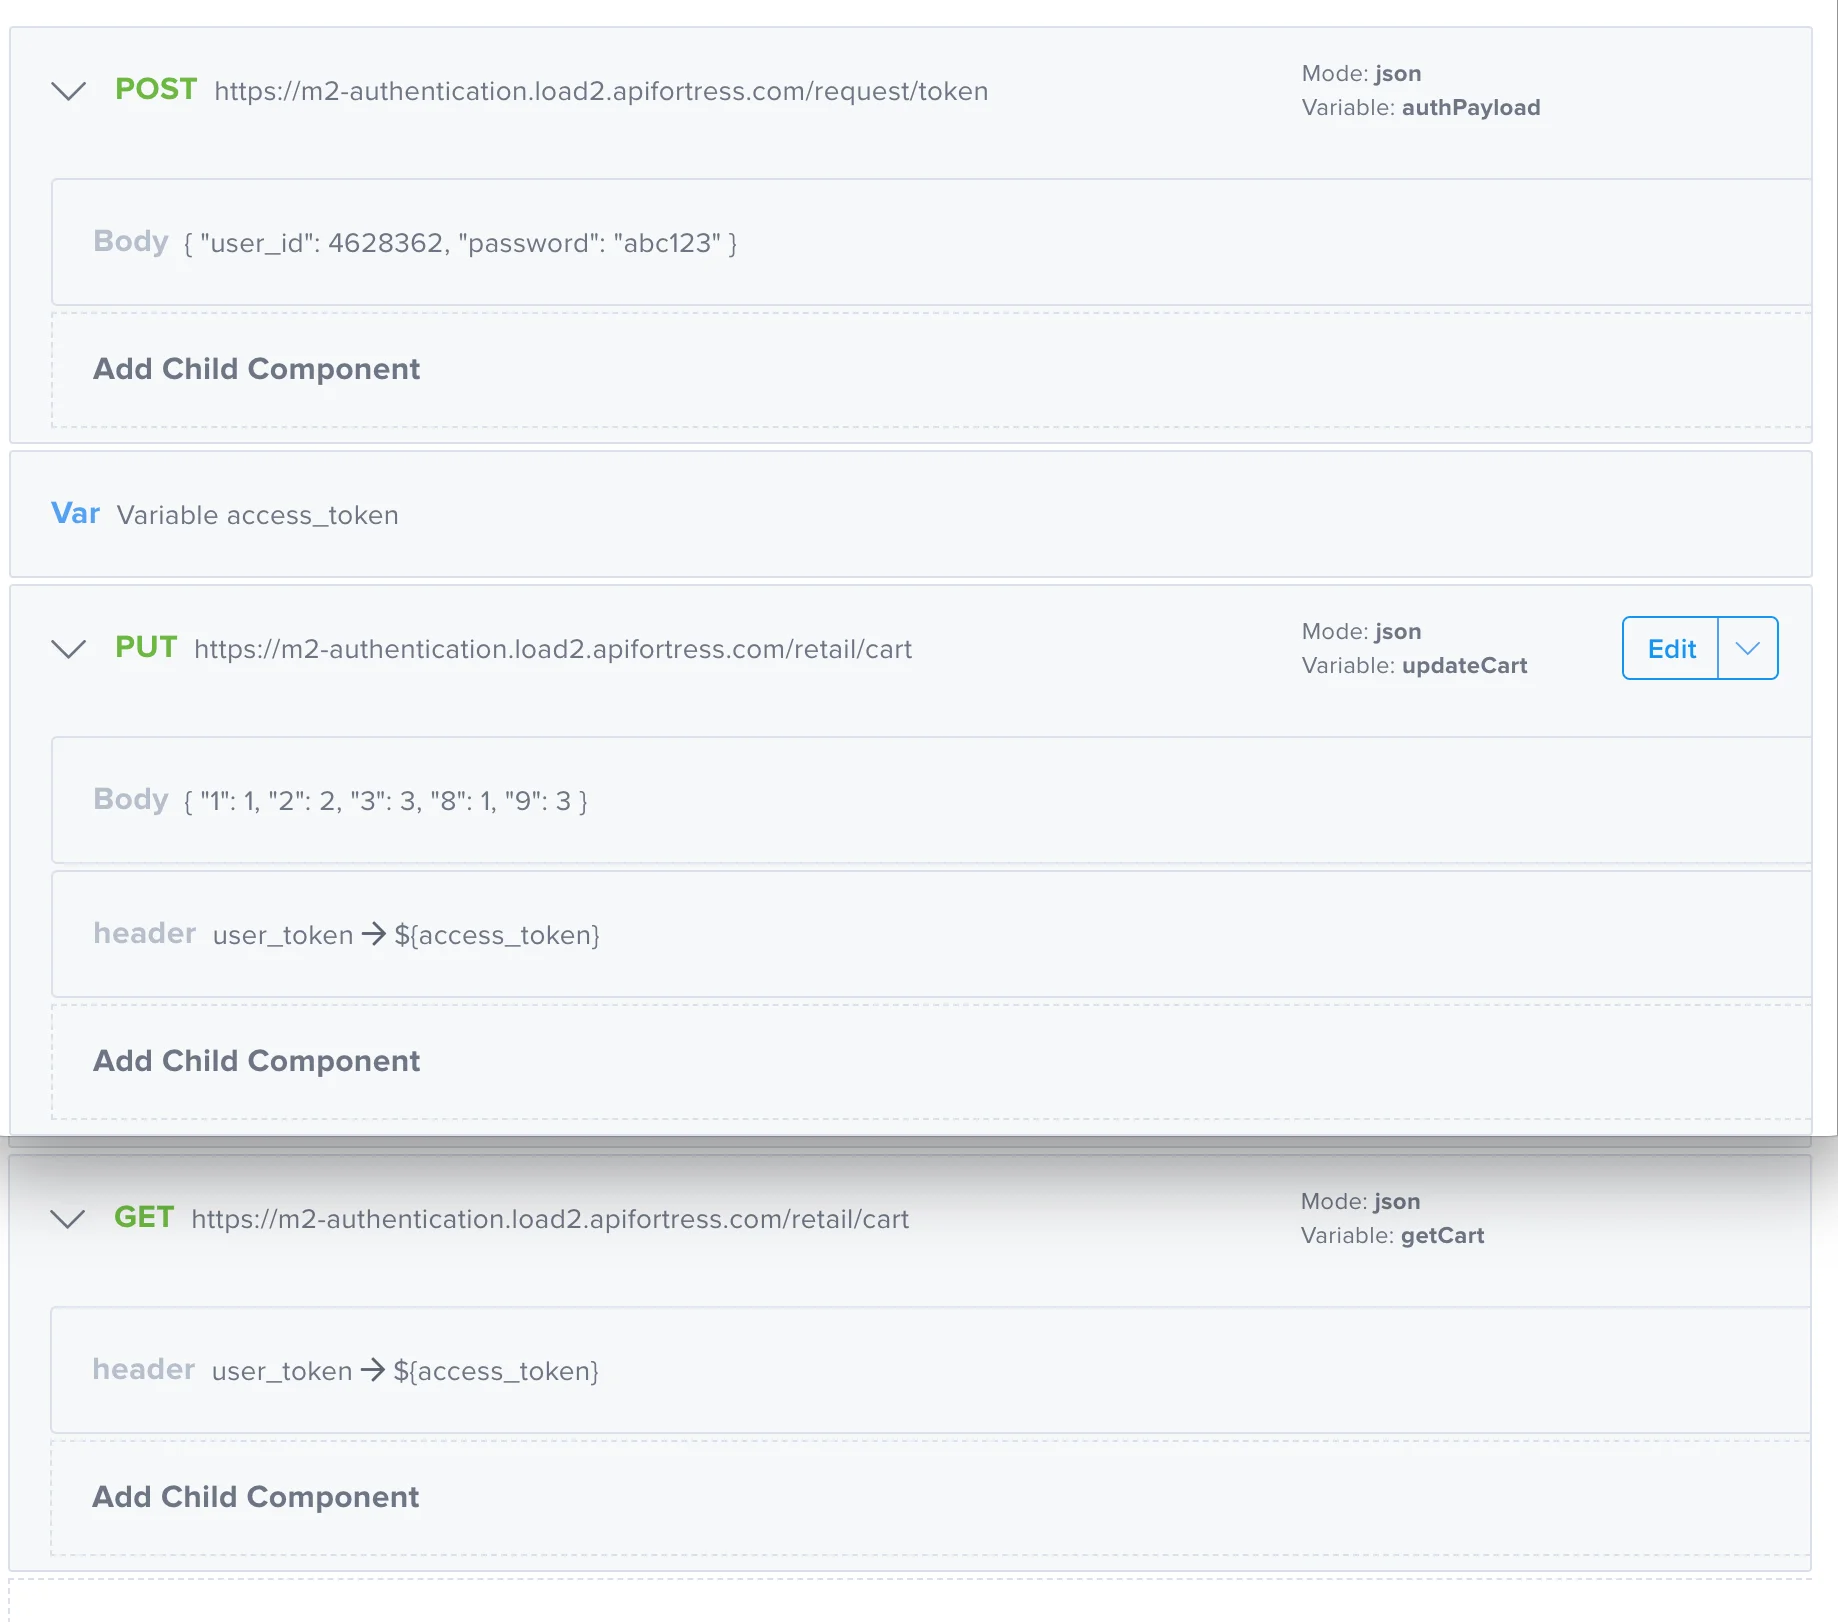
To get the token, make a POST call to the authorization server.
- Url (the endpoint you are calling) - for example
https://m2-authentication.load2.apifortress.com/request/token - Variable (the variable name) - for example
authPayload - Mode (the variable type) - for example
json
The POST requires as Body the user_id and the password:
- Content-Type - for example
application/json - Body - for example
{
	"user_id": 4628362,
	"password": "abc123"
}

Given proper credentials, the authentication server will return a payload response with user_id and access_token

You can double-check that the response contains the correct data by adding an assertion verifying that the user_id provided in the Request Body is the same as in the Response Payload.
Step 2: Save the Token for Further Calls
Next, assign the token to a variable. Variables are used to store data temporarily for a test, but you can use the Sauce Labs API Testing Vault for permanent variables. For more information, see Creating Reusable Variables and Snippets with the Vault).
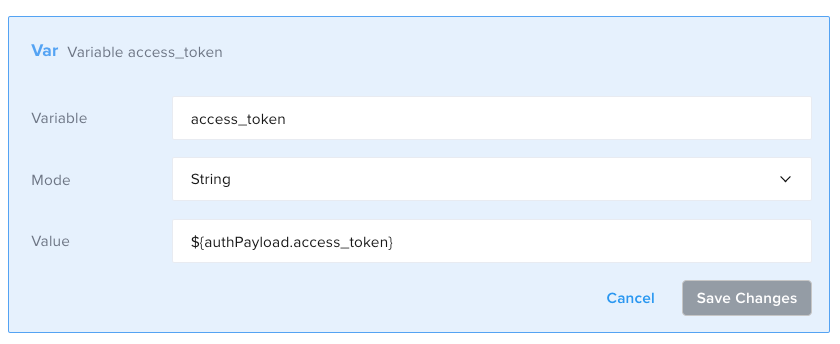
Add a Set (variable) component.
- Variable (the variable name) -
access_token - Mode (the variable type) -
String - Value (the value of the variable) -
${authPayload.access_token}

This step takes the access_token value in the authPayload response, and sets it as access_token. The response body from the orginal POST call was saved to a variable called authPayload and the key for the token is access_token, which can be found by calling authPayload.access_token. We do this so we don't have to manually invoke a variable every time it is needed.
The dollar sign and brackets are necessary when referencing variables so that Sauce Labs API Testing knows to interpret what’s between the brackets instead of using it literally.
Step 3: Make a Follow-up Call
Now you can call the cart function that requires the token granted by the authentication server to add items to a cart.
Add a PUT request to the cart endpoint to update the cart.
- Url (the endpoint you are calling) - for example
https://m2-authentication.load2.apifortress.com/retail/cart - Variable (the variable name) - for example
updateCart - Mode (the variable type) - for example
json
The PUT requires to pass the token granted by the authentication server as Header (we saved as a Variable):
- Name (the variable name) - for example
user_token - Value (the value of the variable) - for example
${access_token}
It also requires a JSON object as a Body that the server will recognize as item id and quantities.
- Content-Type - for example
application/json - Body - for example
{
    "1": 1,
    "2": 2,
    "3": 3,
    "8": 1,
    "9": 3
}
Now, you can add assertions to verify the payload response returned by the call.
Step 4: Reuse the Token in a Final Call
You can reuse the token as many times as you want inside the same test.
Now that you have updated the cart, you can add a GET request to return the items that are currently in it.
Add a GET request to the cart endpoint to view the items.
- Url (the endpoint you are calling) - for example
https://m2-authentication.load2.apifortress.com/retail/cart - Variable (the variable name) - for example
getCart - Mode (the variable type) - for example
json
The GET requires to pass the token granted by the authentication server as Header (we saved as a Variable):
- Name (the variable name) - for example
user_token - Value (the value of the variable) - for example
${access_token}

Now, you can add assertions to verify the payload response returned by the call.
In Code view the test could look like:
- id: post
  children:
    - id: body
      contentType: application/json
      content: |-
        {
        	"user_id": 4628362,
        	"password": "abc123"
        }
  url: https://m2-authentication.load2.apifortress.com/request/token
  var: authPayload
  mode: json
- id: assert-equals
  expression: authPayload.user_id
  comment: The user id returned in the payload response is the same it was passed
    in the request body
  value: 4628362
- id: set
  var: access_token
  mode: string
  value: ${authPayload.access_token}
- id: put
  children:
    - id: body
      contentType: application/json
      content: |
        {
            "1": 1,
            "2": 2,
            "3": 3,
        	"8": 1,
            "9": 3
        }
    - id: header
      name: user_token
      value: ${access_token}
  url: https://m2-authentication.load2.apifortress.com/retail/cart
  var: updateCart
  mode: json
- id: assert-equals
  expression: updateCart.message
  value: Items successfully added
- id: assert-is
  expression: updateCart.status
  type: integer
- id: assert-equals
  expression: updateCart.status
  value: 201
- id: get
  children:
    - id: header
      name: user_token
      value: ${access_token}
  url: https://m2-authentication.load2.apifortress.com/retail/cart
  var: getCart
  mode: json
- id: each
  children:
    - id: comment
      text: current id is ${_1.id}
    - id: if
      children:
        - id: assert-equals
          expression: _1.quantity
          value: 1
      expression: _1.id == 1
    - id: if
      children:
        - id: assert-equals
          expression: _1.quantity
          value: 2
      expression: _1.id == 2
    - id: if
      children:
        - id: assert-equals
          expression: _1.quantity
          value: 3
      expression: _1.id == 3
    - id: if
      children:
        - id: assert-equals
          expression: _1.quantity
          value: 1
      expression: _1.id == 8
    - id: if
      children:
        - id: assert-equals
          expression: _1.quantity
          value: 3
      expression: _1.id == 9
  expression: getCart
Conclusions
It is important to not just exercise endpoints, but validate that an entire series of micorservices are working. It's best to do that by writing test that emulate common and uncommon user flows. A critical part of that work involves creating reusable variables to allow the test to work at any time, with any data. By making a request for a fresh token at the beginning of the sequence, and then assigning it to a variable, you will know that any time you run this test, you are doing so with a valid access token, which is automatically being passed to all follow-up calls.