Unity
The TestFairy allows you to integrate it's powerful mobile testing platform into your Unity project. By following the steps below, you'll be able to start using TestFairy to capture valuable insights into your app's performance and user behavior.
Installation
To integrate the TestFairy Unity SDK with your Unity project, follow the steps below:
-
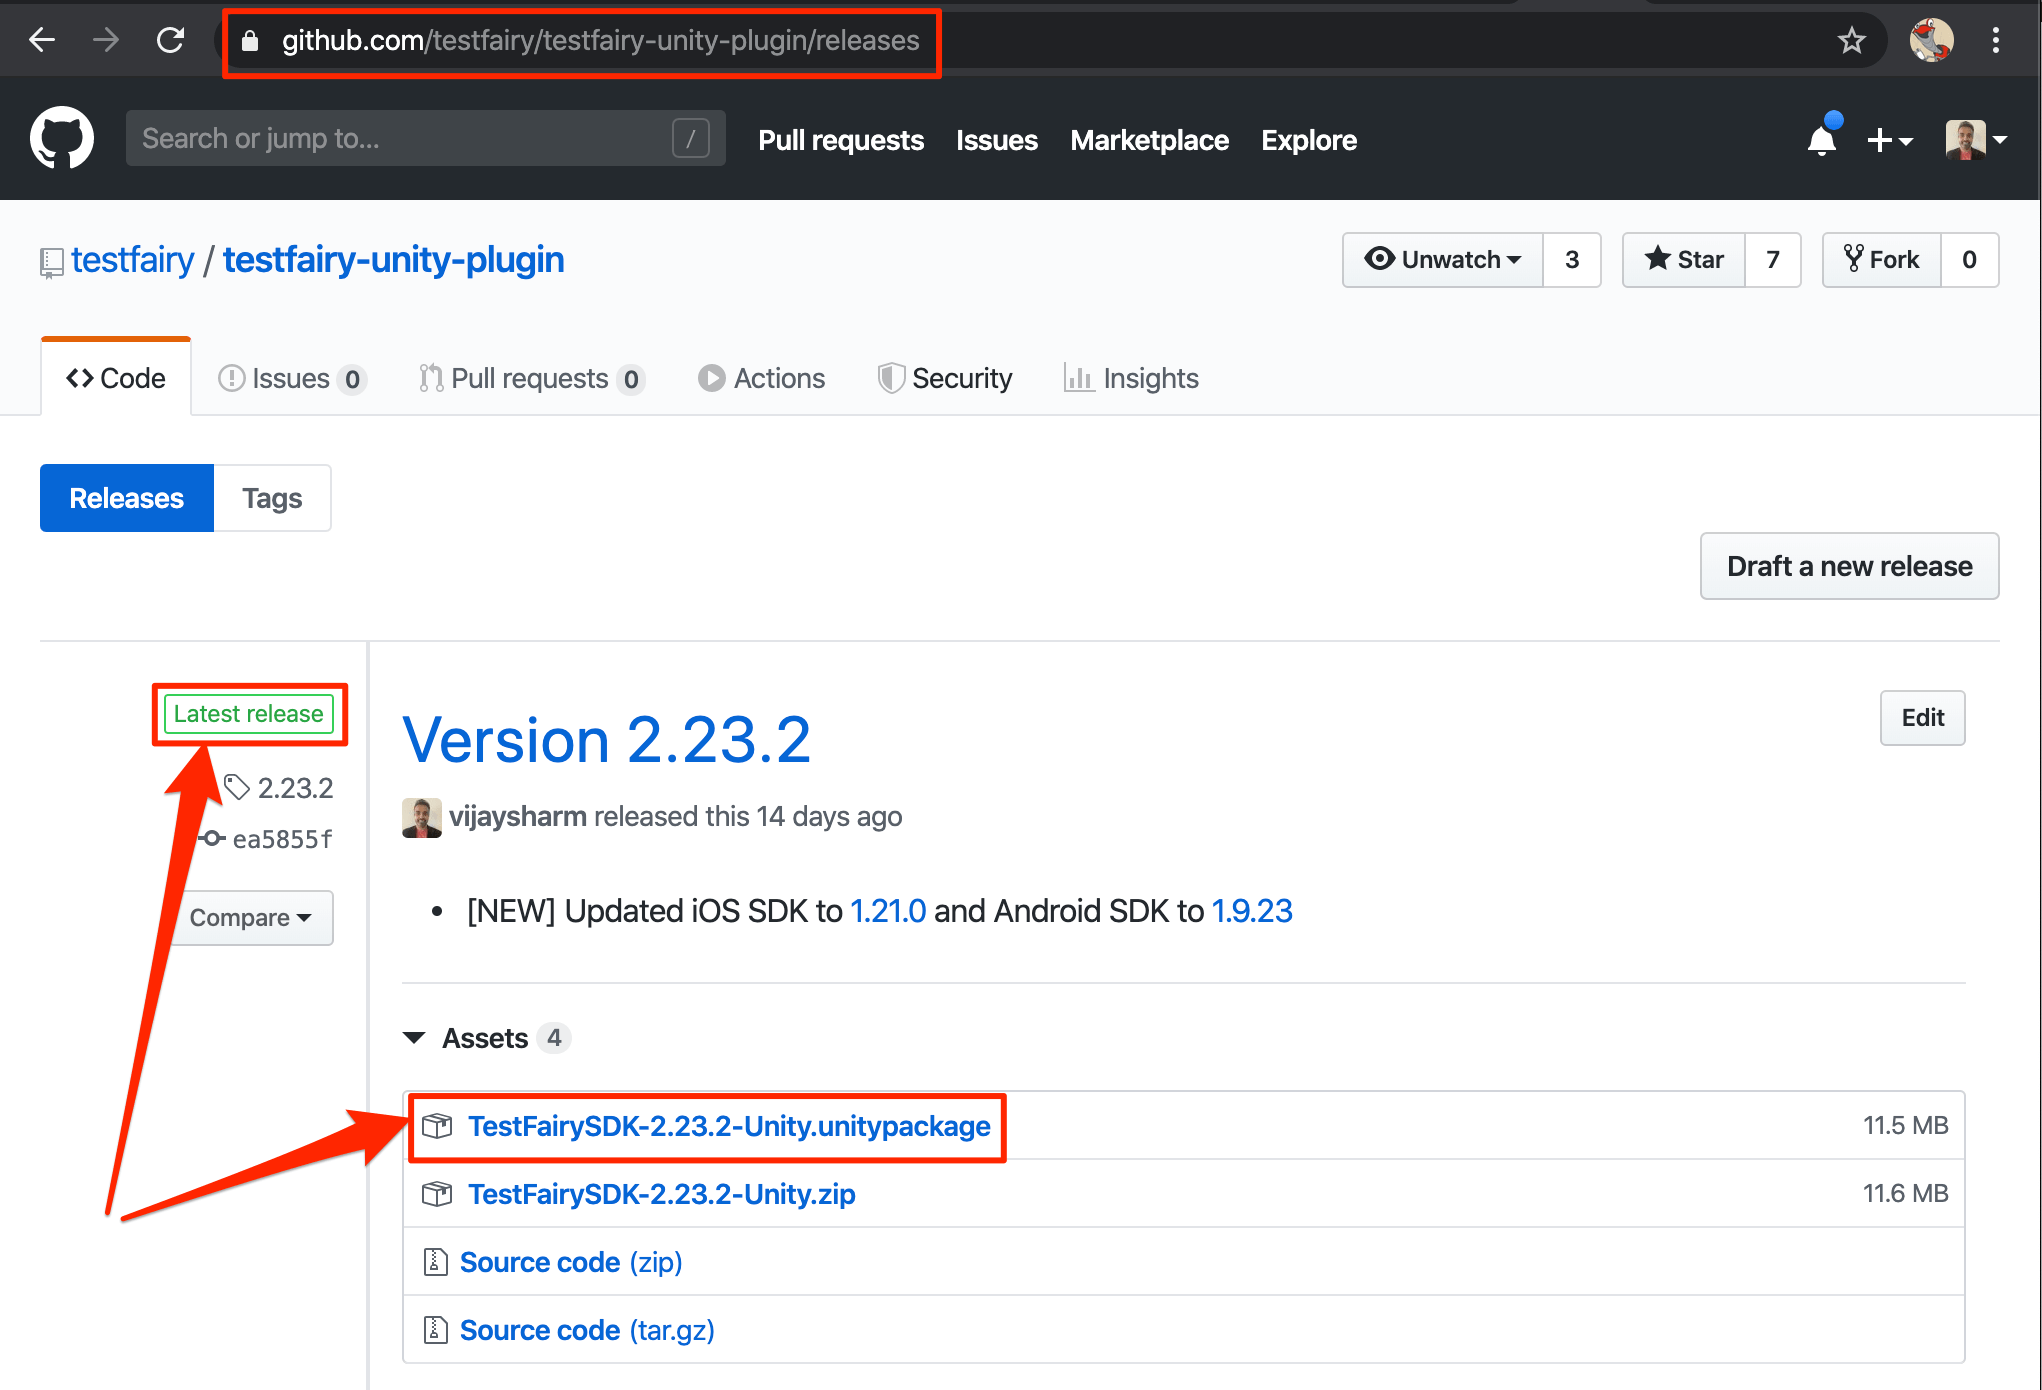
From the TestFairy Unity SDK GitHub page, download the latest version of the
unitypackage.
-
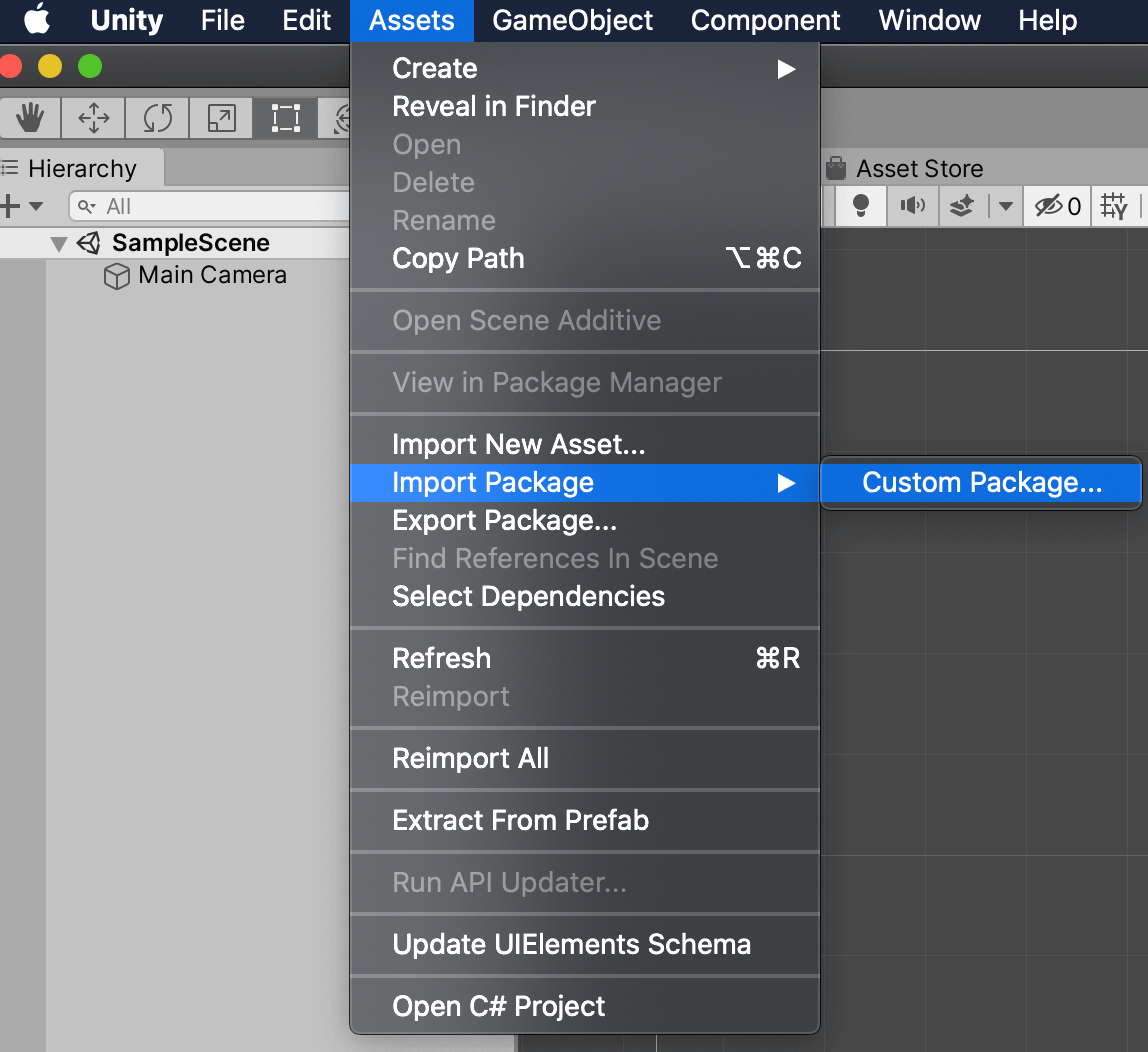
In your open Unity project, navigate to Assets > Import Package > Custom Package.

-
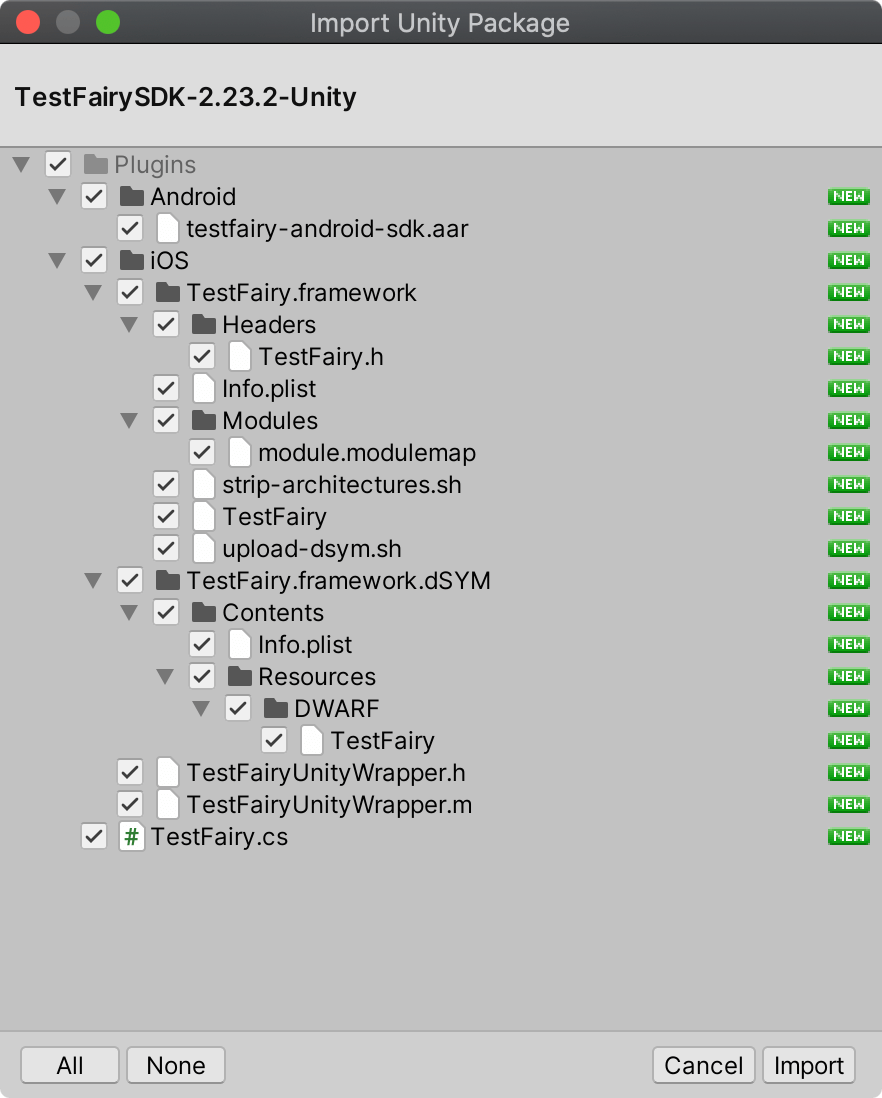
In the Import Unity Package window, first click All to include the TestFairy SDK in your app. Then click Import.

-
To use the TestFairy Unity SDK, click
mainCamerain Hierarchy and clickAdd Componentin the Inspector.noteYou can add the TestFairy script to any game object. TestFairy is a singleton so no harm is done.

-
Click Add Component again, and select a Script component. Type in the script's name, for example,
mainCameraScript, and click on Create and Add.
-
Edit the newly created CSharp script, add
using TestFairyUnity;to the import section, and a call toTestFairy.begin();with your app token. You can find your app token on the Account Settings page.
Below is the code for copy-pasting:
using UnityEngine;
using System.Collections;
using TestFairyUnity;

public class mainCameraScript : MonoBehaviour {

// Use this for initialization
void Start () {
   TestFairy.begin("PUT YOUR SDK APP TOKEN HERE SEE COMMENT ABOVE");
}

...
} -
Save, build, and run.
Setting Screen Name
TestFairy can capture screenshots during a recorded session. By default, it attempts to name a screenshot based on different measures automatically. However, you can override this behavior and set a custom name for a captured screen using the setScreenName method. This can help you organize and label screenshots with appropriate information, such as the level name. See the example below:
using UnityEngine;
using System.Collections;
using TestFairyUnity;
using UnityEngine.SceneManagement;

public class cameraScript : MonoBehaviour {
...
 void OnLevelWasLoaded(int level) {
 TestFairy.setScreenName(Application.loadedLevelName);
 }
...
}
Log Your Exceptions
To capture exception logs and send them to the TestFairy dashboard, you can use the following code example. This will help you track and analyze any exceptions that occur during the usage of your app.
private void OnEnable()
{
 Application.logMessageReceivedThreaded += HandleLog;
}

private void OnDisable()
{
 Application.logMessageReceivedThreaded -= HandleLog;
}

private void HandleLog(string message, string stackTrace, LogType type)
{
 TestFairy.log(message);
 TestFairy.log(stackTrace);
}
Troubleshooting
If you encounter certain errors during the integration process, refer to the following troubleshooting tips:
ERROR ITMS-90087: "Unsupported Architectures. The executable TestFairy.framework contains unsupported architectures '[x86_64, i386]'
This error happens when you export your iOS app to the App Store. The App Store only supports apps built for the ARM architecture; however, to allow developers to test in the iOS Simulator, we include the architectures for 64-bit (x86_64) and 32-bit (i386) Intel architectures.
Error: exportArchive: IPA processing failed
Error Domain=IDEFoundationErrorDomain Code=1 "IPA processing failed" UserInfo={NSLocalizedDescription=IPA processing failed}
This error happens when you export an Ad hoc version of your iOS app. Most often seen in Unity Cloud build.
Identifying Your Users
To learn how to identify users and set session attributes using the TestFairy SDK in Unity, refer to the identifying users section in the SDK Documentation.
Session Attributes�
For information on how to set session attributes using the TestFairy Unity SDK, please refer to the SDK Documentation on session attributes.
Remote Logging
To understand how to perform remote logging with the TestFairy SDK in Unity, refer to the remote logging section in the SDK Documentation.