Install the Sauce Labs IDE Plugin
The Sauce Labs IDE Plugin lets you access Sauce Labs directly from your IDE. After installing the plugin, you can sign in to your Sauce Labs account, start live testing sessions on real devices, and use AI-powered test authoring without leaving your development environment.
Prerequisites
- A supported IDE: VS Code 1.85 or newer. Support for Cursor, Antigravity, IntelliJ IDEA, and Android Studio is coming soon.
- A Sauce Labs account in one of the supported data centers (US West, US East, or EU Central).
- Your Sauce Labs username and access key. Both are available from Sauce Labs user settings. See Managing User Information.
- FFmpeg on your
PATH(optional). Only required for MP4 session recording. Screenshots, log streaming, and everything else work without it.- macOS:
brew install ffmpeg - Linux:
sudo apt install ffmpeg(or the equivalent for your distribution) - Windows: download from ffmpeg.org and add
bin/to yourPATH
- macOS:
To start live device sessions you also need private (dedicated) devices and Real Device Access API concurrency on your account. See Requirements and entitlements.
Install the plugin
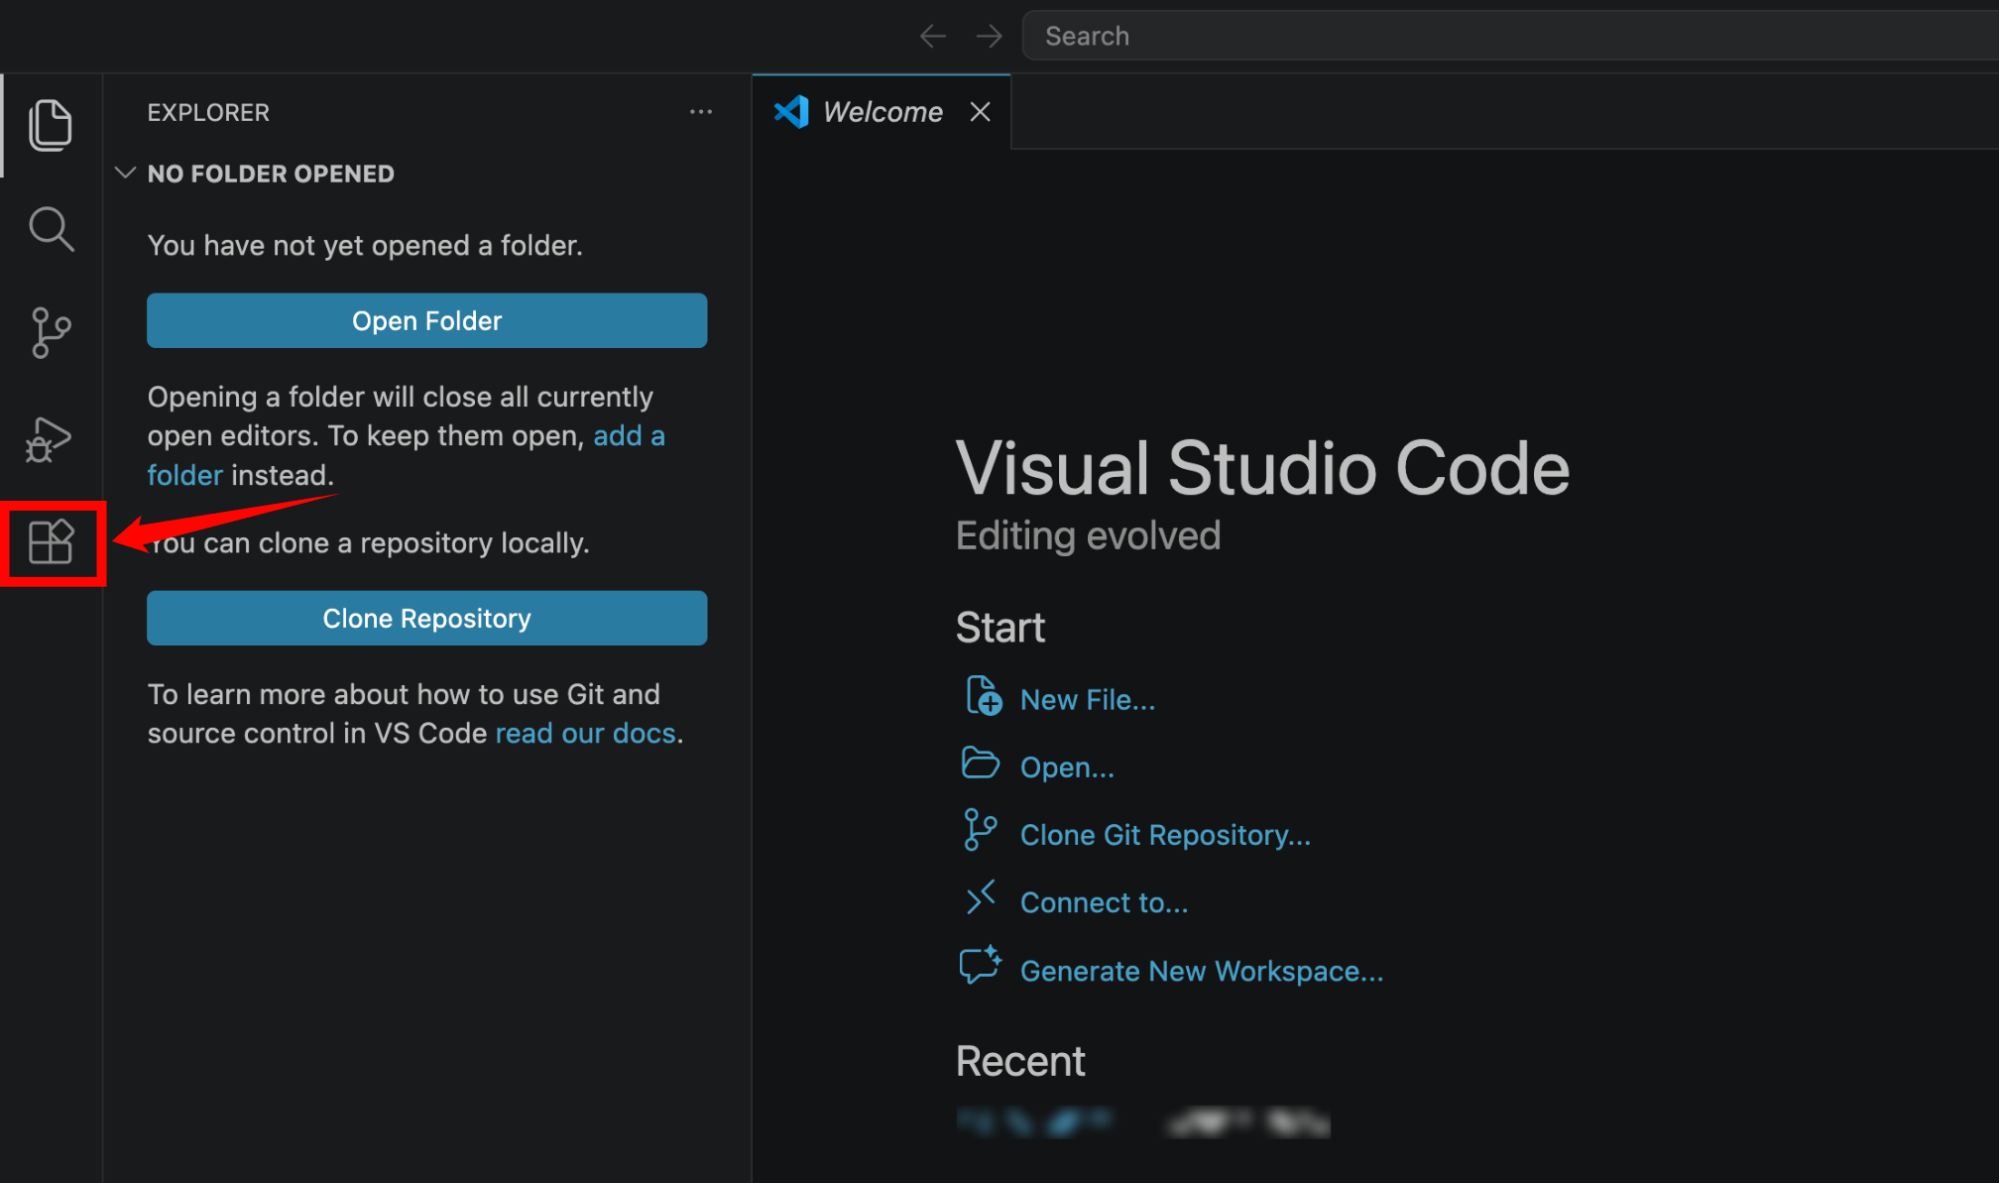
Step 1: Open Visual Studio Code and navigate to the Extensions view by clicking the Extensions icon in the Activity Bar or pressing Cmd+Shift+X (macOS) or Ctrl+Shift+X (Windows/Linux).
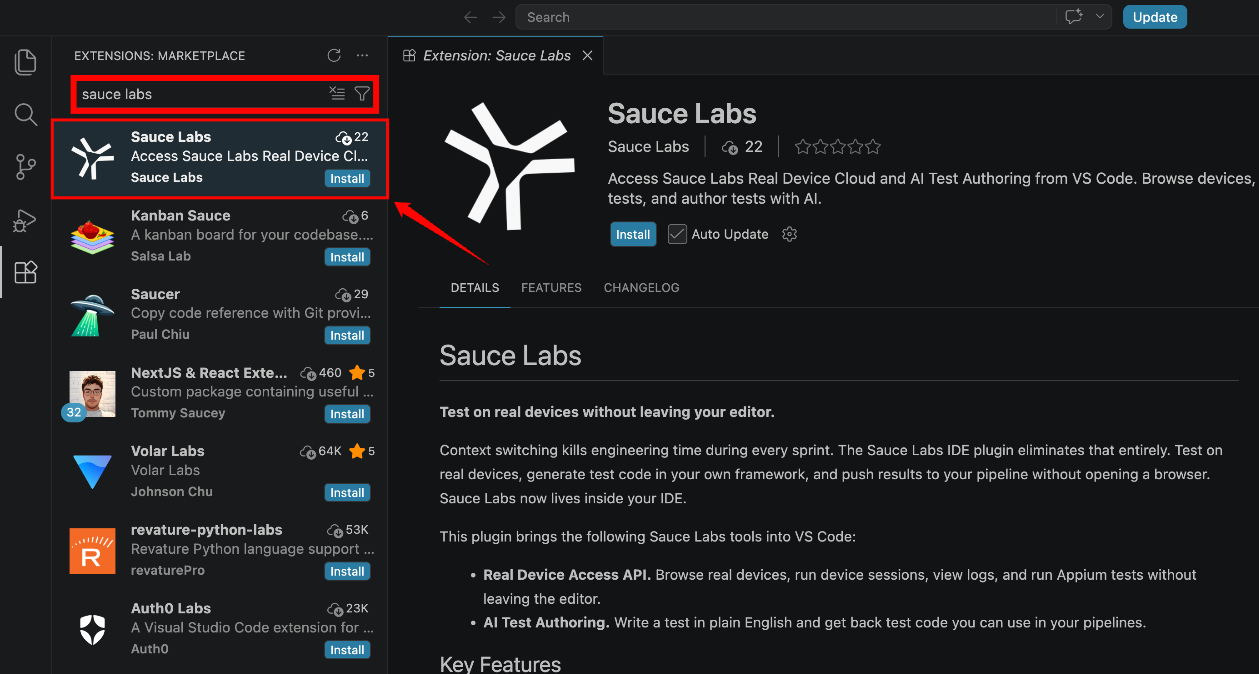
Step 2: Search for Sauce Labs, then select the Sauce Labs extension published by the verified Sauce Labs publisher.
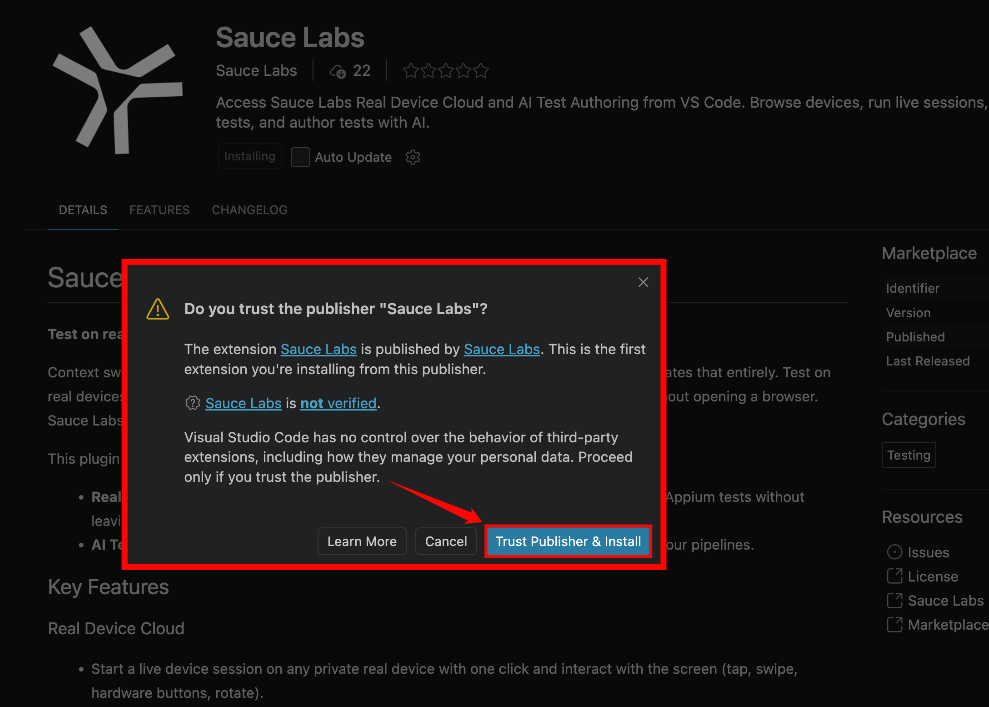
Step 3: Click Install to begin installing the extension. If prompted, review the publisher information in the Do you trust the publisher? dialog, then click Trust Publisher & Install to continue.
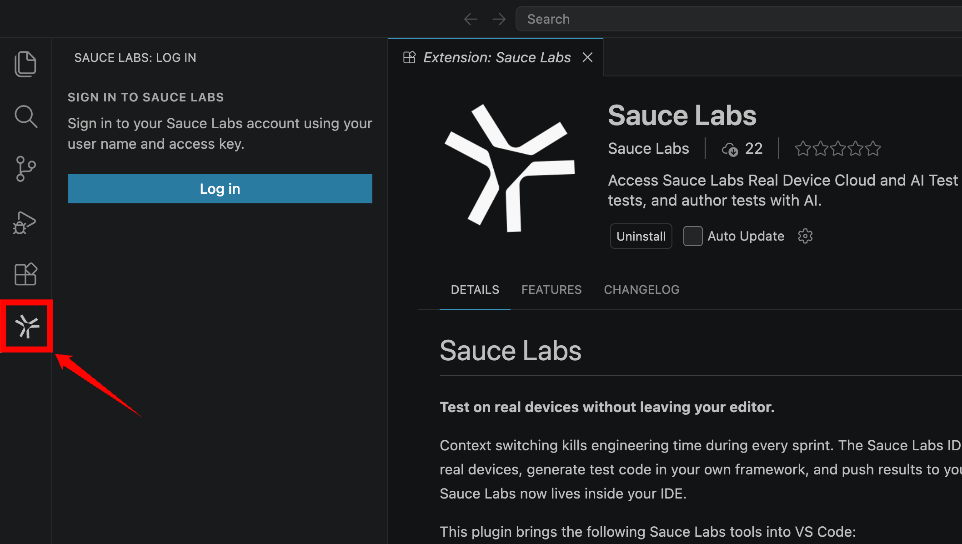
Step 4: After the installation is complete, the Sauce Labs icon appears in the Activity Bar. If prompted, reload Visual Studio Code to finish the installation.
Sign in
After installing the Sauce Labs IDE Plugin, sign in with your Sauce Labs account to access the plugin features. Signing in connects the plugin to your account, allowing you to start live testing sessions on real devices and use AI Test Authoring directly from your IDE.
Step 1: Click the Sauce Labs icon in the Activity Bar to open the Sign In page.
Step 2: From the Region dropdown list, select the data center where your Sauce Labs account is hosted (for example, US West, US East, or EU Central).
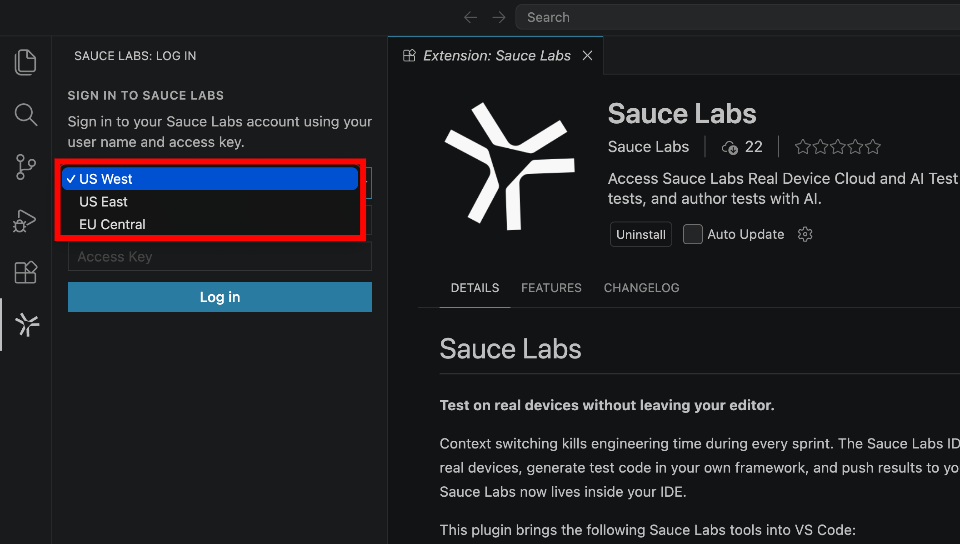
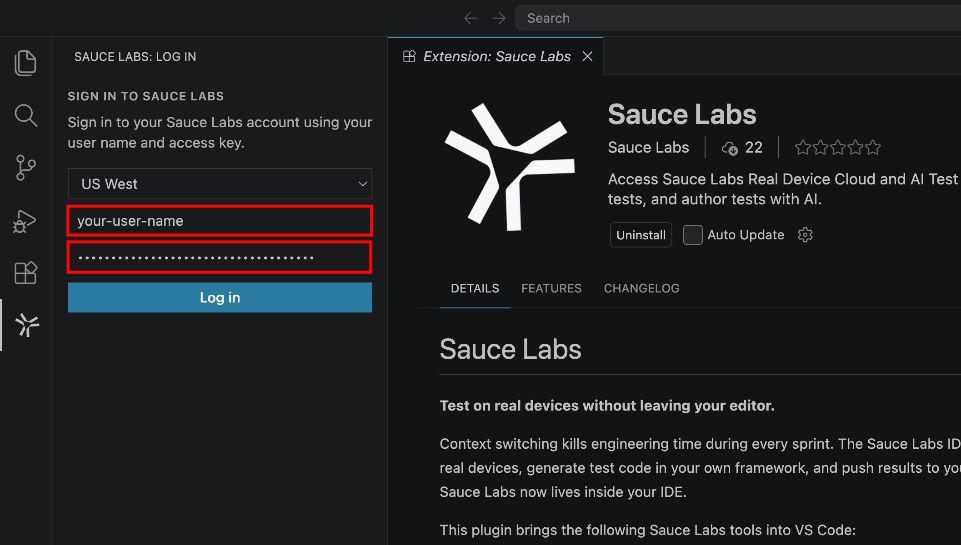
Step 3: Enter your Username and Access Key in the corresponding fields, then click Log In to authenticate your account.
If you don't know your Username or Access Key, refer to the Find your access Key documentation to locate your credentials.
Step 4: After you successfully sign in, the Sauce Labs icon is replaced by two product icons in the Activity Bar:
-
Real Device Cloud, which lets you start and manage live device sessions.
-
Sauce Labs Test Authoring, which provides AI-powered test generation.
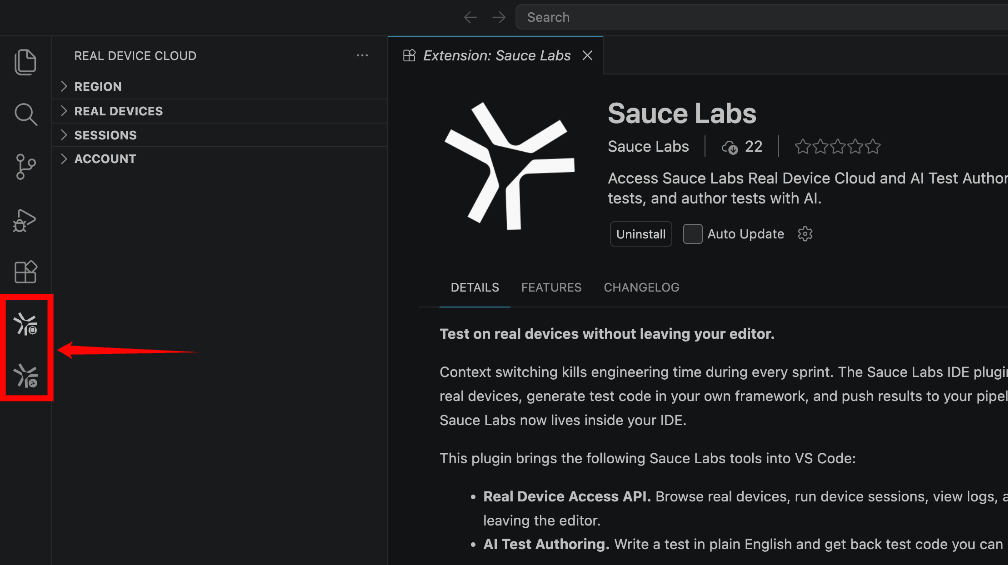
Your credentials are securely stored using your operating system's credential manager (such as macOS Keychain, Windows Credential Manager, or libsecret on Linux). They are never saved in your workspace or project settings.
Sign Out
If you no longer want to use the Sauce Labs IDE Plugin with your current account, you can sign out at any time.
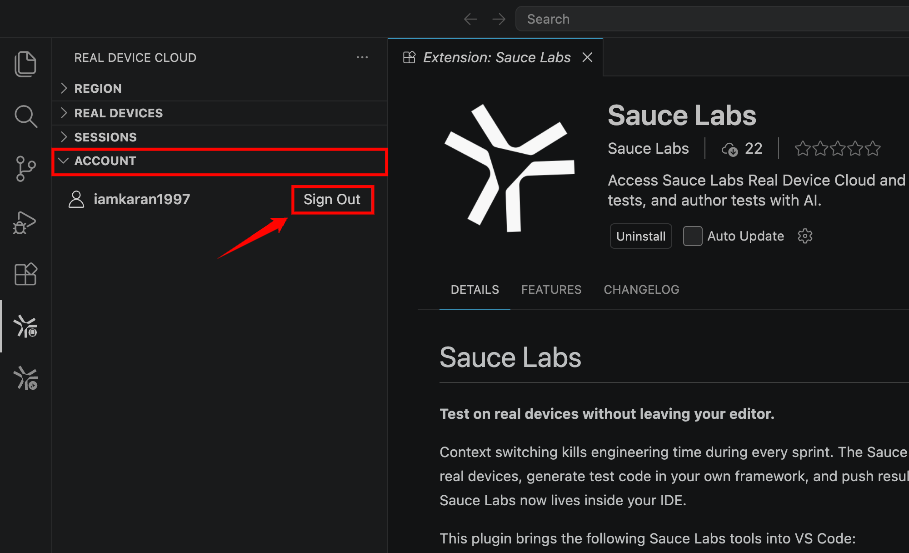
Step 1: Open the Real Device Cloud view from the Activity Bar.
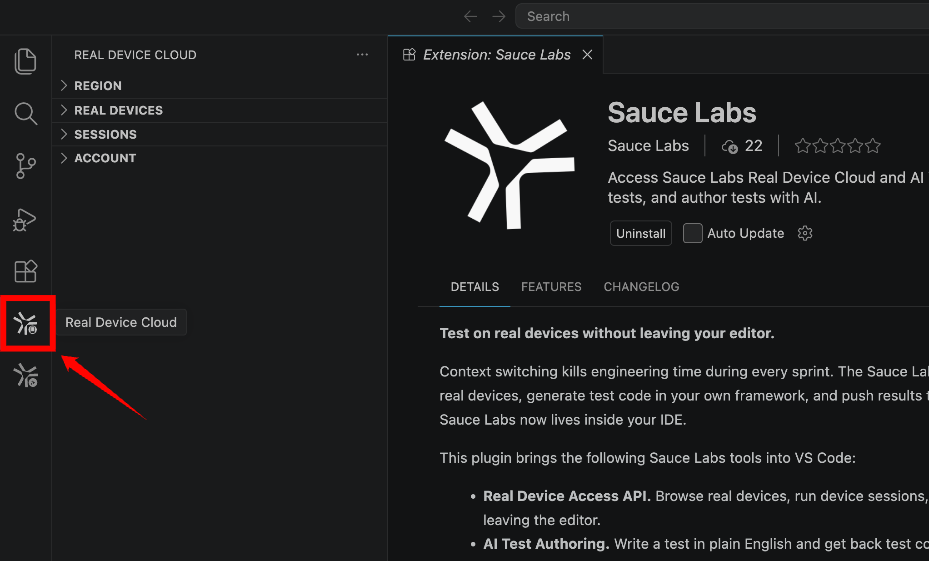
Step 2: In the Account section, click Sign Out to sign out of your Sauce Labs account. Alternatively, open the Command Palette and run the Sauce: Sign Out command.
If you switch from an account without an entitlement to one that has it, reload the editor window so entitled views (such as the test case list) populate correctly.
Select a data center region
All three Sauce Labs data centers are supported:
| Region | Host |
|---|---|
| US West (California) | api.us-west-1.saucelabs.com |
| US East (Virginia) | api.us-east-4.saucelabs.com |
| EU Central (Frankfurt) | api.eu-central-1.saucelabs.com |
You can switch regions two ways, whichever is more convenient:
- Click a region row in the sidebar's Region section.
- Pick one in the region dropdown list on the sign-in form.
Switching re-validates your credentials against the new region and refreshes the device and session lists automatically.
Get Started with the Plugin
After you've signed in, you can start exploring the key features of the Sauce Labs IDE Plugin. Use the Activity Bar to access Real Device Cloud for live device testing or Sauce Labs Test Authoring to create automated tests with AI.
Start Your First Real Device Session
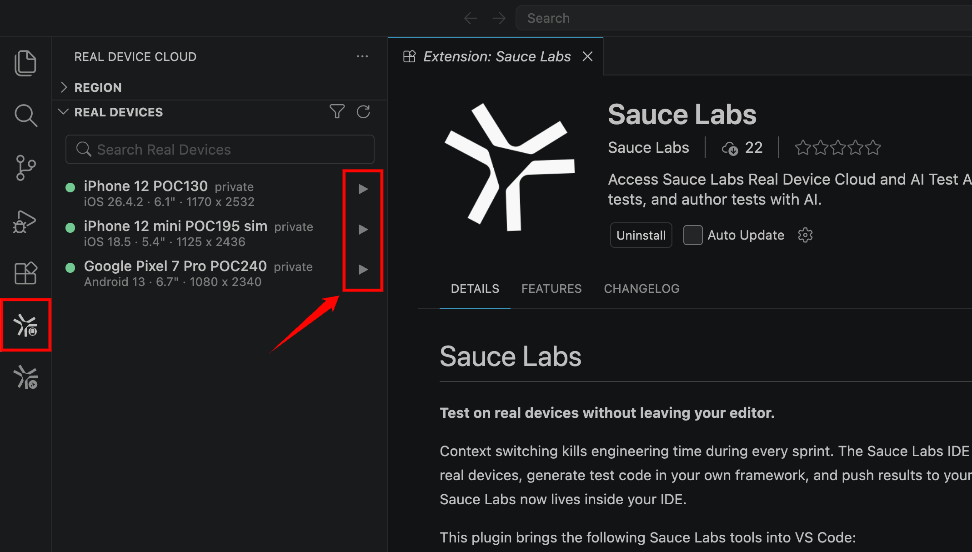
Step 1: Open the Real Device Cloud view from the Activity Bar. Wait for the list of available devices to load, then click the Play icon next to the device you want to use.
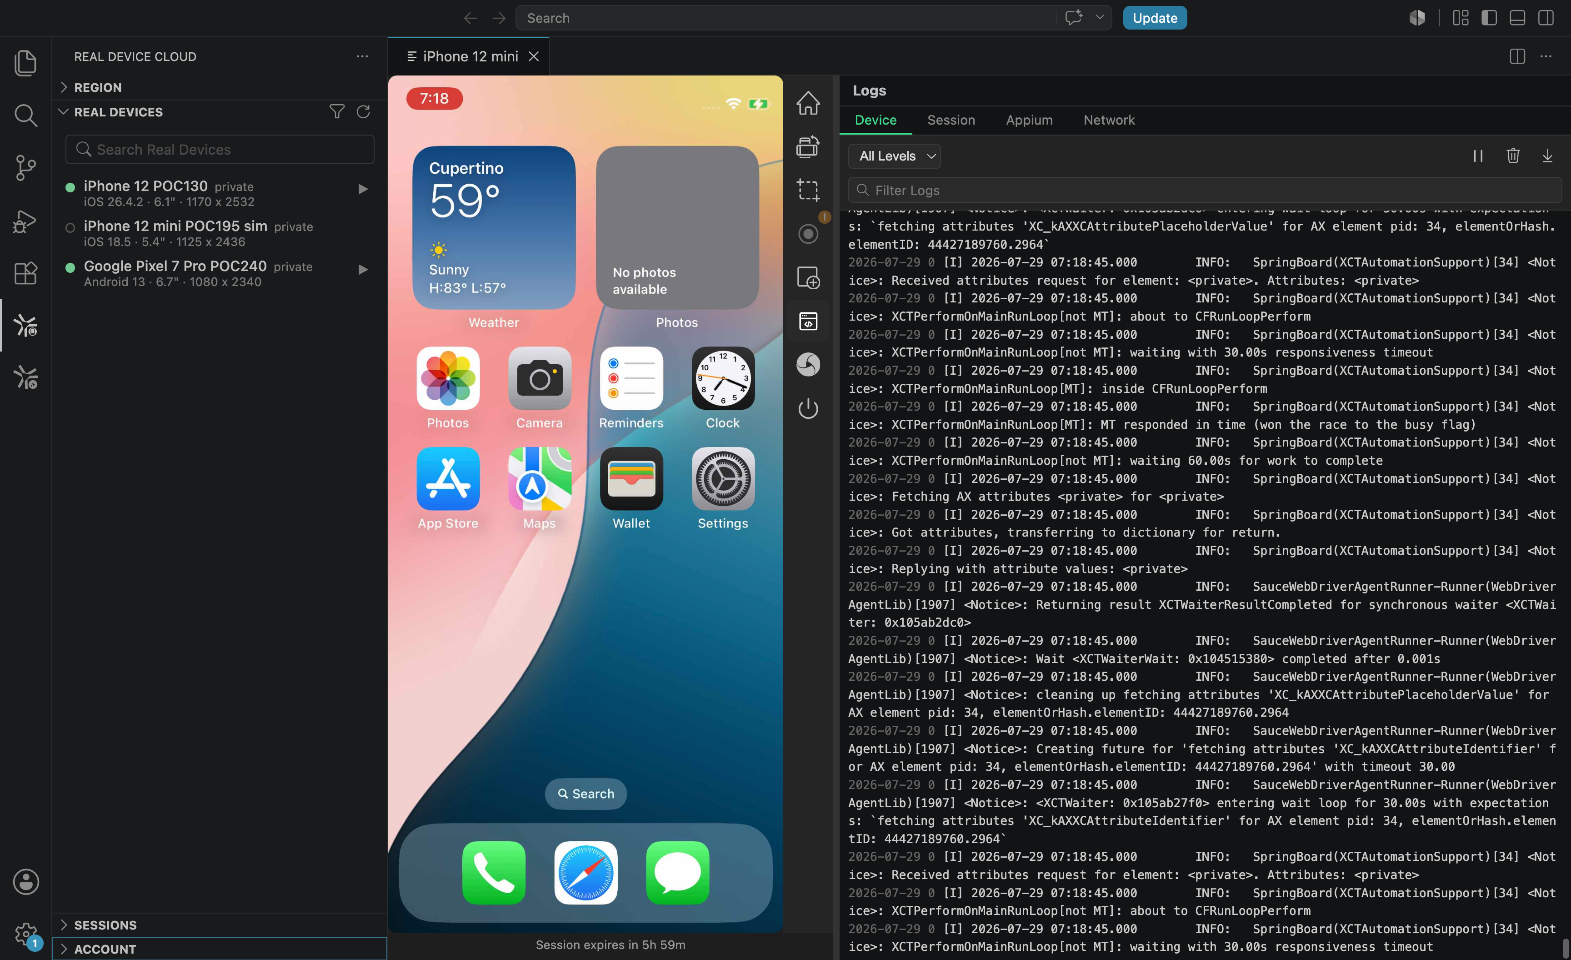
Step 2: A new editor tab opens and connects to the selected device. After the session is ready, you can begin interacting with the live device directly from your IDE.
Next step: To learn how to upload apps, interact with the device, capture screenshots, and manage live sessions, see Real Device Cloud in Your IDE.
Generate Your First AI Test
Step 1: Open the Sauce Labs Test Authoring view from the Activity Bar, then click Create Test Script to start a new AI-generated test.
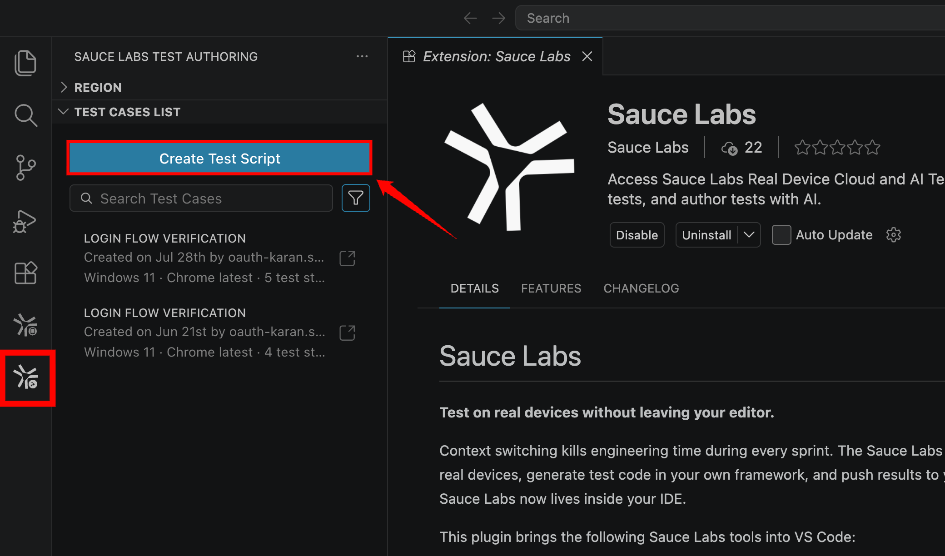
Step 2: Select a website or app as the test target, describe the test scenario in plain English, and submit your request. Sauce AI runs the test and generates a runnable automation script.
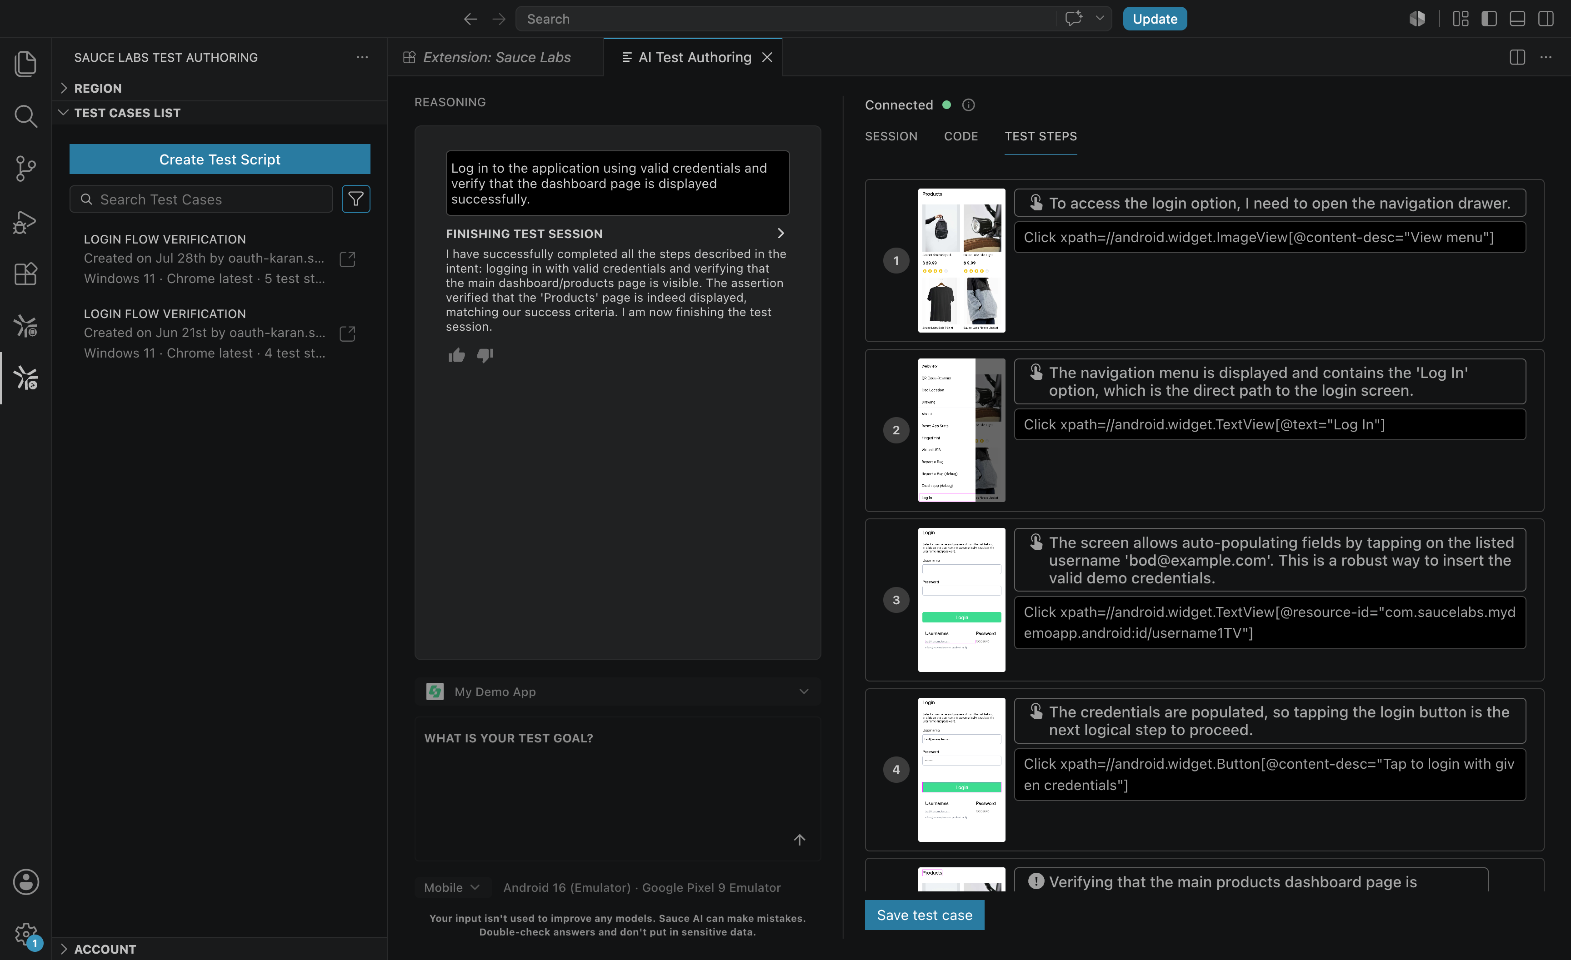
AI Test Authoring requires the Sauce AI for Test Authoring entitlement. For complete instructions, see AI Test Authoring in Your IDE.