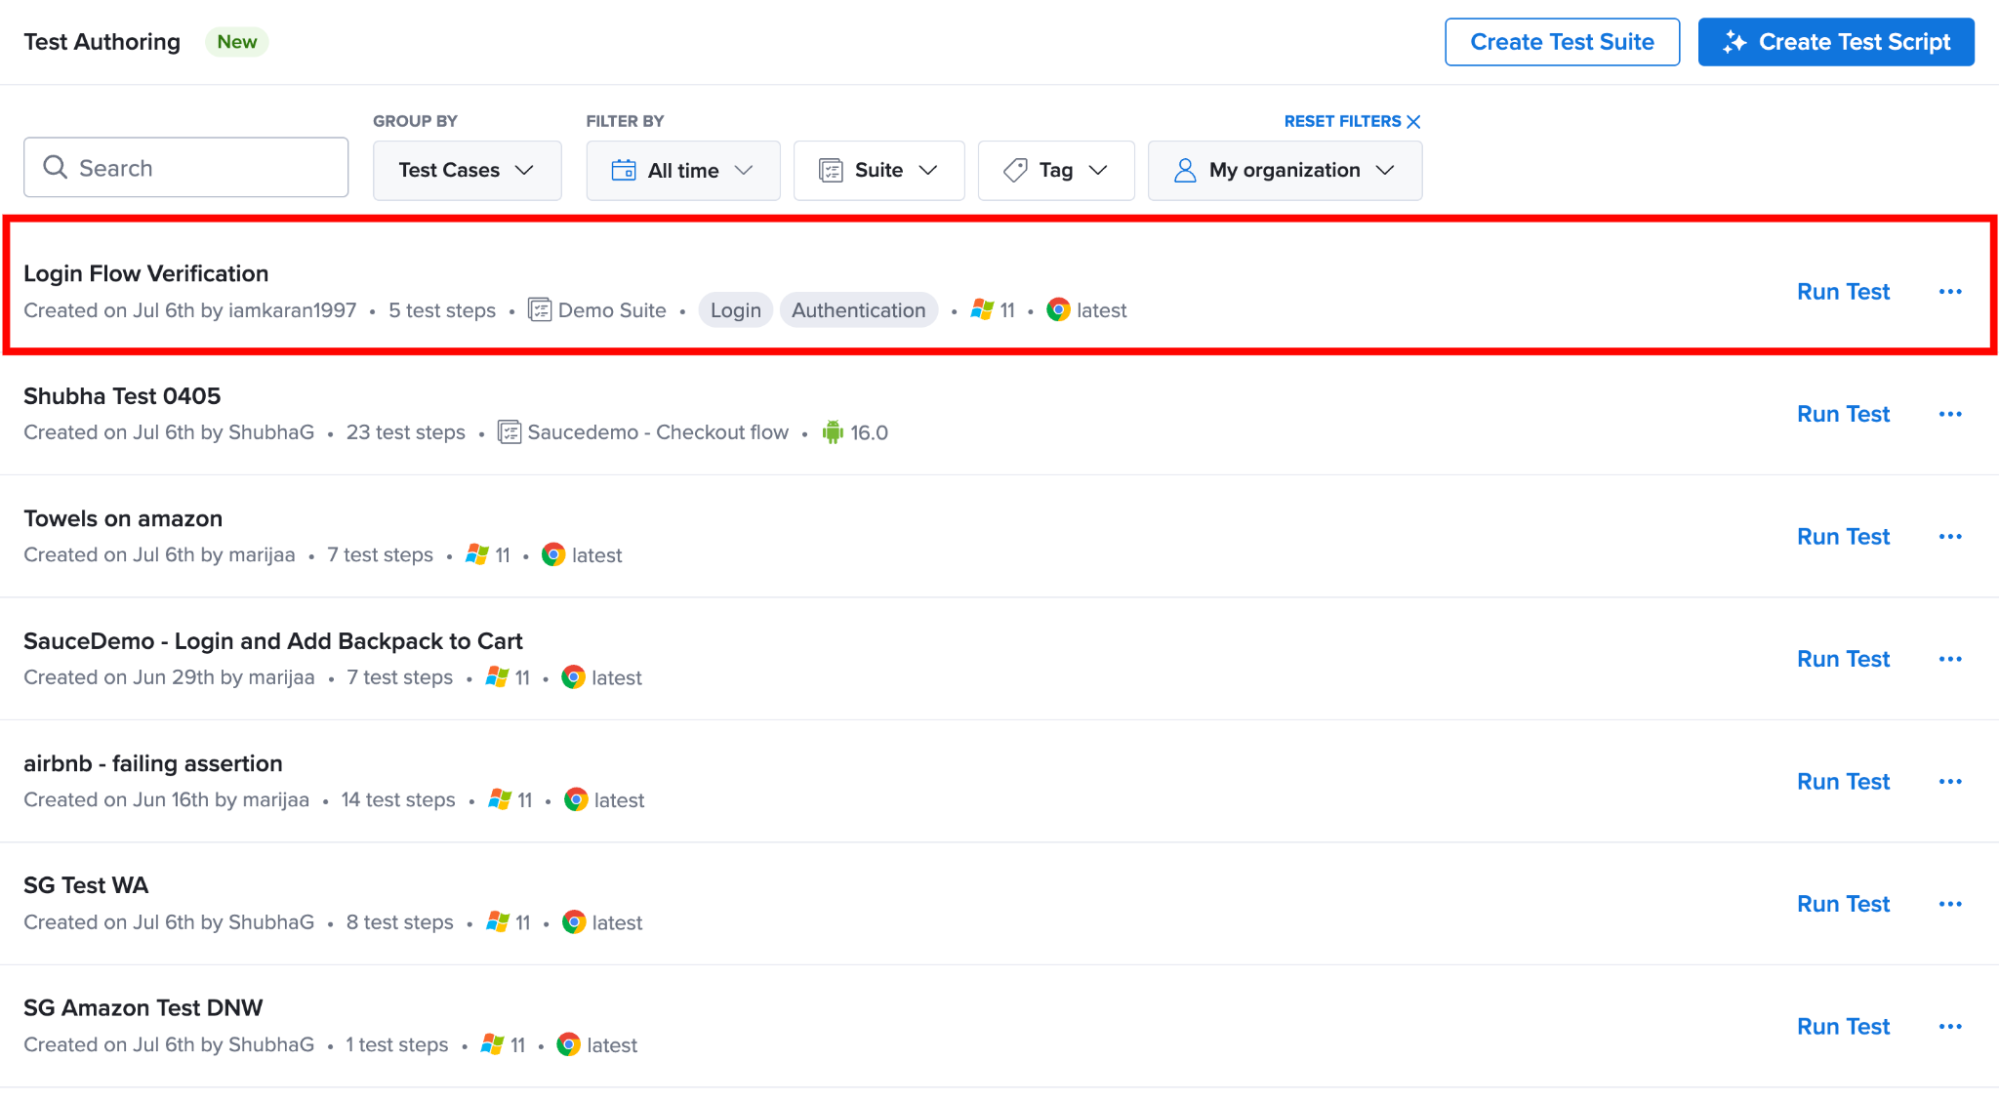
Generate Test Case
Sauce AI generates automated test cases directly from plain-English descriptions, eliminating the overhead of manual script authoring. To generate a test, provide your web application URL or select your mobile app from App Management, configure your target browser or device environment, and describe your testing goal.
Sauce AI then interacts directly with your application to run your testing objective, automatically capturing every digital interaction as a structured, sequential test step. Once this automated generation process is complete, you can review the entire test flow, edit individual actions or validations as needed, and immediately save or run the finalized test case.
Before getting started, please refer to the Prerequisites.
Navigation
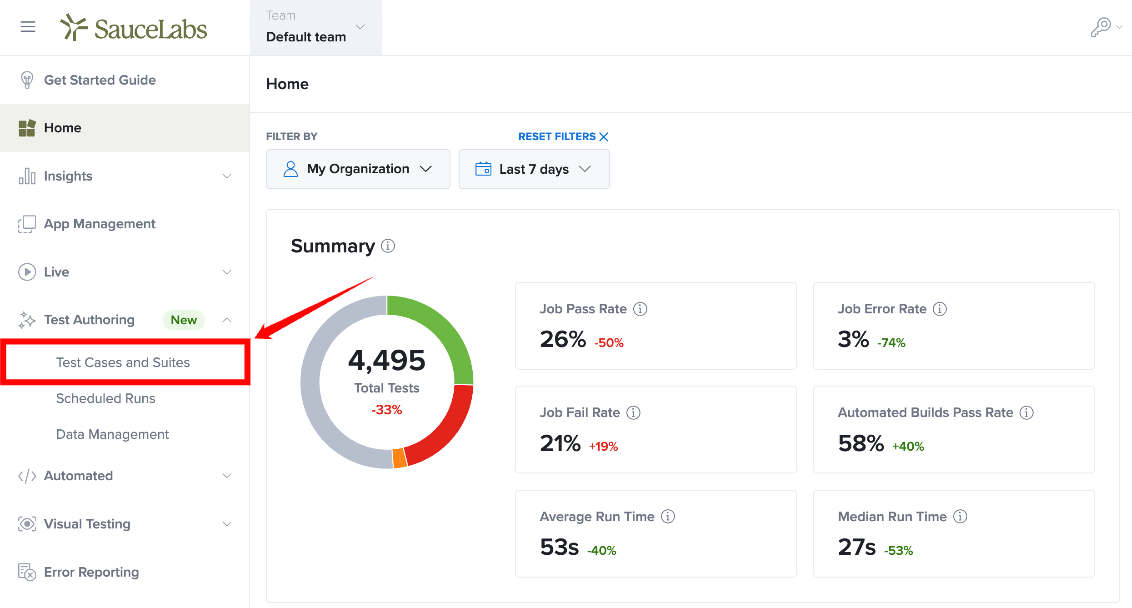
Step 1: Inside your Sauce Labs account, find Test Authoring from the left-hand navigation menu, expand its available options, and select Test Cases and Suites.
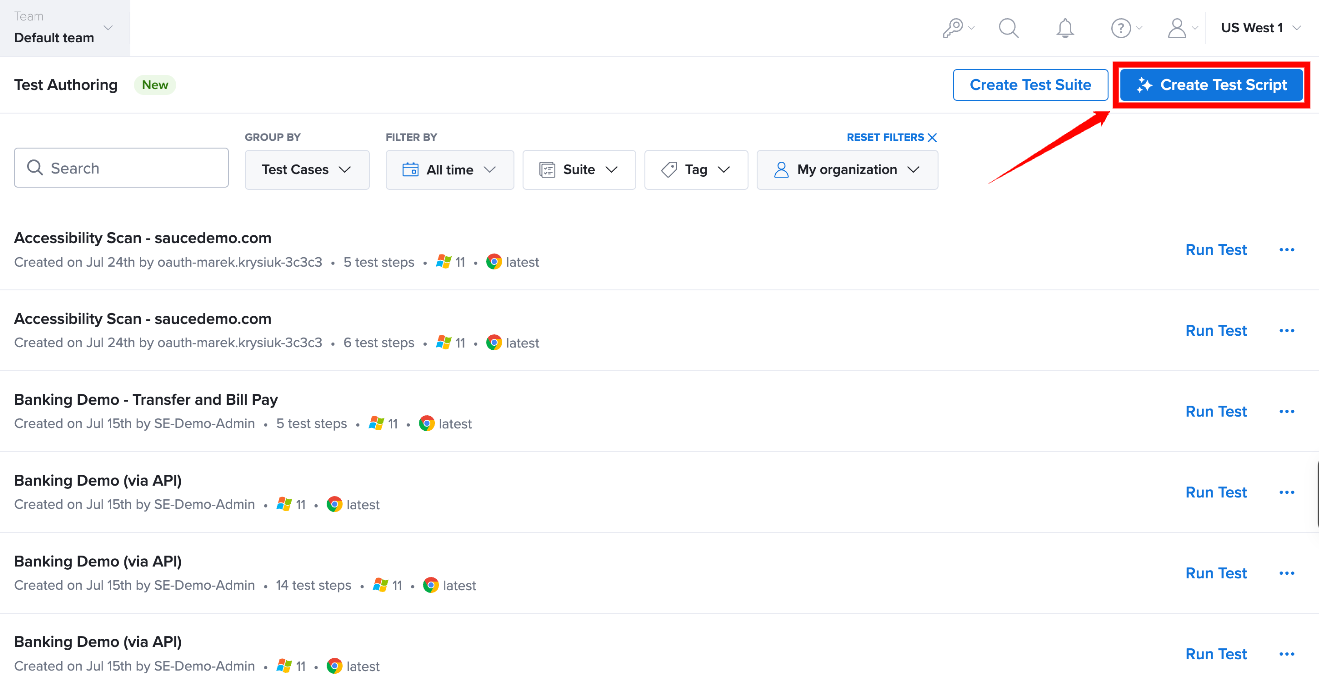
Step 2: Click Create Test Script in the top-right corner to start a new test generation session. The button is also displayed in the center of the page when no test cases have been created.
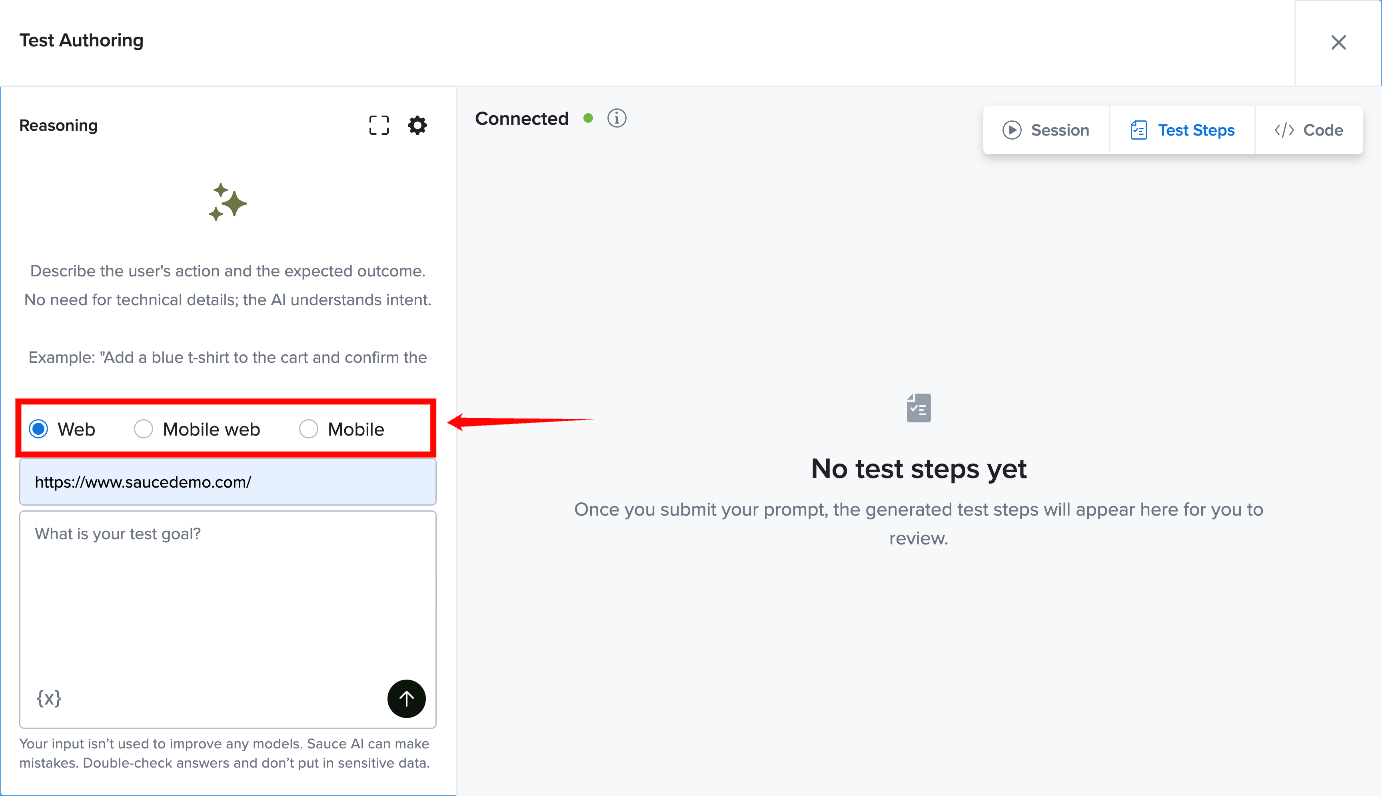
After clicking on the Create Test Script, the test generation setup page opens, where you can choose the type of application you want to test, configure the target testing environment, and write the natural-language prompt describing the test scenario you want Sauce AI to generate.
Select Your Application Type
Choose the type of application you want to test based on your testing requirements.
| Application Type | Description | Supported Formats |
|---|---|---|
| Web | Paste the complete URL of the web application you want to test in the Paste initial URL to test field. Sauce AI launches a desktop browser session and interacts with your application based on the provided test prompt. | URL |
| Mobile web | Paste the complete URL of the website you want to test in the Paste initial URL to test field. Sauce AI opens the website in a mobile browser on an emulated device and interacts with it based on the provided test prompt. | URL |
| Mobile | Select your application from the available builds uploaded to App Management. The list displays the latest uploaded application builds available in your Sauce Labs account. | Android: APK iOS: IPA, ZIP |
Generation runs on an emulated device: an Android emulator or an iOS simulator. Emulated devices start quickly and are the fastest way to author and iterate on a mobile web flow.
Once the test case is saved, you can run it against real mobile devices as well as emulators and simulators. Authoring happens on an emulated device; execution is not limited to one. See Run Test Cases.
Additional Test Generation Options (Optional)
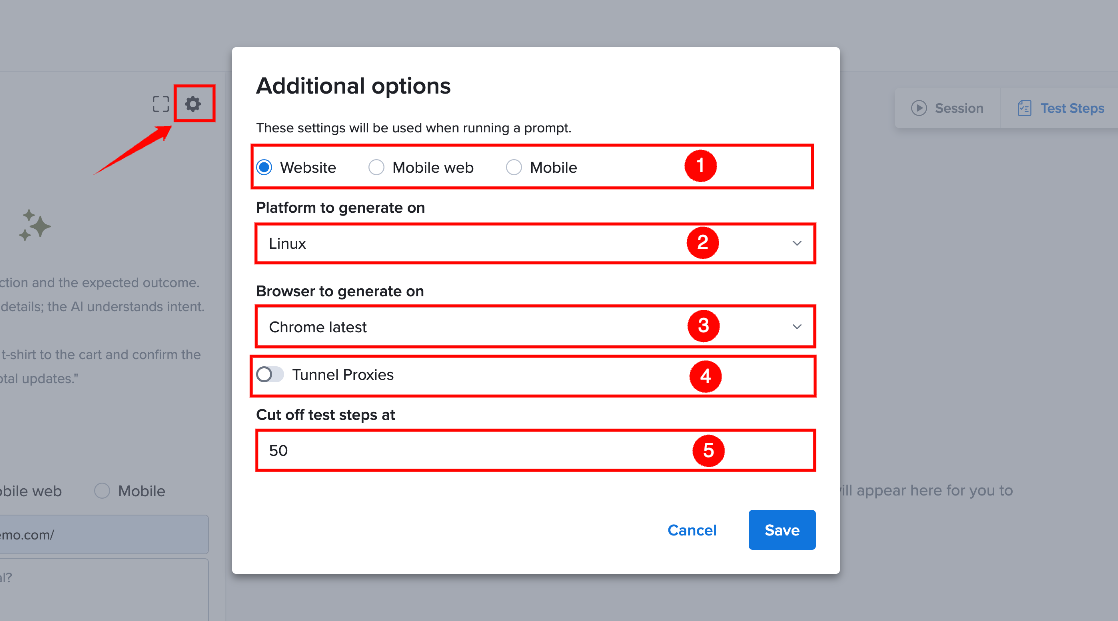
Before generating your test case, you can customize the test generation environment by clicking the Settings (Cog) icon. This allows you to configure the platform, browser or device settings, network access, and the maximum number of steps Sauce AI can generate.
The following configuration options are available:
| Ref. | Option | Description |
|---|---|---|
| 1 | Application Type | Select whether you want to generate a test for a Web, Mobile web, or Mobile application. The available device configuration options are updated based on the selected application type. |
| 2 | Platform to Generate On | Select the operating system or mobile platform where Sauce AI will perform the test generation. |
| 3 | Browser to Generate On | For web applications, select the browser that Sauce AI will use to interact with your application during test generation. |
| 4 | Tunnel Proxies | Enable this option if your application is hosted on a private or restricted network that requires a Sauce Connect tunnel to establish secure access during test generation. If your organization enforces tunnel usage, the default tunnel is automatically selected for your test runs. |
| 5 | Cut Off Test Steps At | Define the maximum number of steps Sauce AI can generate during the test creation process. The maximum supported value is 200 steps. This helps control the size and complexity of the generated test flow. |
If you do not modify these settings, Sauce Labs automatically applies the default configuration based on your selected application type. Your most recently used settings are also saved and applied to future test generation sessions.
Write Your Test Prompt
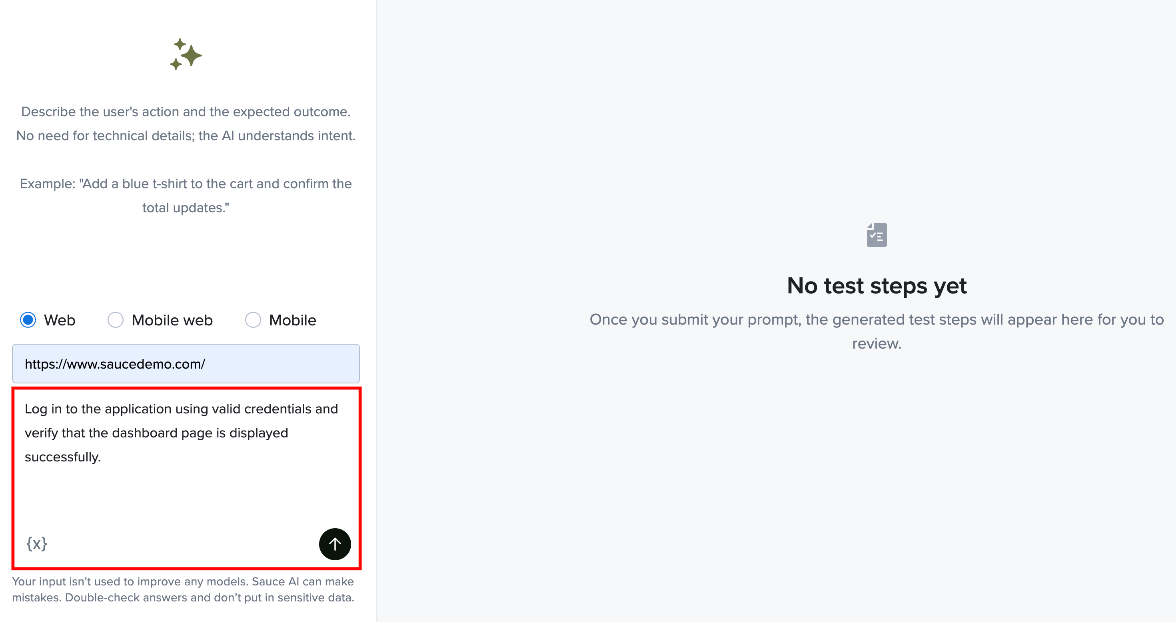
After selecting your application type and configuring the test generation settings, describe the test scenario you want Sauce AI to automate using a natural-language prompt.
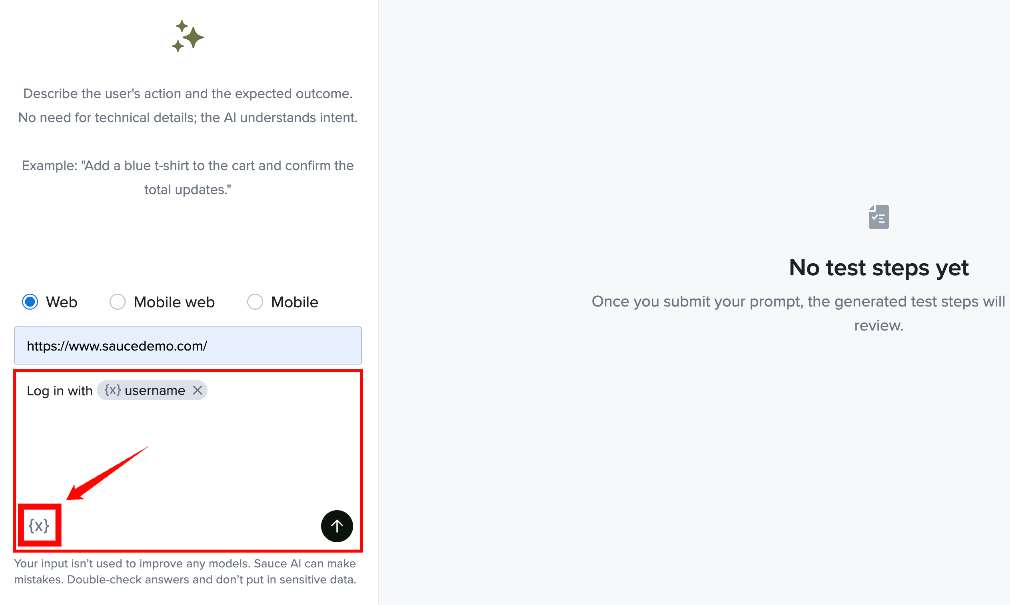
Instead of entering sensitive or reusable values directly in your prompt, you can reference Data Variables using the {{variable_name}} syntax or insert them from the {x} button. For more information, see Data Variables.
You can write prompts in everyday language. For example:
Log in to the application using valid credentials and verify that the dashboard page is displayed successfully.
Sauce AI understands the intent behind your instructions and translates them into automated test steps. However, providing more specific details helps generate more accurate and reliable test flows.
If your team already maintains test cases using Gherkin or other behavior-driven development (BDD) formats, you can provide those scenarios directly as prompts.
For example:
Given I am on the login page.
When I enter valid username and password
And I click the Sign In button
Then I should be redirected to the dashboard
Clear and specific prompts produce more reliable test flows. Include important details such as the exact UI elements to interact with and the expected outcome of each action.
For additional prompting recommendations, see the Test Authoring Prompting Guide.
Use Data Variables in Your Prompt
Instead of entering usernames, passwords, URLs, or other reusable test data directly in your prompt, reference them as Data Variables. Variable values are stored separately from your prompt and are never sent to the AI model. Sauce AI only sees the variable reference, and the stored value is substituted when the step runs. For more information, see How Variable Values Are Protected.
To add a variable to your prompt, type {{ or click the {x} icon in the prompt field to open the variable picker, then select the variable you want to use. For step-by-step instructions, see Insert a Variable in the UI.
You can reference a variable by name, or target a specific scope with a prefix:
| Syntax | Resolves to |
|---|---|
{{variable_name}} | The variable with that name from the most specific scope that applies to the test. |
{{org:variable_name}} | The organization-scoped variable with that name. |
{{team:variable_name}} | The team-scoped variable with that name. |
For the full list of supported scopes and how Sauce AI chooses between variables with the same name, see Variable Reference Syntax and Resolution Order.
For example:
Go to {{org:base_url}}, log in using {{team:username}} and {{team:password}}, then verify the dashboard is displayed.
During initial generation of a new test case, only team and org variables can be resolved without an explicit scope prefix. If a reference does not match any variable you have access to, the {{...}} text is passed to the AI as plain text and no error is raised. See Unresolved Variables.
Start Test Generation
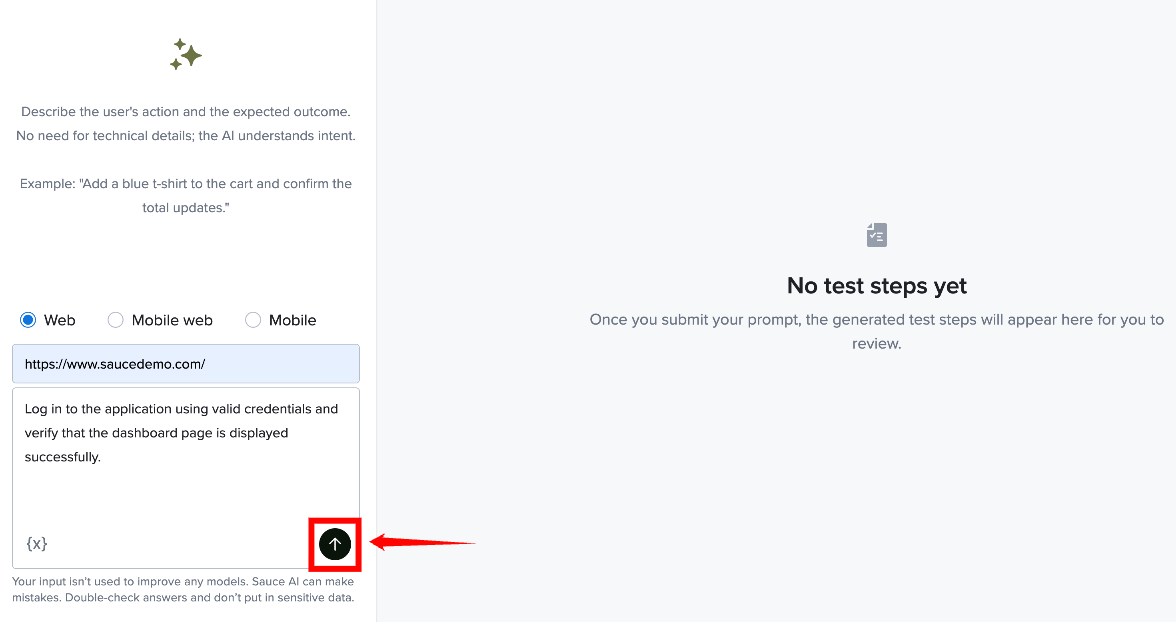
After entering your application details and test prompt, click Start Session to begin the test generation process.
Sauce AI launches the selected browser or device environment and interacts with your application based on the instructions provided in your prompt.
During generation, Sauce AI can perform actions such as:
- Clicking buttons and links.
- Entering text into input fields.
- Performing right-click and double-click actions.
- Long pressing on mobile devices.
- Scrolling through application screens.
Each action is executed in real time, and the system captures the details required to build the automated test flow.
Review the Generated Test Flow
After the test generation session is complete, Sauce AI provides the generated test in multiple views to help you review and validate the results before editing, saving, or running the test.
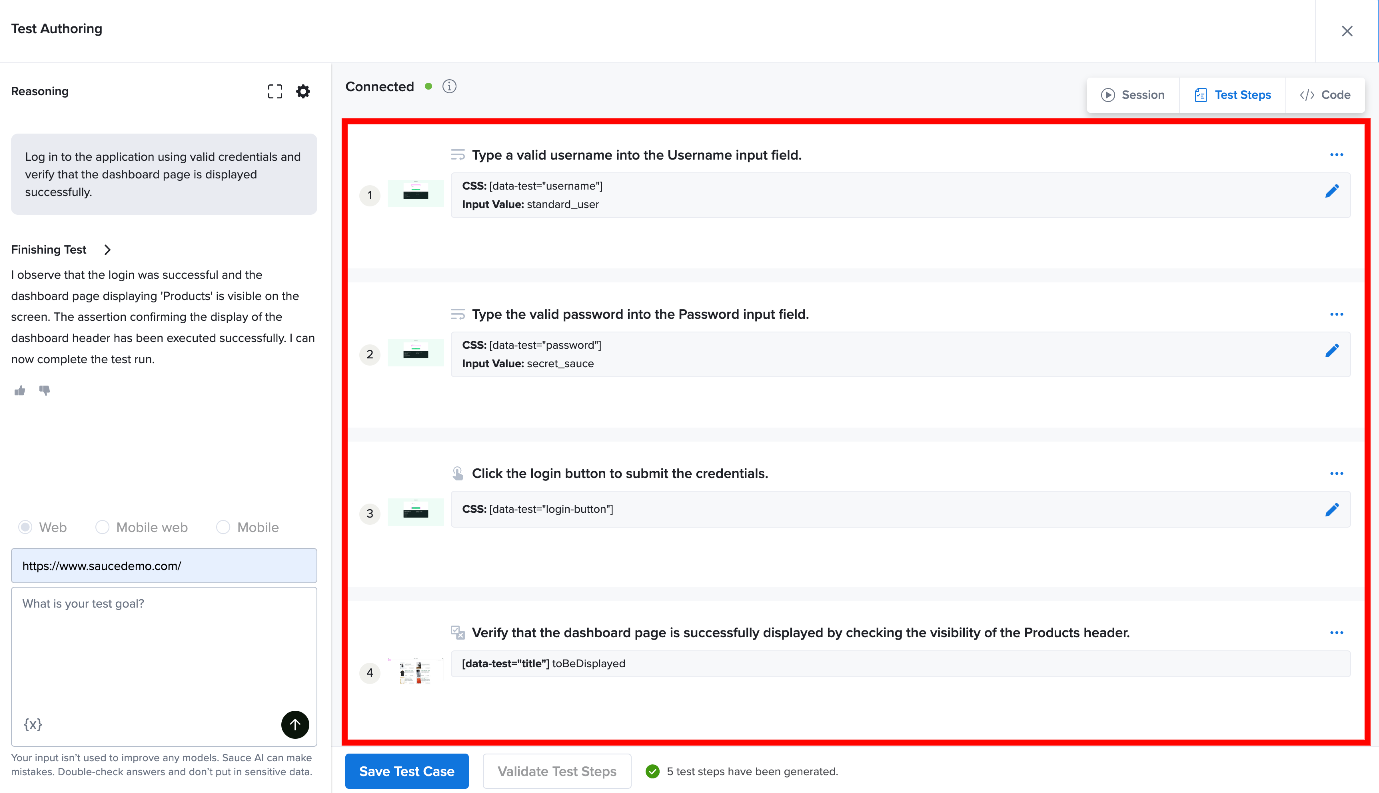
Test Steps View
The Test Steps view displays the generated test flow in a clear, step-by-step format. This allows you to review how Sauce AI interpreted your prompt and generated the test scenario.
The generated test flow includes details such as:
- The pages or screens visited during the test.
- The buttons, links, and other UI elements interacted with.
- The input values entered during the test.
- The element locators used to identify application components.
Reviewing the generated steps helps you verify that the test accurately reflects the intended user workflow.
If the generated test flow does not match your expected behavior, you can stop the generation, refine your prompt, and try again. During generation, the start prompt button changes into stop while prompt result is being generated.
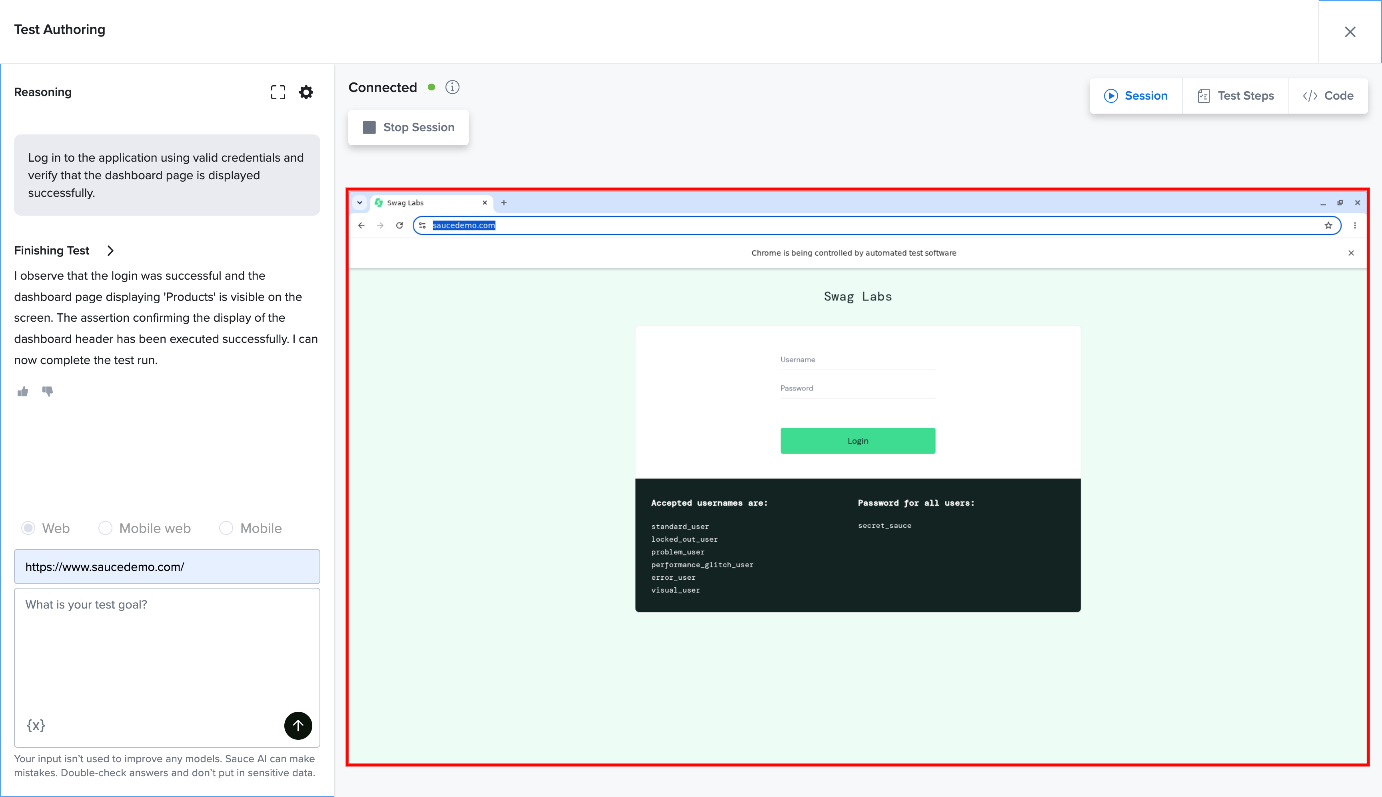
Session View
The Session view provides a video recording of the test generation session. This allows you to watch the actions performed by Sauce AI in the browser and visually confirm that the generated workflow matches the expected behavior of your application.
Code View
The Code view allows you to generate automation scripts from the test case using your preferred programming language and automation framework.
Code generation is an on-demand action. The generated script is created when requested and is not saved as part of the test case. You can regenerate the script at any time using different language and framework combinations.
After generating the script, you can review, copy, or download it for use in your existing test automation projects and CI/CD pipelines.
For detailed instructions, see Generate Test Scripts.
This view helps you convert authored test cases into reusable automation code while maintaining the workflow defined in the generated test.
Known limitations when generating on Safari
Some Test Authoring capabilities are not fully supported when generating tests on Safari.
When using Safari:
-
Session data may not always be completely cleared between generation restarts.
-
Some selector types, including selectors inside Shadow DOM elements, may not be generated correctly.
For the most reliable test generation experience, Sauce Labs recommends using a Chromium-based browser, such as Google Chrome.
Assertions
An assertion is a check that Sauce AI performs against your application during a test. Every assertion has a failure mode that decides what happens to the rest of the test when that check fails during test generation or execution: soft assertions record the failure and let the test keep going, hard assertions stop the test immediately.
Sauce AI only creates the assertions you ask for. If you want a value checked, so say in your prompt. See Writing assertions in your prompt.
| Failure mode | What happens when the check fails | Rest of the test |
|---|---|---|
| Soft | The step is marked with a warning and the failure is recorded in the results. | Continues to the end. Every remaining check still runs and reports its own result. |
| Hard | The step fails and the test is stopped at that point. | Does not run. Remaining steps are not executed. |
In both cases the test case itself is reported as failed. A soft assertion does not hide a broken check, it only keeps the test running if possible so that the checks after it still report.
When Sauce AI generates your test case:
- A failed soft assertion is recorded against the step and generation continues through the rest of your prompt, so you get a complete test case to review and edit.
- A failed hard assertion stops generation at that step.
This means you can point Sauce AI at a screen you already know has a problem, generate the whole flow once, and see all the failing checks in the Test Steps view instead of regenerating after each fix.
Set the Default Failure Mode for a Test Case
The failure mode you set on the test case applies to every assertion in it that does not have its own override.
Step 1: On the test generation setup page, open Additional options (the Settings cog icon).
Step 2: Set the assertion failure mode for the test case.
Step 3: Write your prompt and click Start Session.
The setting is stored with the test case, so it applies to later runs and regenerations until you change it.
Existing test cases keep the behavior they were authored against. They continue to stop at the first failed assertion until you change the setting on the test case and regenerate it.
Override the Failure Mode for a Single Step
Any individual assertion can override the test case default. You can set the failure mode when you add a new assertion or when you edit an existing one.
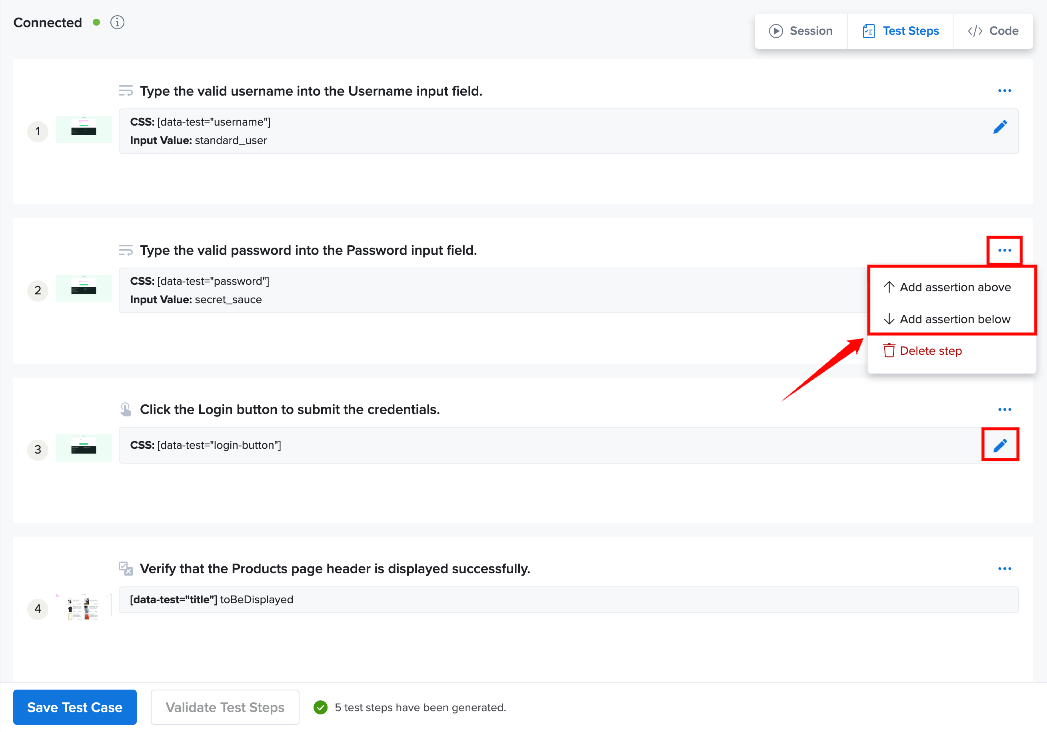
Step 1: In the Test Steps view, open the Add Test Assertion dialog in one of the following ways:
- To add a new assertion: Click the More options (⋯) menu on the step where you want to add the assertion, then select Add assertion above or Add assertion below.
- To change an existing assertion: Click the Edit (pencil) icon on the assertion step you want to change.
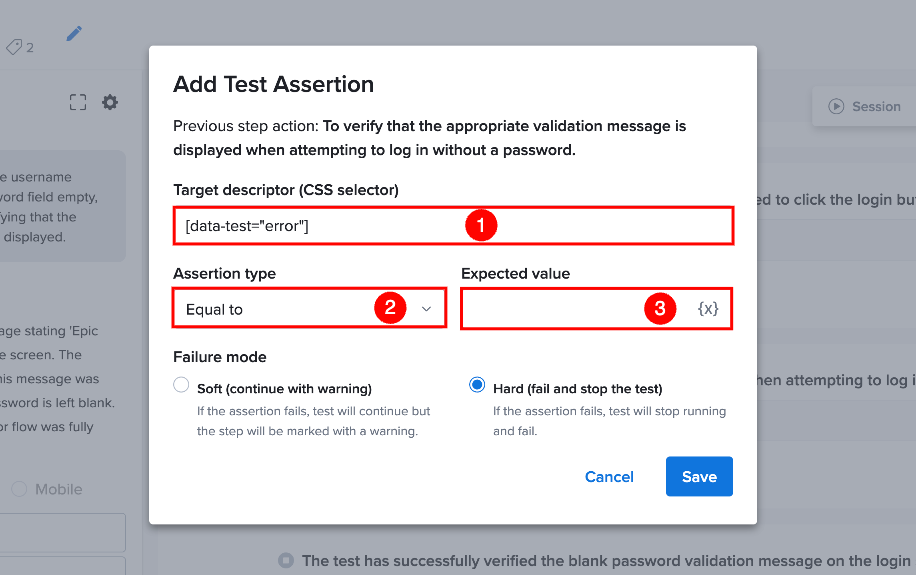
Step 2: In the Add Test Assertion dialog, review the Previous step action displayed at the top. It shows the step the assertion is placed after, so you can confirm the assertion is in the right position.
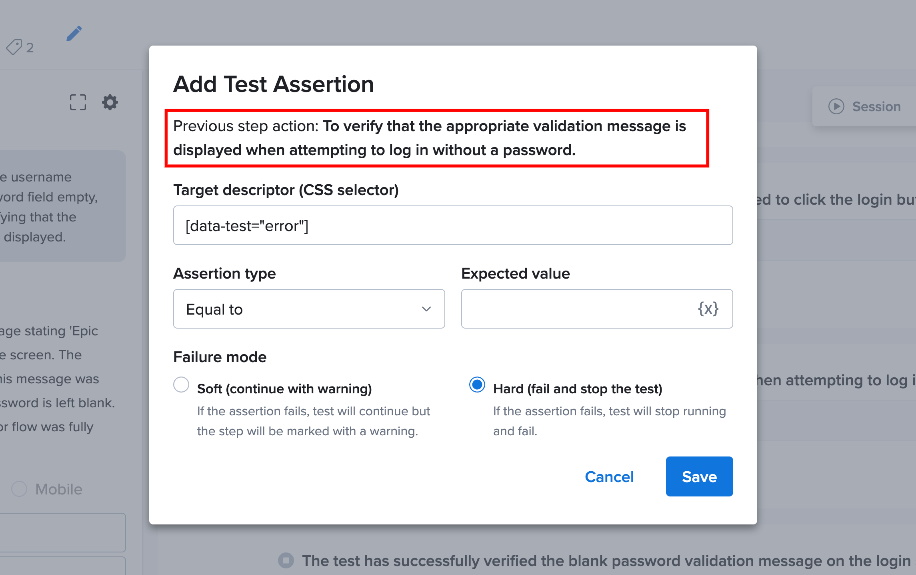
Step 3: Configure the assertion:
| Ref. | Field | Description |
|---|---|---|
| 1 | Target descriptor (CSS selector) | Enter the CSS selector of the element you want to check, for example [data-test="error"]. |
| 2 | Assertion type | Select how the element is compared with the expected value, for example Equal to. |
| 3 | Expected value | Enter the value the element is expected to have. To use a stored value, click the {x} icon and select a Data Variable. |
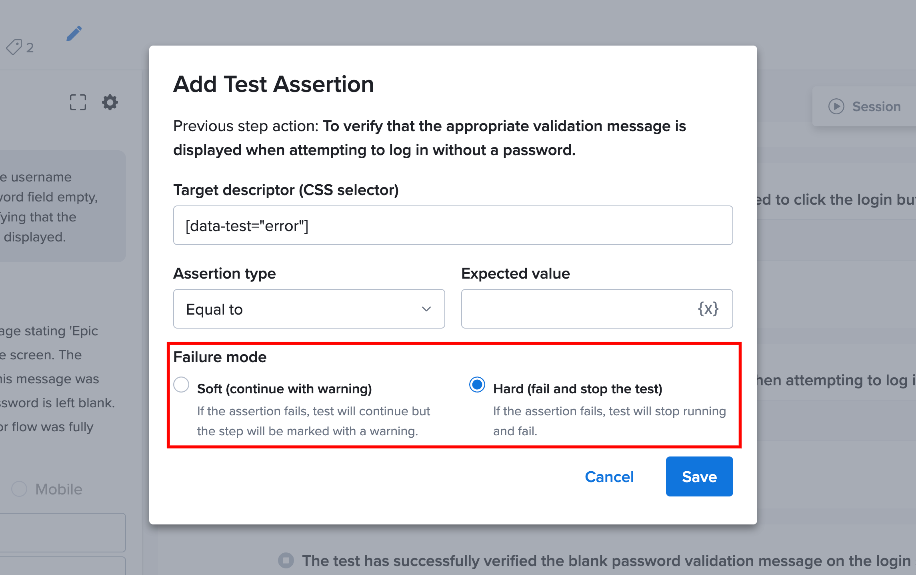
Step 4: Under Failure mode, select one of the following options:
- Soft (continue with warning): If the assertion fails, the test continues, but the step is marked with a warning.
- Hard (fail and stop the test): If the assertion fails, the test stops running and fails.
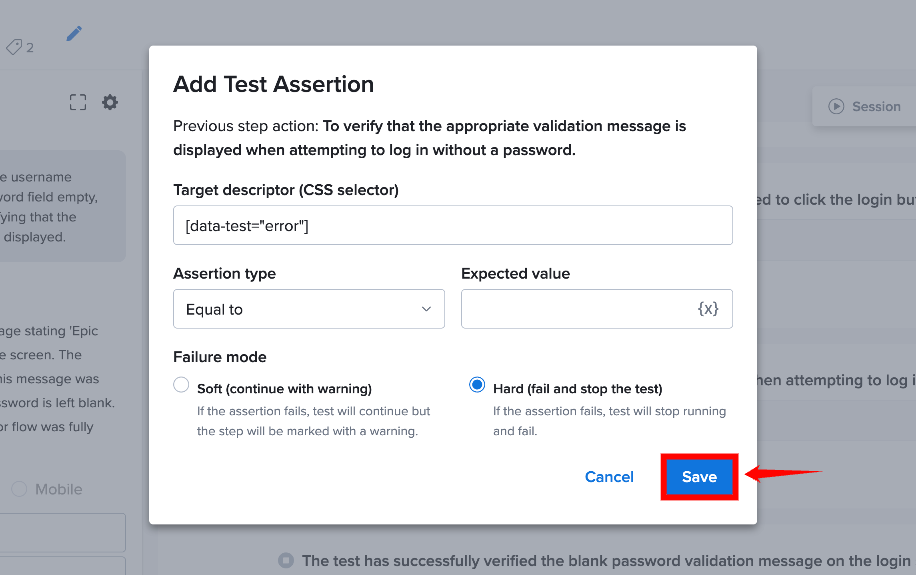
Step 5: Click Save to apply the assertion. Click Cancel to close the dialog without saving your changes.
A step with no override inherits the test case default.
The More options (⋯) menu also includes Delete step, which removes the step from the test flow. For more information, see Delete a Test Step.
Save Your Test Case
After reviewing and confirming the generated test flow, you can save the test case to:
- Reuse it later
- Organize it into test suites
- Schedule executions
- Run it on demand.
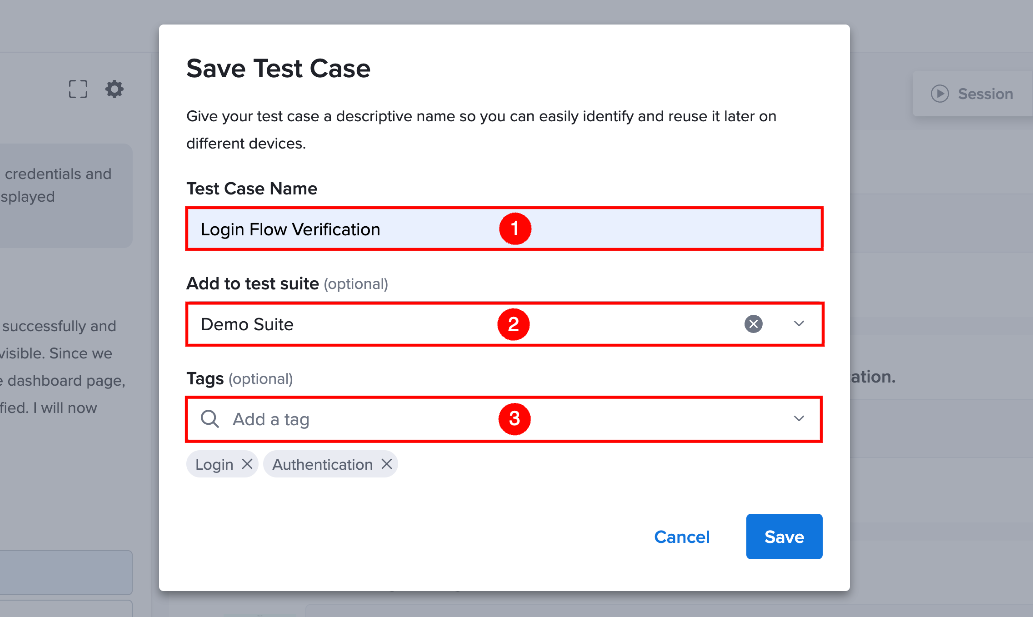
Step 1: After you have reviewed the generated test flow and confirmed that all actions, validations, and expected outcomes align with your testing requirements, click Save Test Case to save your generated test case.
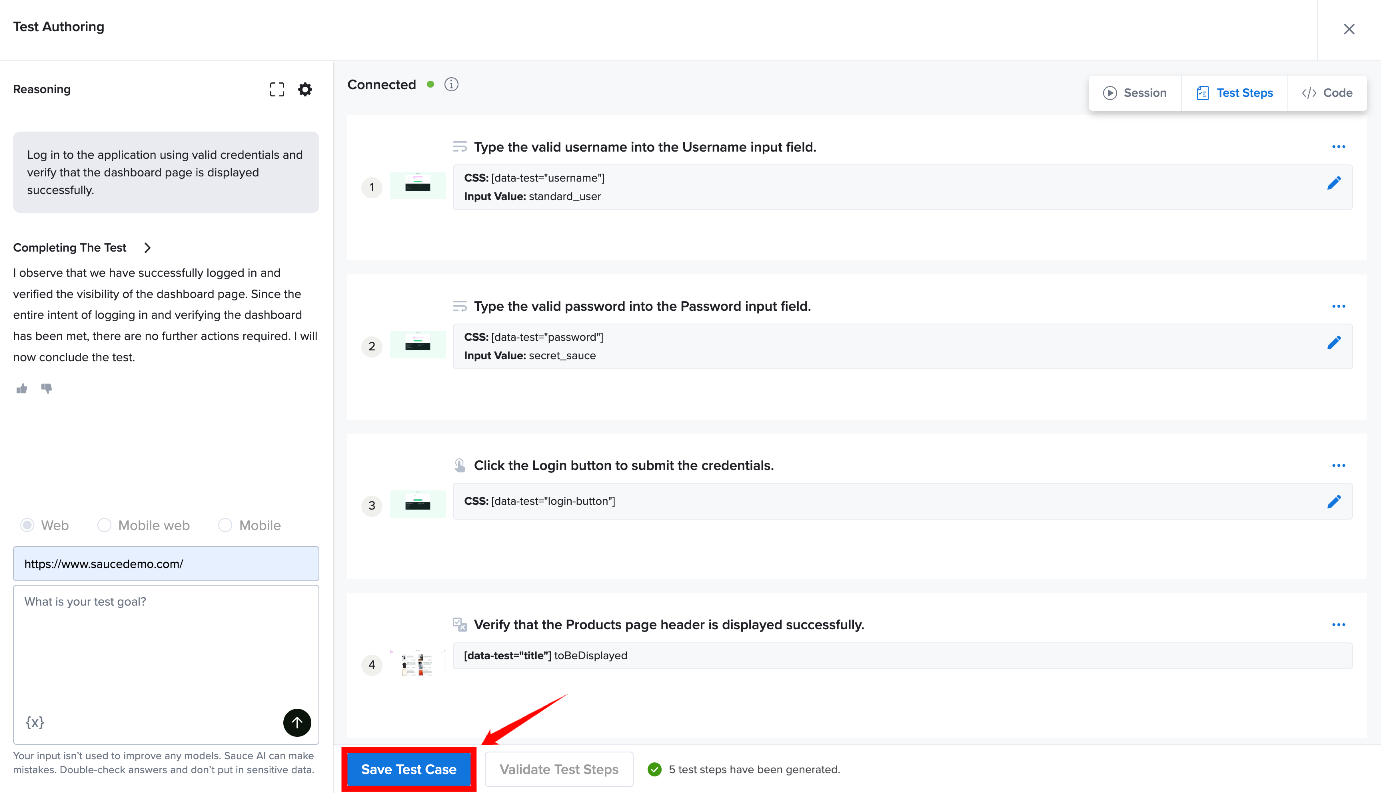
Step 2: In the Save Test Case dialog, provide the following details before saving your test case:
| Ref. | Field | Description |
|---|---|---|
| 1 | Test Case Name | Enter a meaningful and descriptive name for the test case. A clear name makes it easier to identify, search, and reuse the test case later. |
| 2 | Add to Test Suite (Optional) | Select an existing test suite to organize the test case within a related testing workflow. Leave this field blank if you do not want to associate the test case with a test suite. |
| 3 | Tags (Optional) | Add one or more tags to categorize the test case. Tags help organize, search, and filter test cases based on features, modules, priorities, releases, or other criteria. A test case can have multiple tags. The maximum allowed number of tags per test case is 20. |
After providing the required details, click Save to store your test case.
The saved test case will be available in the Test Cases and Suites page for future execution, modification, and management.