SSO / SAML
SAML-based Single Sign-On (SSO) allows users to sign in to your organization using an identity provider (IdP), such as Okta, Azure AD, OneLogin, Google Workspace, or PingIdentity.
Only Account Owners and Org Admins can configure SSO.
Setting Up SSO
Set up SSO in two passes: save your identity provider's metadata first, then copy the Service Provider Details that appear into your IdP application.
The Service Provider Details card only appears after you save the metadata. If your identity provider needs the service provider values up front, use:
- SP Entity ID:
https://your-org.testfairy.com - ACS URL:
https://your-org.testfairy.com/login/sso
Replace your-org with your organization's subdomain.
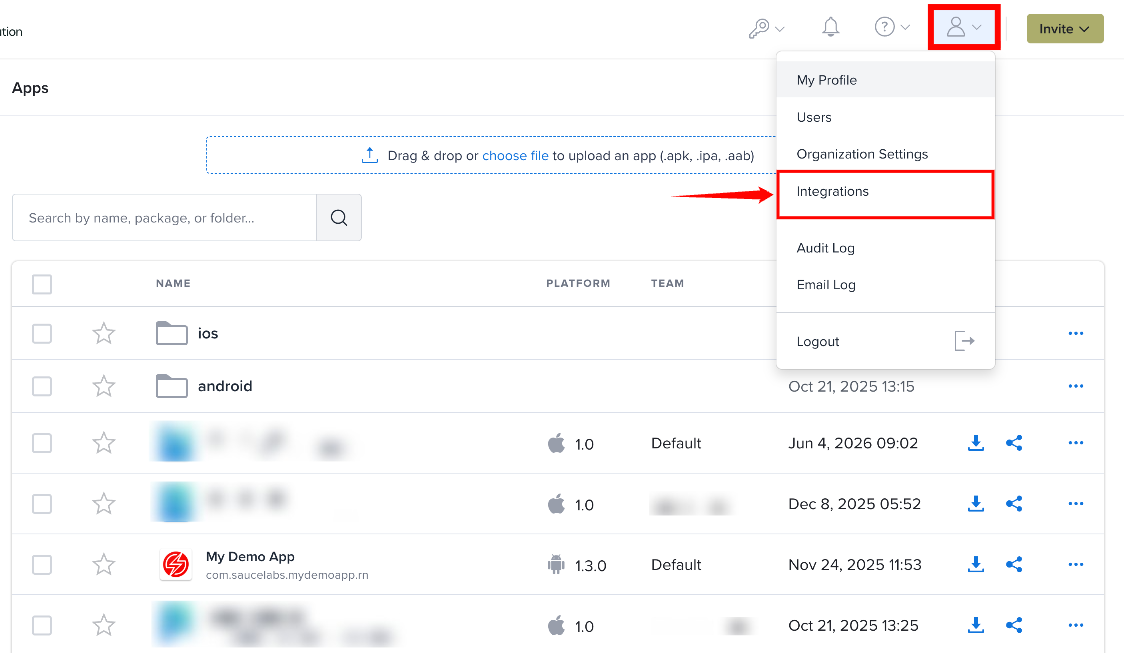
Step 1: Click the Profile icon in the top-right corner and select Integrations from the user menu.
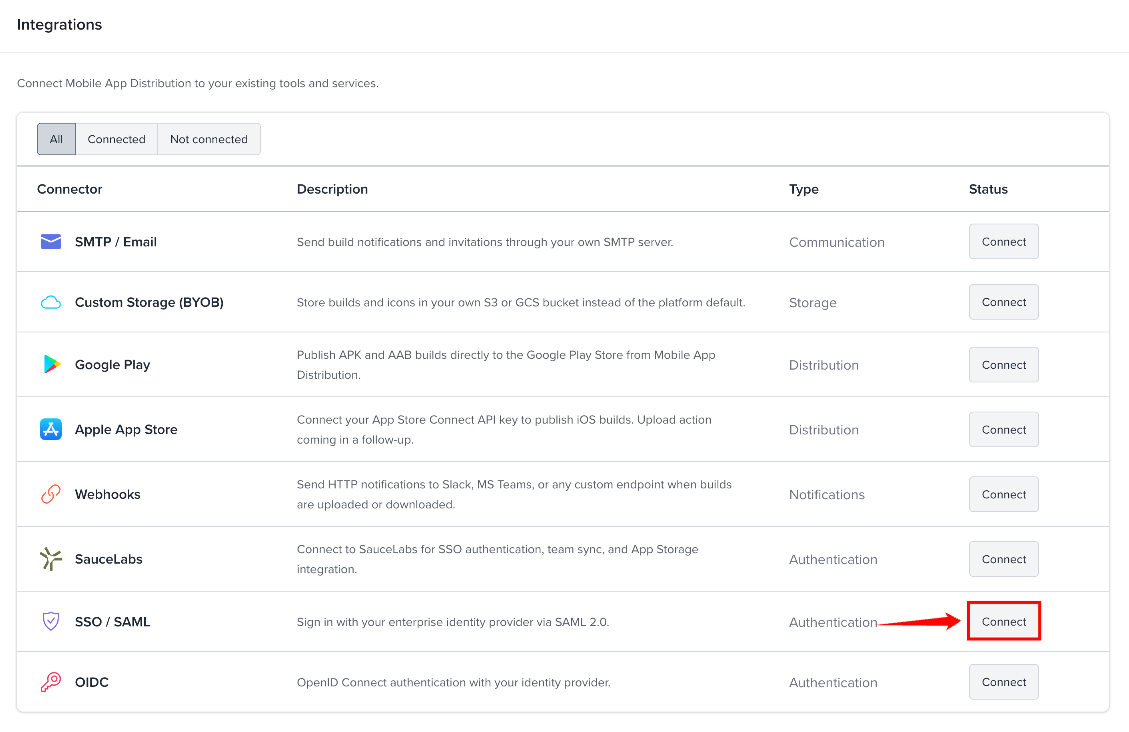
Step 2: On the Integrations page, find SSO / SAML and click Connect.
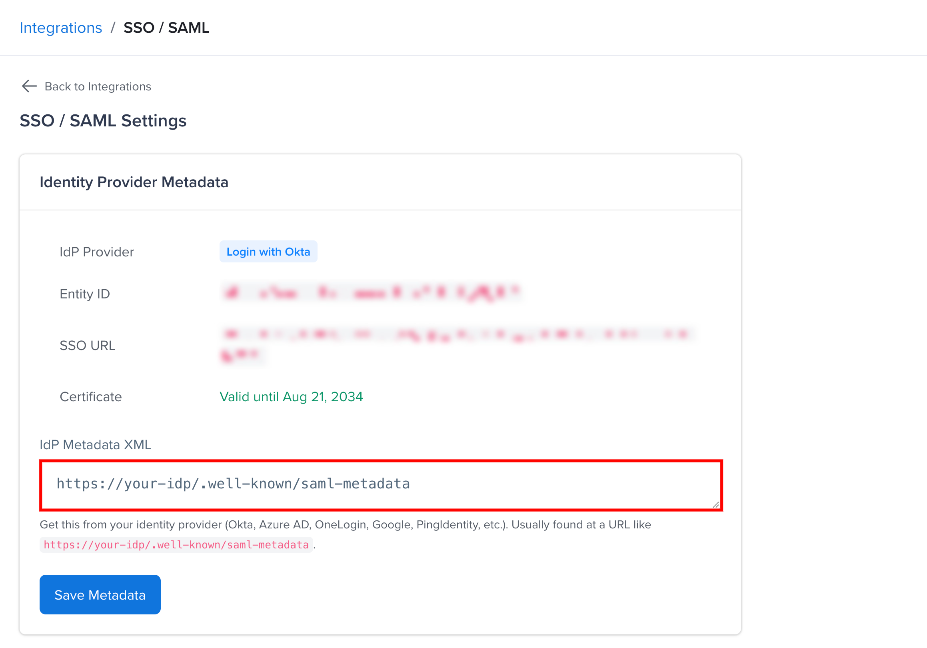
Step 3: Copy your SAML metadata XML from your identity provider and paste it into the IdP Metadata XML field. This is usually available at a URL like https://your-idp/.well-known/saml-metadata.
Step 4: Click Save to save the identity provider metadata. Once SSO is configured, this button reads Update Metadata.
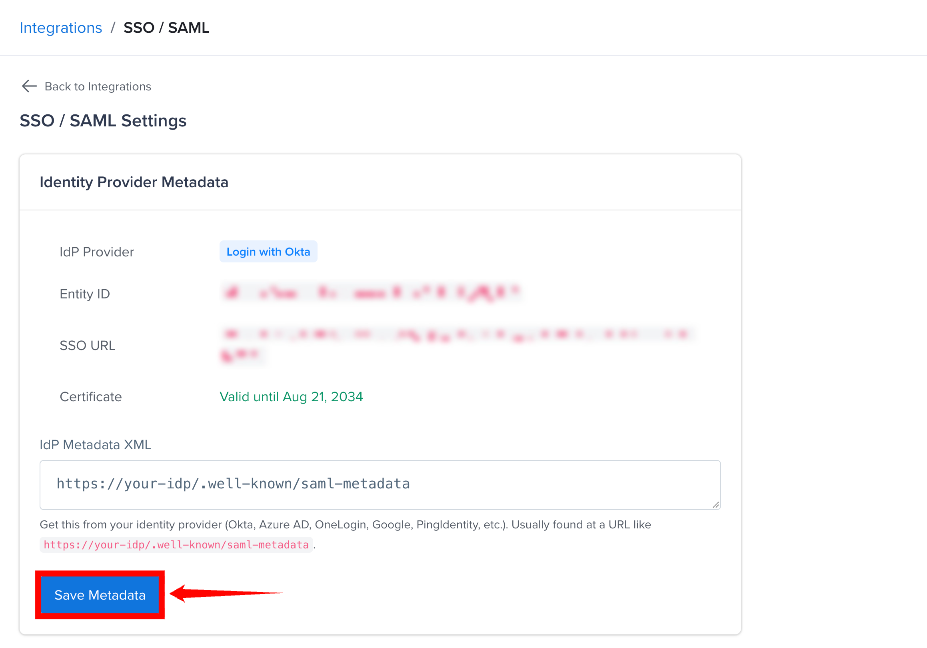
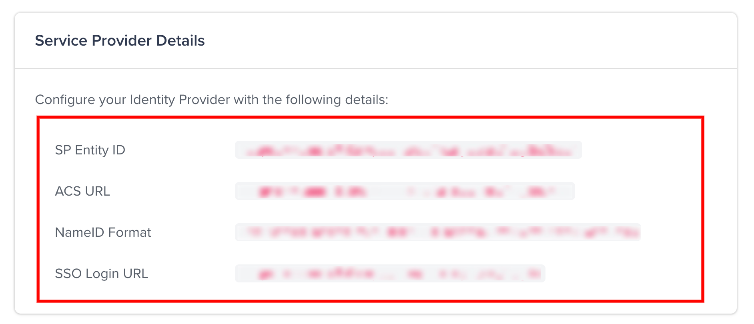
After the metadata is saved, the system automatically extracts the Entity ID, SSO URL, and certificate, and the Service Provider Details card appears. Copy those values into your identity provider's SAML application.
Enable SSO and Auto-create Users on SSO Login are on by default, so SSO starts working as soon as you save the metadata.
Configure SSO Options
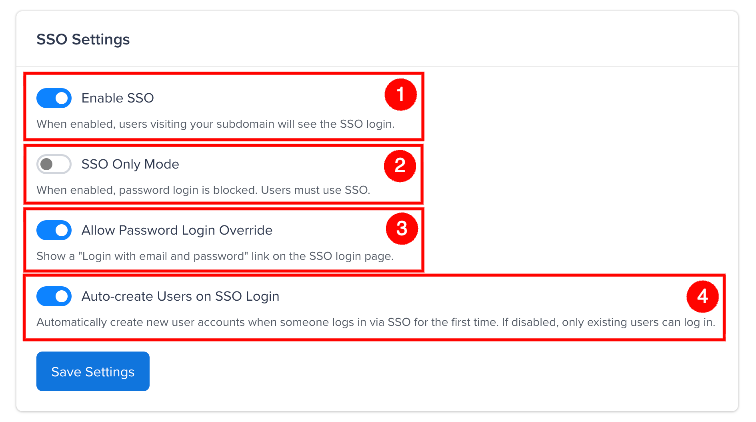
After saving the SAML metadata, you can configure the following options:
| Sr. No. | Option | Description |
|---|---|---|
| 1 | Enable SSO | Your organization's login page becomes the SSO sign-in page. Users can sign in with a password only through the Email and password link, and only if Allow Password Login Override is on. |
| 2 | SSO Only Mode | Disables password login. Users must sign in through SSO. |
| 3 | Allow Password Login Override | Provides a Login with email and password option as a fallback. |
| 4 | Auto-create Users on SSO Login | Automatically creates a user account when a new user signs in through SSO for the first time. |
Click Save Settings to apply the options. To remove the configuration entirely, use Delete SSO Configuration.
SSO login is only available when users access the login page via your organization's subdomain (e.g. https://your-org.testfairy.com/login). The SSO button will not appear on the main application login page.
Service Provider Details
These are the values to enter when creating the SAML application in your identity provider (the SSO Settings page shows them with your exact host):
| Field | Value | Also called |
|---|---|---|
| SP Entity ID | https://your-org.testfairy.com | Audience URI, Identifier (Azure AD) |
| ACS URL | https://your-org.testfairy.com/login/sso | Redirect URL, Reply URL (Azure AD), Single sign-on URL (Okta) |
| NameID Format | urn:oasis:names:tc:SAML:1.1:nameid-format:emailAddress | Name ID format — emailAddress (recommended) or unspecified. The NameID value must be the user's email address. |
| SSO Login URL | https://your-org.testfairy.com/login | Login/start URL — where users begin an SSO login |
Replace your-org with your organization's subdomain. The SAML response must be delivered to the ACS URL via HTTP POST. The ACS URL may also end with a trailing slash.
For Okta, the Entity ID is https://your-org.testfairy.com/login/sso/. Always copy the exact values shown on the SSO Settings page, opened from your organization's subdomain.
User Provisioning
- New users created through SSO join as Tester.
- The
groupsattribute can set the user's role and sync their tester groups. - Names are read from the
givenname/surname,firstNameorfirst_nameattributes. - With Auto-create Users on SSO Login turned off, unknown users see "You are not authorized to access this organization."
- Single Logout is available at
/logout/sso(Redirect binding).
Certificate Expiry
The IdP certificate expiry date is shown on the settings page. A warning badge appears 30 days before the certificate expires, and turns red once it has expired. Update the metadata XML with a fresh copy from your IdP to renew it.