Tester Groups
Tester groups let you organize testers and control which apps and builds they can access. Each tester group belongs to a specific team and can only be assigned to apps in that team.
All team members, including Members, Team Admins, Org Admins, and Account Owners, can create and manage tester groups in their teams.
Creating a Group
Step 1: Select Testers from the sidebar. The Testers page opens, with the Testers and Groups tabs.
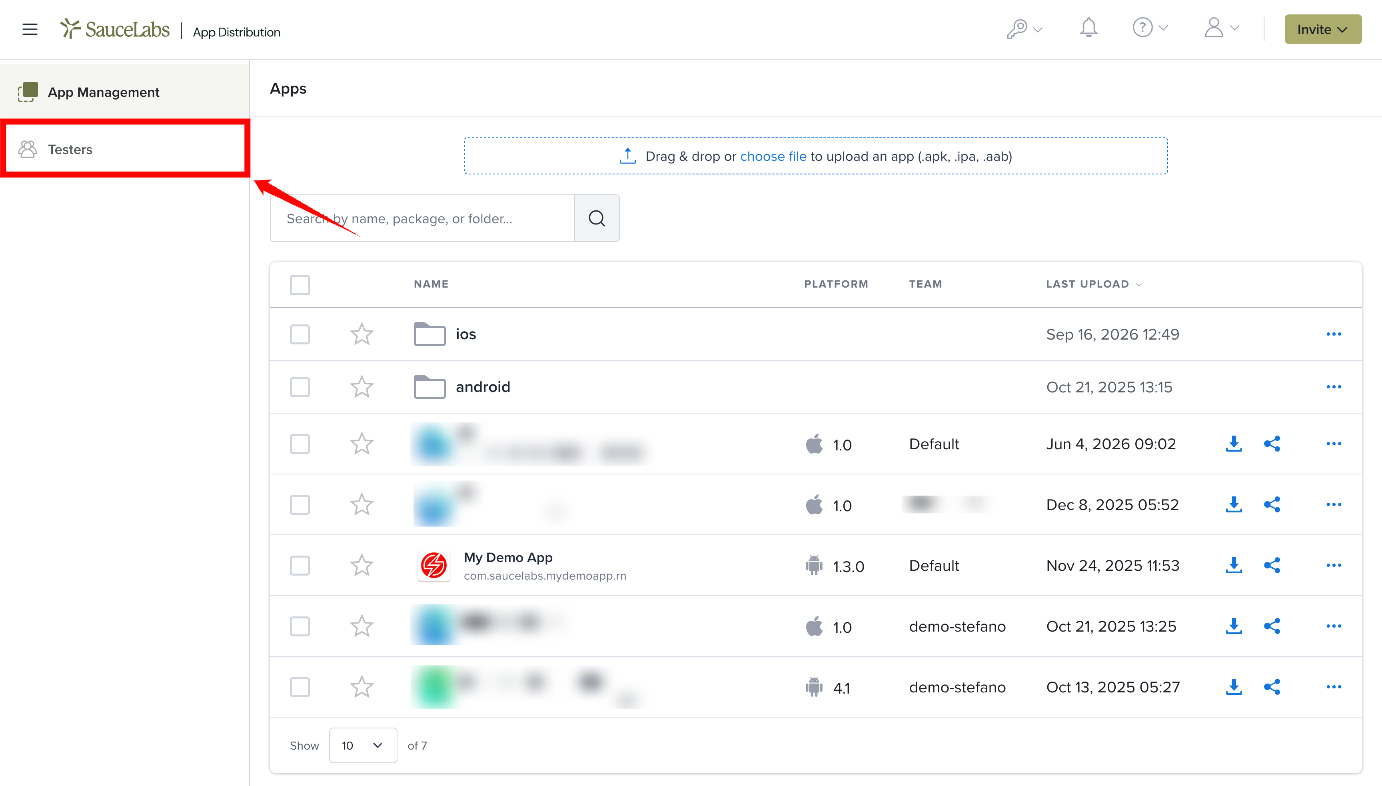
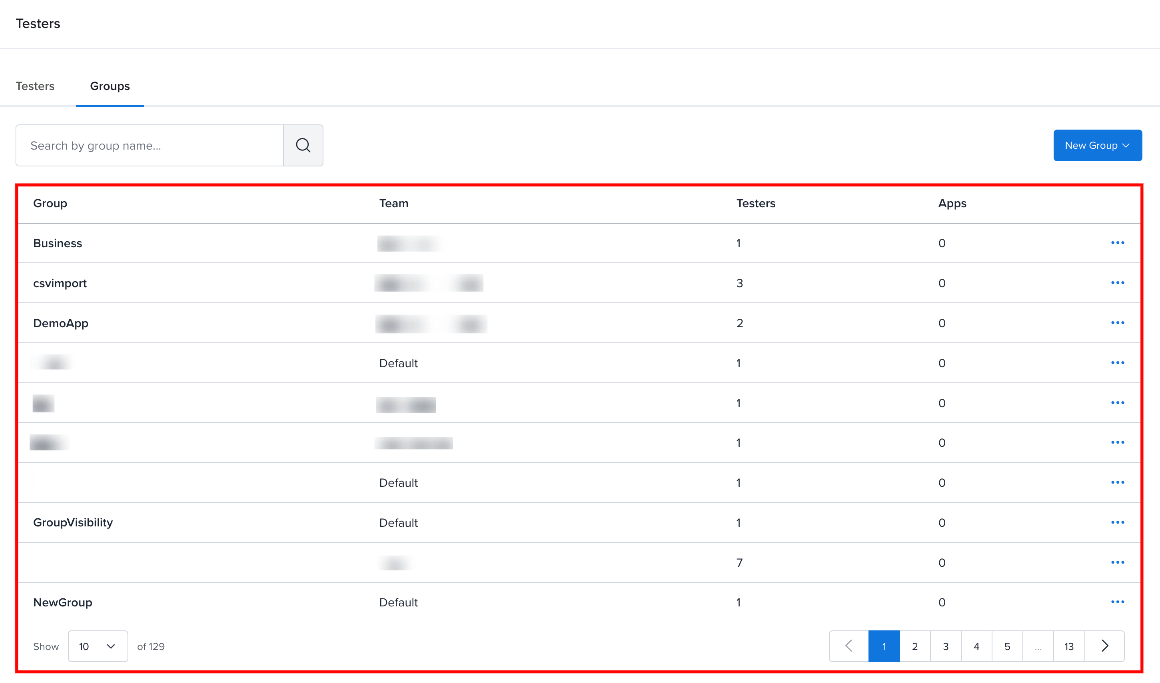
Step 2: Select the Groups tab. The Groups page displays the groups in your teams (admins see all groups).
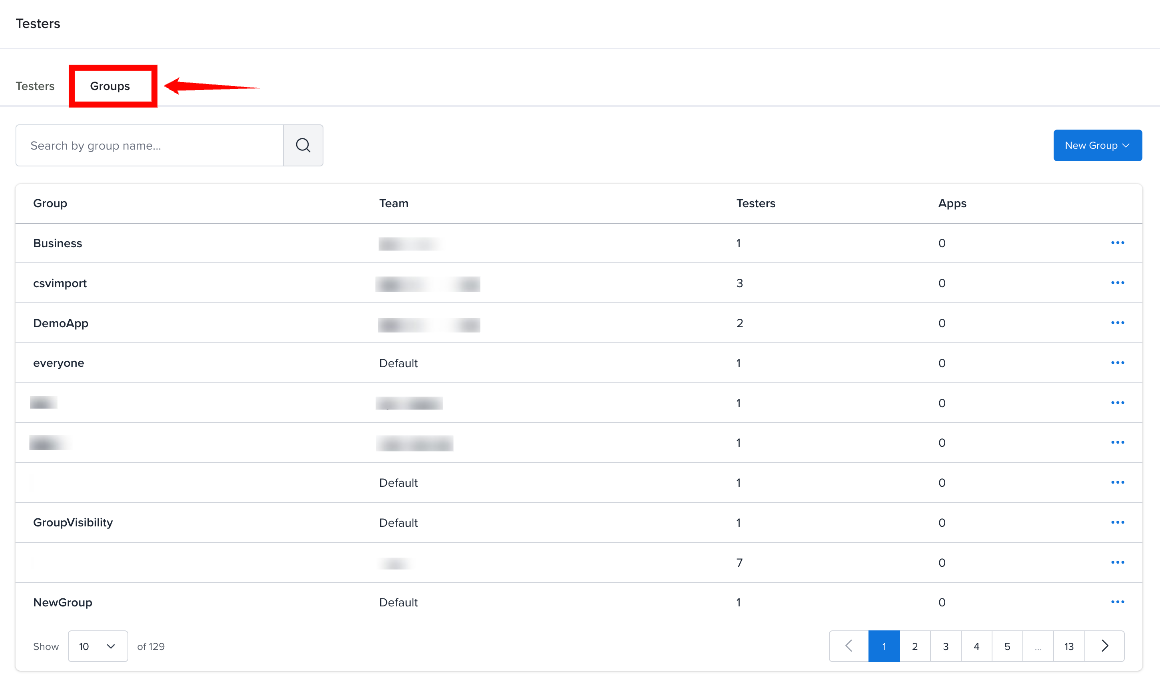
Step 3: Select New Group in the top-right corner. If you belong to more than one team, a list of your teams appears. If you belong to one team, the New Tester Group form opens directly.
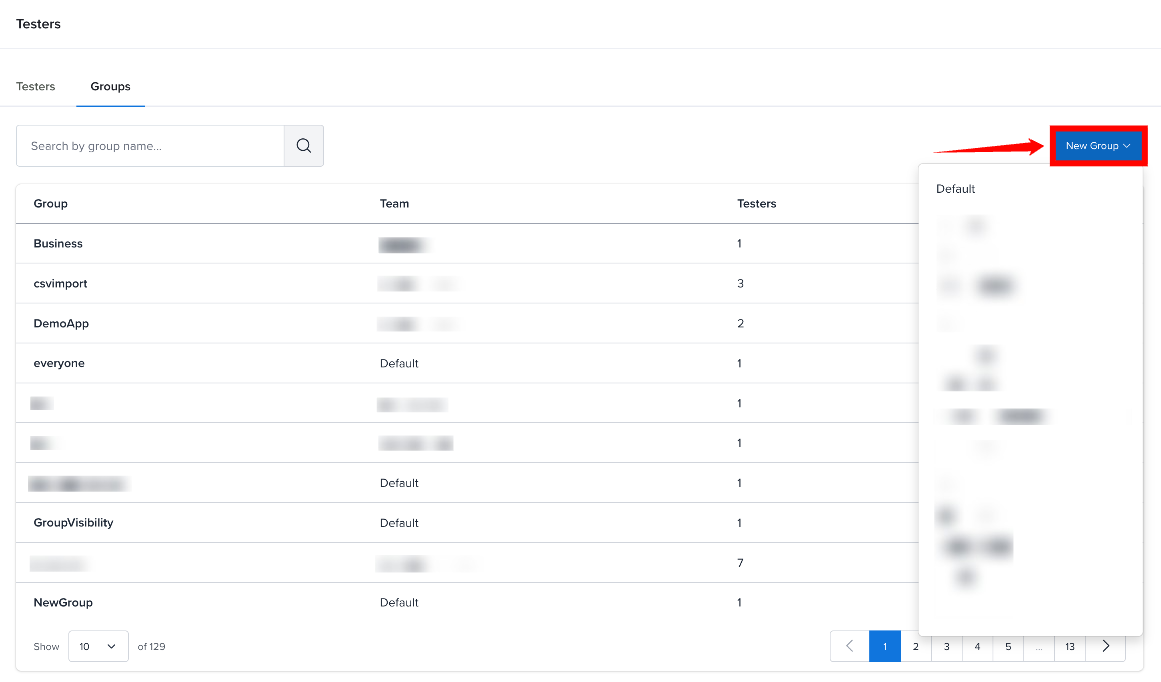
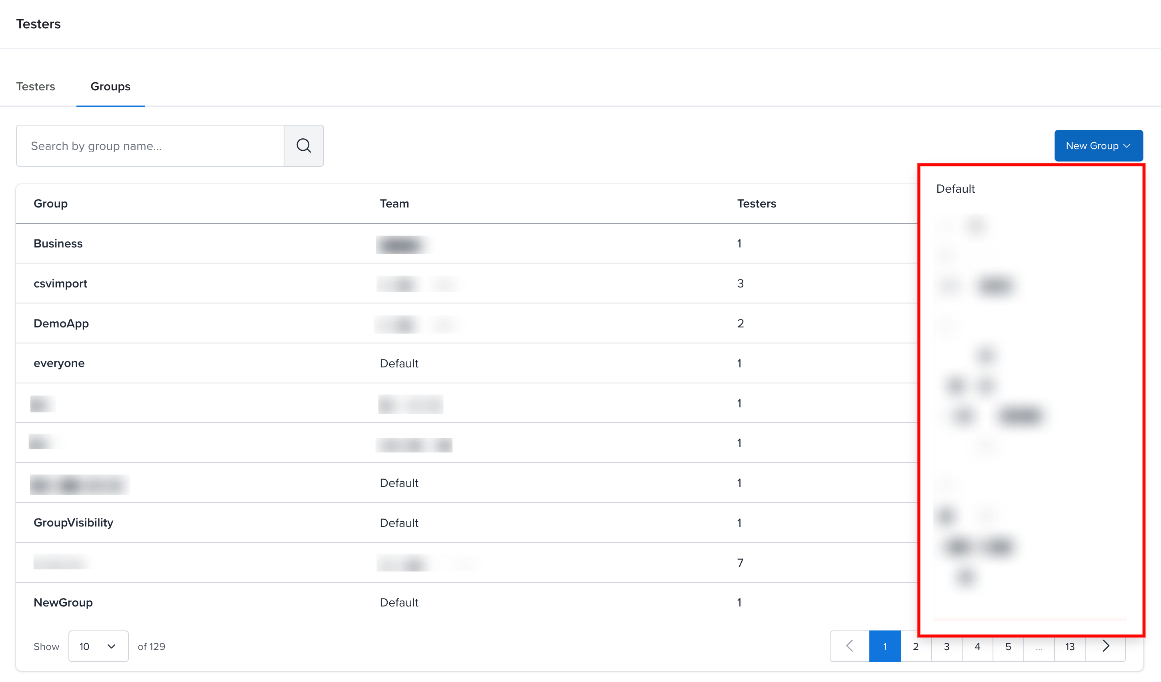
Step 4: Select the team for which you want to create the tester group. The New Tester Group page opens and shows the selected team.
Step 5: Enter a name for the tester group in the Group Name field and then click Create Group.
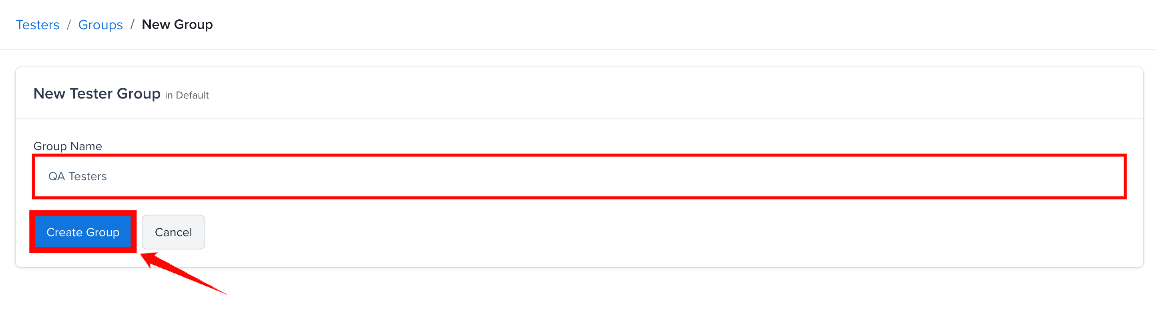
Step 6: The tester group is created and its details page opens. The selected team is displayed below the group name.
Adding Testers
After creating a group, you can add existing testers or invite new testers.
- Select existing testers from a dropdown of users with the Tester role in your organization.
- Invite new testers by email, they will receive an invitation to join.
Invite a New Tester
If the person is not already an existing tester, you can invite them to your organization by entering their email addresses. You can also add them to tester groups during the invitation process.
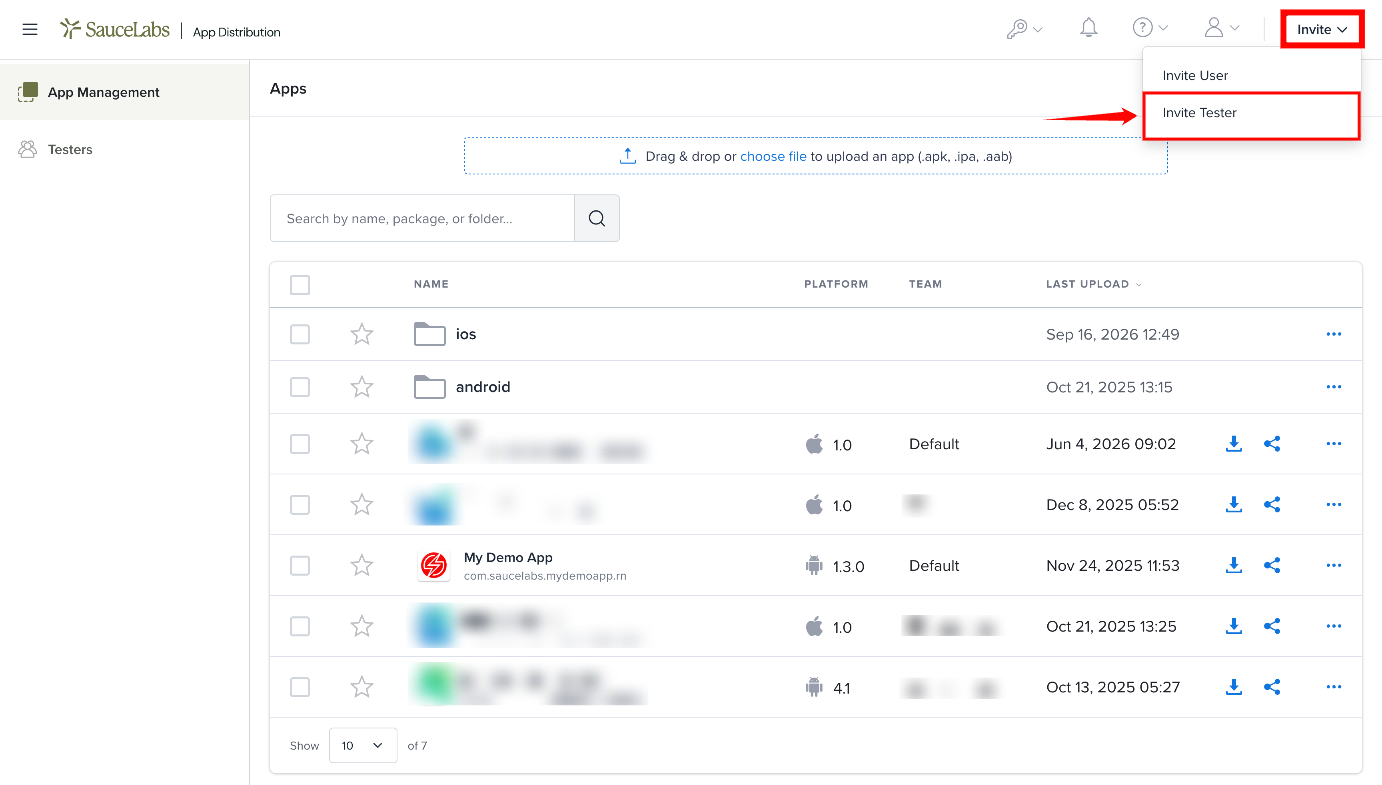
Step 1: Select Invite in the top-right corner, and then select Invite Tester. The Invite Testers page opens.
Members who don't see the Invite menu can use the Invite Testers button on the Testers page.
Step 2: Enter the tester's email address in the Email Addresses field.
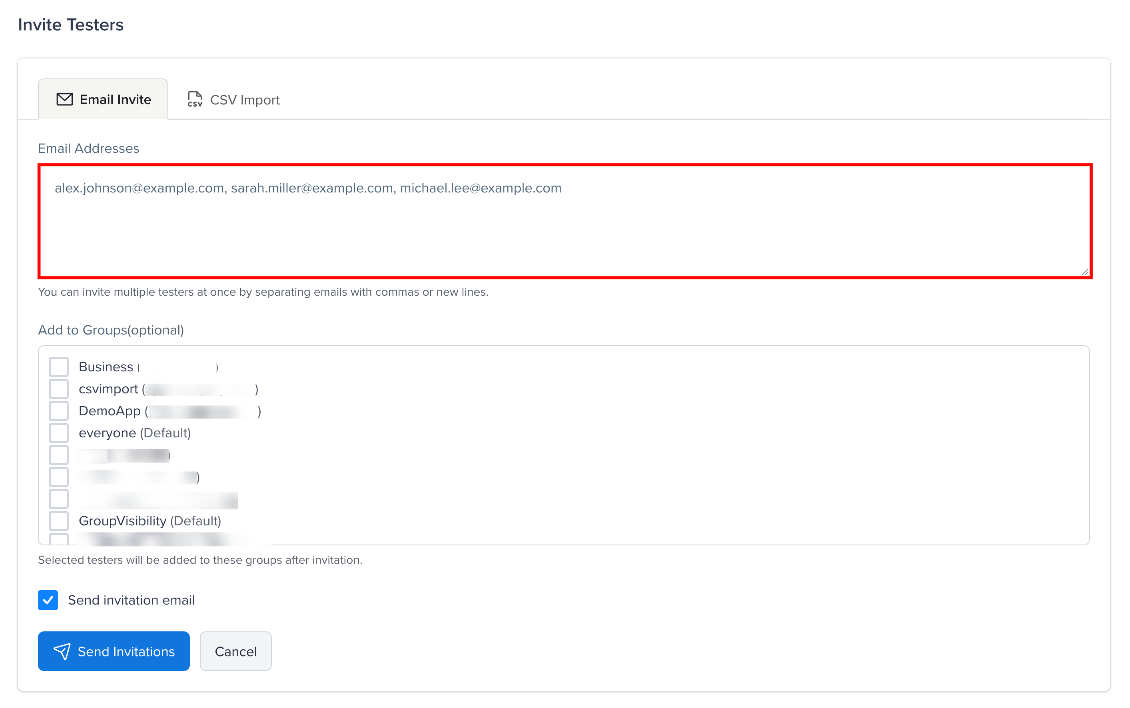
You can invite multiple testers at once by entering multiple email addresses separated by commas or new lines.
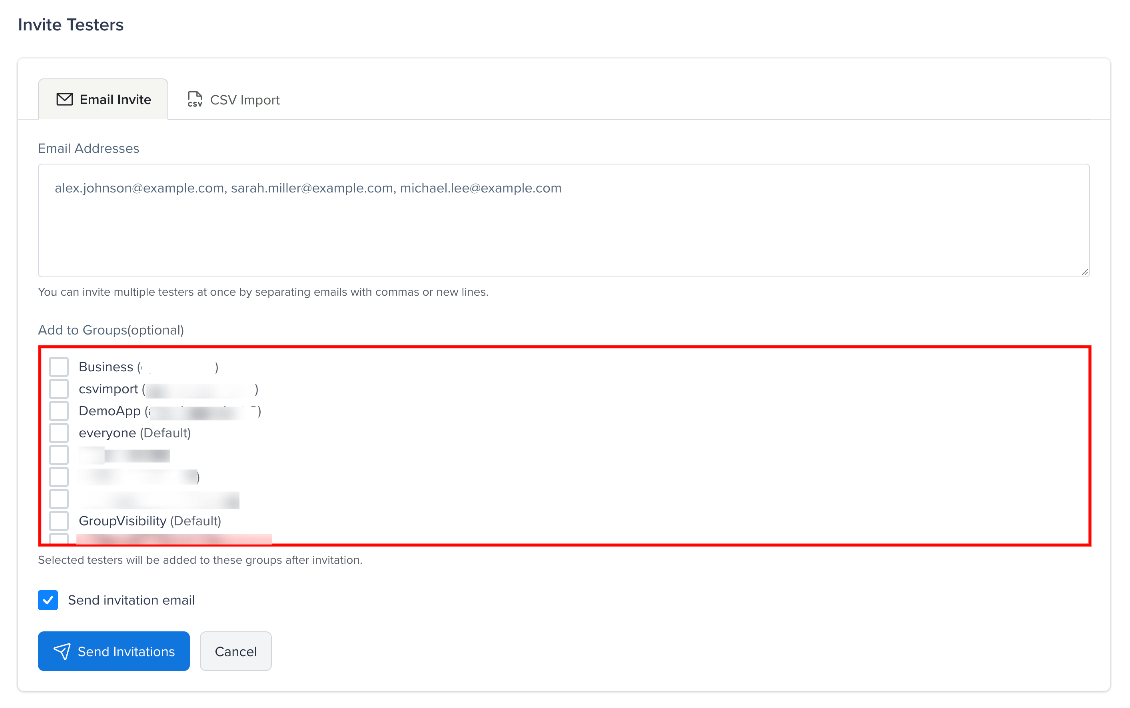
Step 3: If you want to add the testers to a group, select one or more groups under Add to Groups (optional). The selected testers will be added to these groups after the invitation.
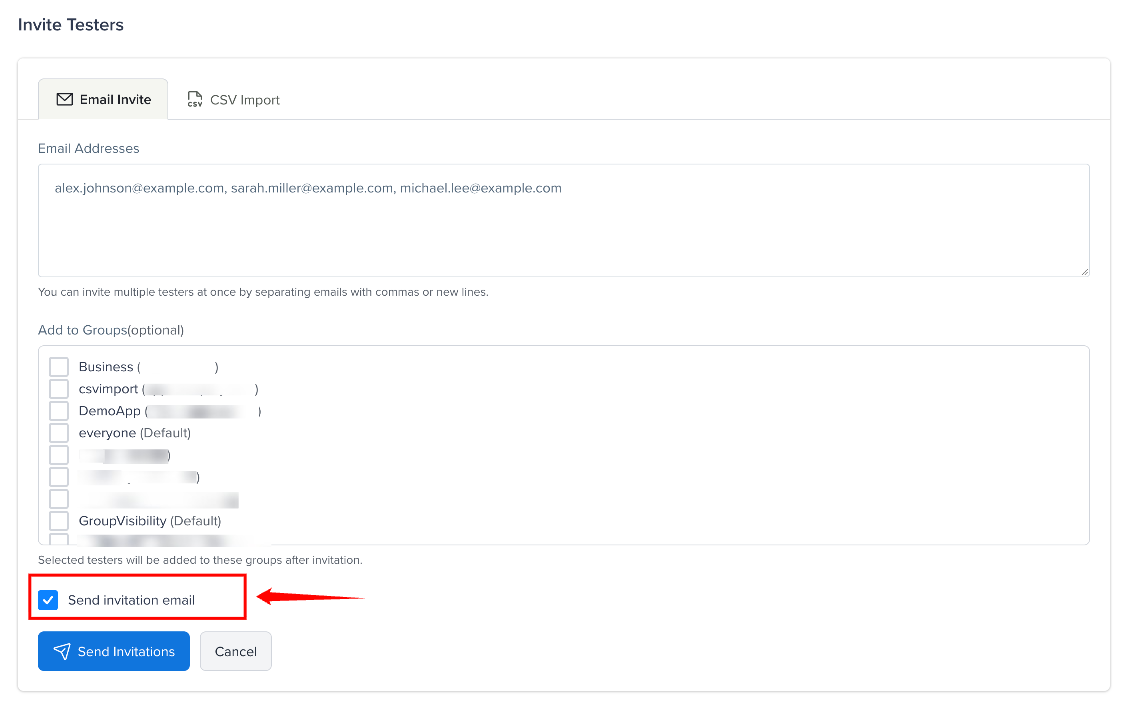
Step 4: Select Send invitation email if you want the testers to receive an invitation email. This option is selected by default.
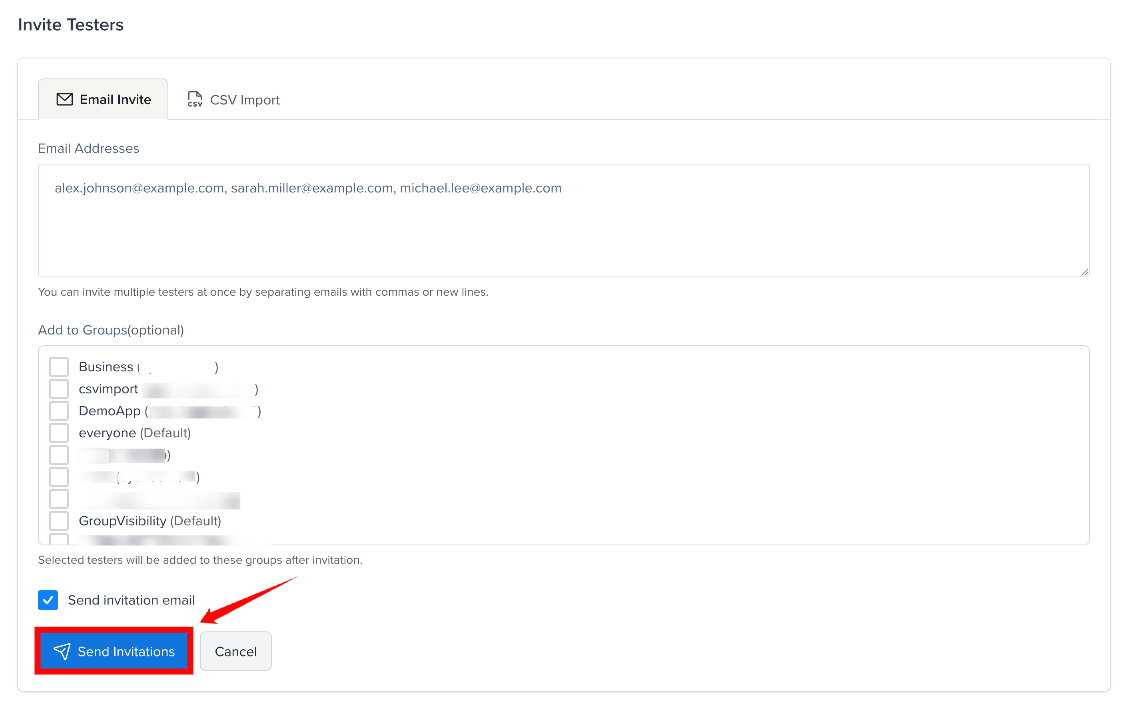
Step 5: Select Send Invitations. The invitations are sent to the specified email addresses.
Invite Testers from a CSV File
On the Invite Testers page, open the CSV Import tab, upload a .csv file with an email column, then click Import & Invite.
Team Isolation
Groups belong to a specific team. This means:
- A group created in Team A can only be assigned to Team A's apps.
- Members only see groups from their own team.
- Admins (Account Owner / Org Admin) see all groups across all teams.
- Testers can be added to groups in different teams - they will only see the apps assigned to each specific group.
Assigning Groups to Apps
After adding testers to a group, assign the group to an app so the testers can access its builds.
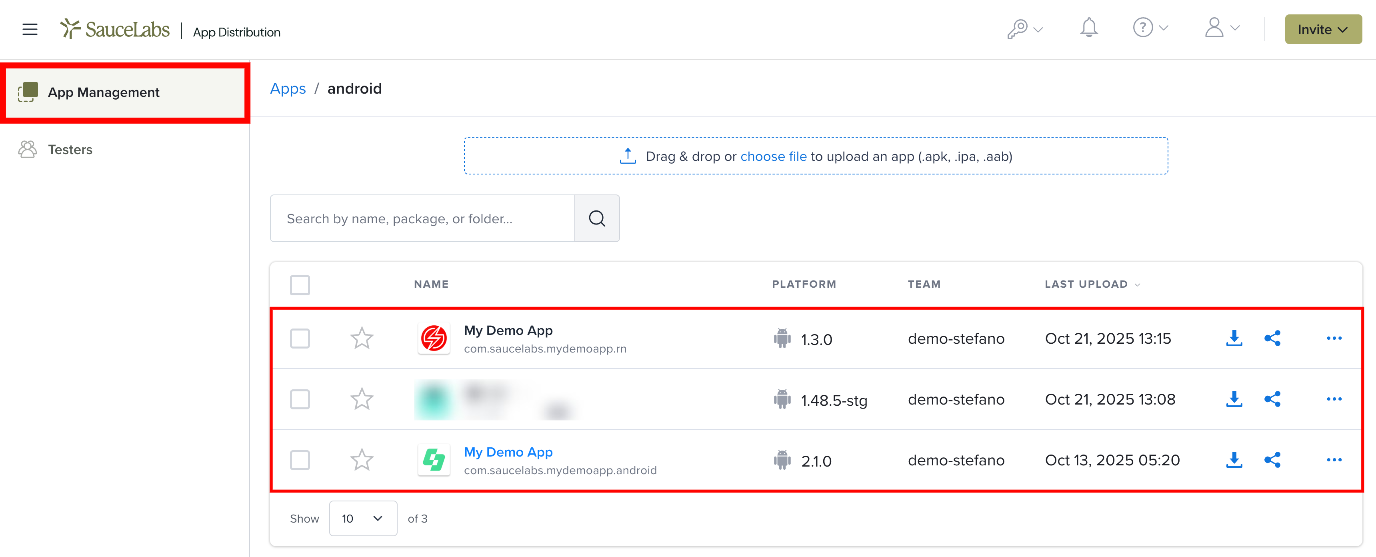
Step 1: Open App Management from the sidebar and select the app to which you want to assign the tester group. The app details page opens.
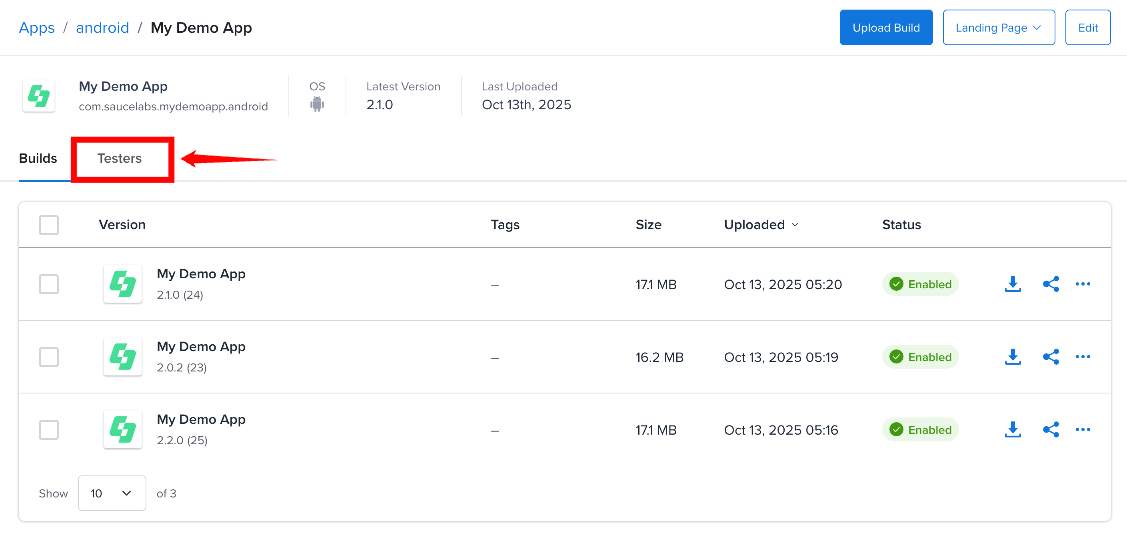
Step 2: Select the Testers tab. The Groups tab is displayed by default.
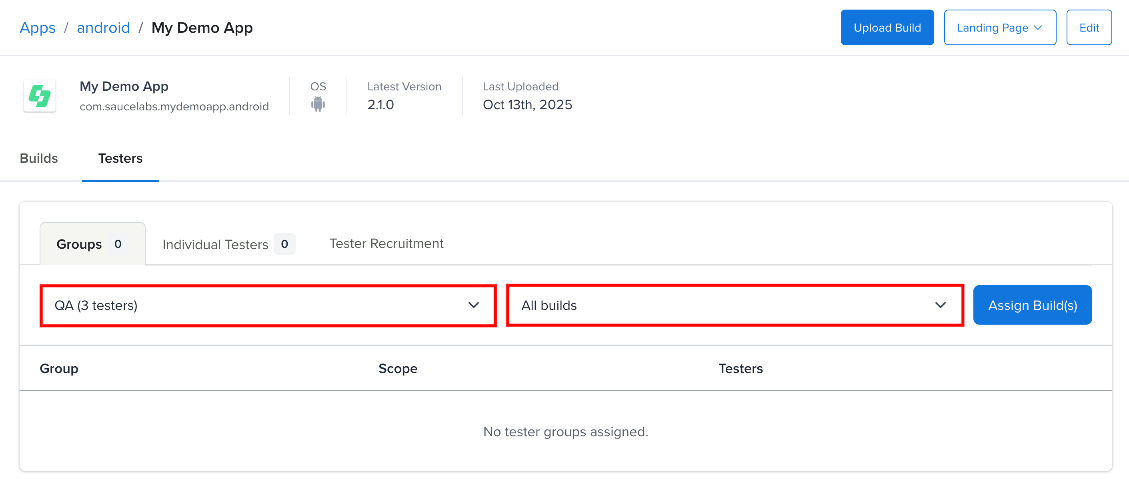
Step 3: Select a tester group from the Select a group dropdown list, then select the builds you want to make available to the group. You can assign the group to all builds of the app or to a specific build only.
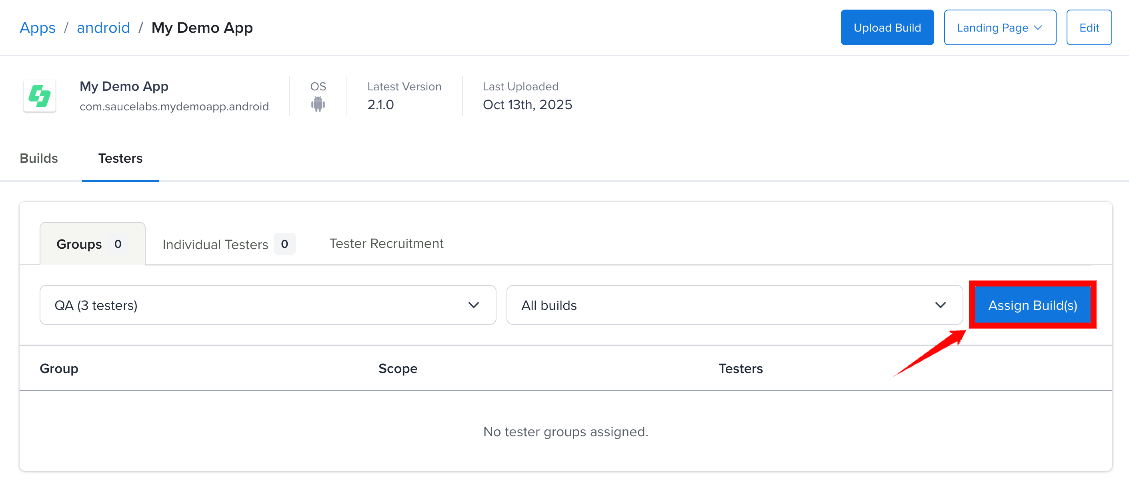
Step 4: Select Assign Build(s). The tester group is assigned to the selected build or builds. The assignment appears in the list below with the group, scope, and number of testers.
Only groups belonging to the same team as the app will be available for assignment.
CSV Import / Export
You can bulk-manage testers using CSV files from the group detail page:
Export: Click Export CSV to download all testers in the group as a CSV file with email, first_name, and last_name columns.
Import: Click Import CSV to upload a CSV file. The file must include an email column. Optional columns: first_name, last_name.
- New users will be created and sent an invitation email automatically.
- Existing users already in the group will be skipped.
- If a user exists but doesn't have a name set, the name from the CSV will be used.
The file must have a .csv extension. Testers added by CSV import don't receive the in-app "added to group" notification.
Example CSV:
email,first_name,last_name
jane@example.com,Jane,Doe
john@example.com,John,Smith
Notifications
On the app page, open Testers ▸ Groups, click ⋯ on the group's row, and select Send Notification to email all testers in the group with the install link for the app.
Testers who have opted out of email notifications will not receive these emails. Each user can manage their preference from My Profile or via the unsubscribe link in notification emails. See Notifications for details.