SMTP Integration
Configure your own SMTP server to send all outgoing emails (build notifications, invitations, app assignments) through your mail provider. Each organization can have its own SMTP configuration, with a global fallback for organizations that don't.
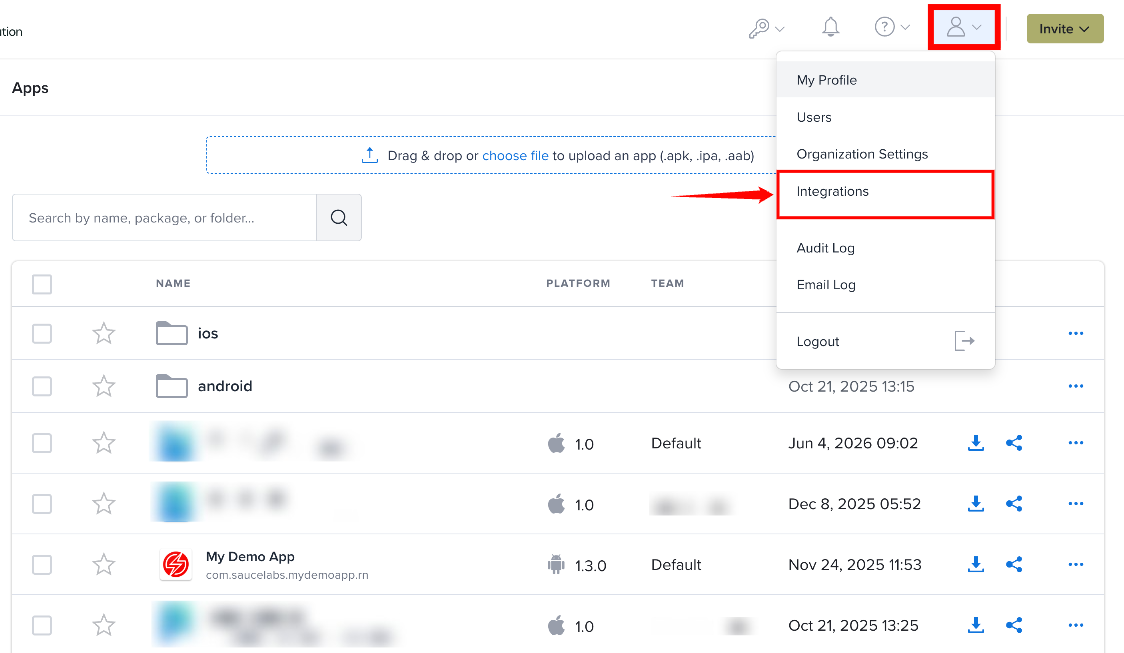
Only Account Owners and Org Admins can configure SMTP settings. Go to Profile menu → Integrations → SMTP.
Prerequisites
- An SMTP server (e.g., Amazon SES, SendGrid, Mailgun, Gmail, or your corporate mail server)
- SMTP credentials: host, port, username, and password
- A verified sender email address (required by most providers to avoid spam filtering)
Setting Up SMTP
Step 1: Click the Profile icon in the top-right corner and select Integrations from the user menu.
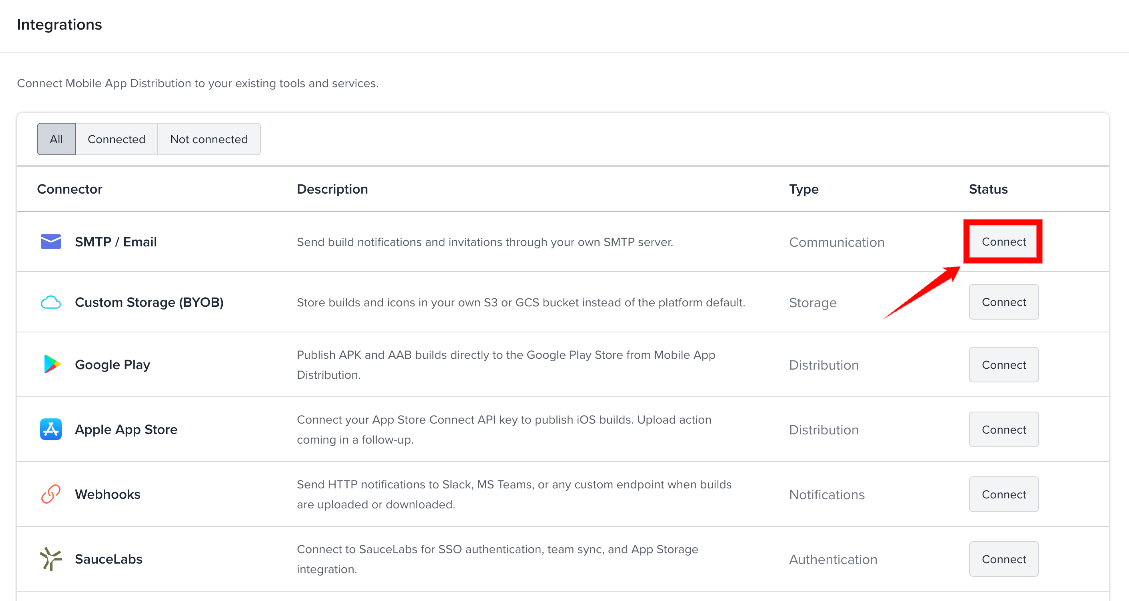
Step 2: On the Integrations page, find SMTP / Email under Communication and click Connect.
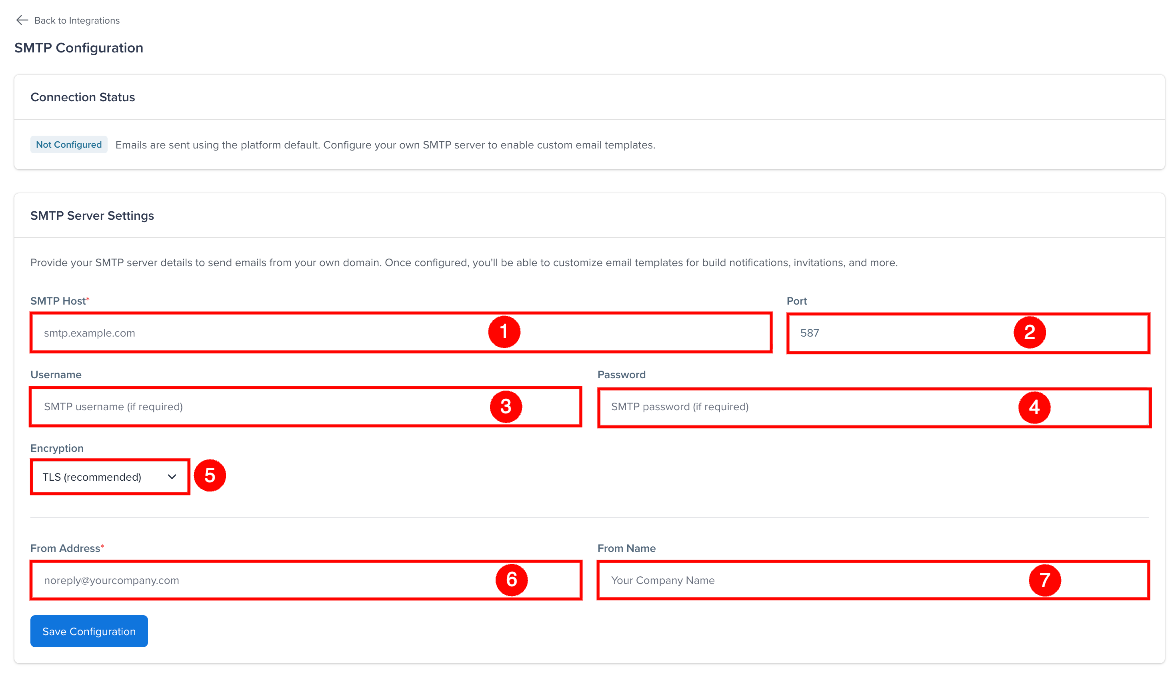
Step 3: In the SMTP Configuration page, enter your SMTP server details.
| Ref. | Field | Description | Example |
|---|---|---|---|
| 1. | SMTP Host | Your mail server hostname | email-smtp.us-east-1.amazonaws.com |
| 2. | SMTP Port | Server port (default: 587) | 587 |
| 3. | Username | SMTP authentication username | your-smtp-username |
| 4. | Password | SMTP authentication password | Stored encrypted — never shown after saving |
| 5. | Encryption | Connection security: TLS, SSL, or None | TLS (recommended) |
| 6. | From Address | Sender email on outgoing messages | noreply@yourcompany.com |
| 7. | From Name | Sender display name (optional) | Your Company |
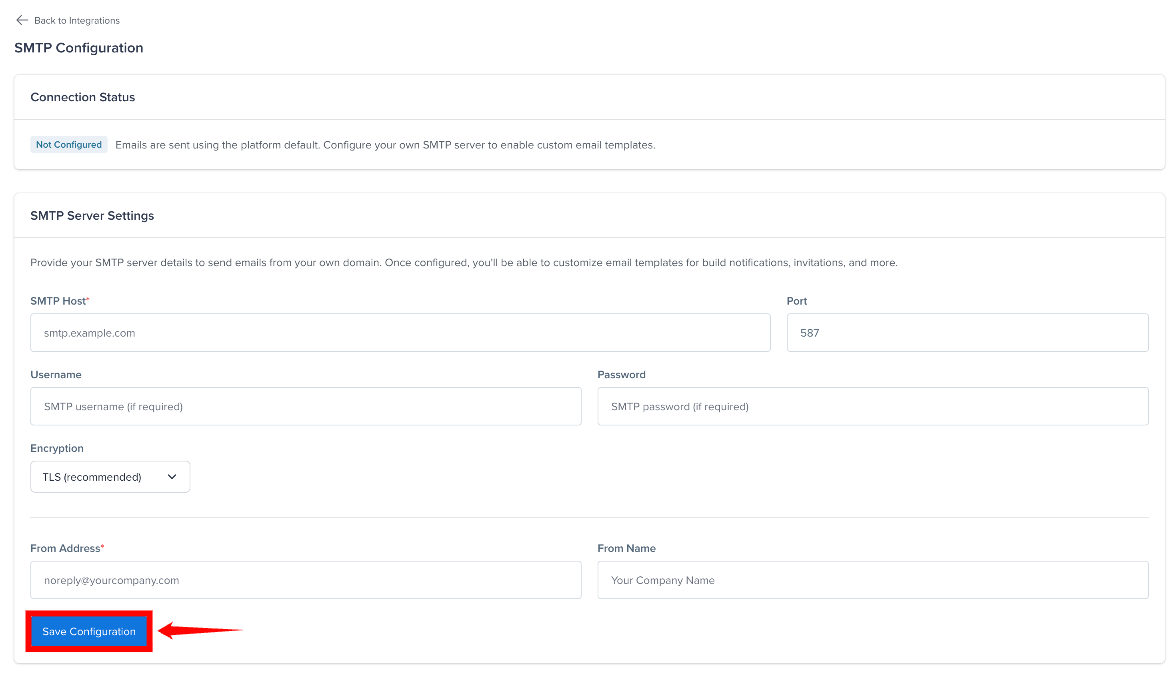
Step 4: Click Save Configuration to save your SMTP settings.
Step 5: Click Test Connection to send a test email to your own address and verify the setup.
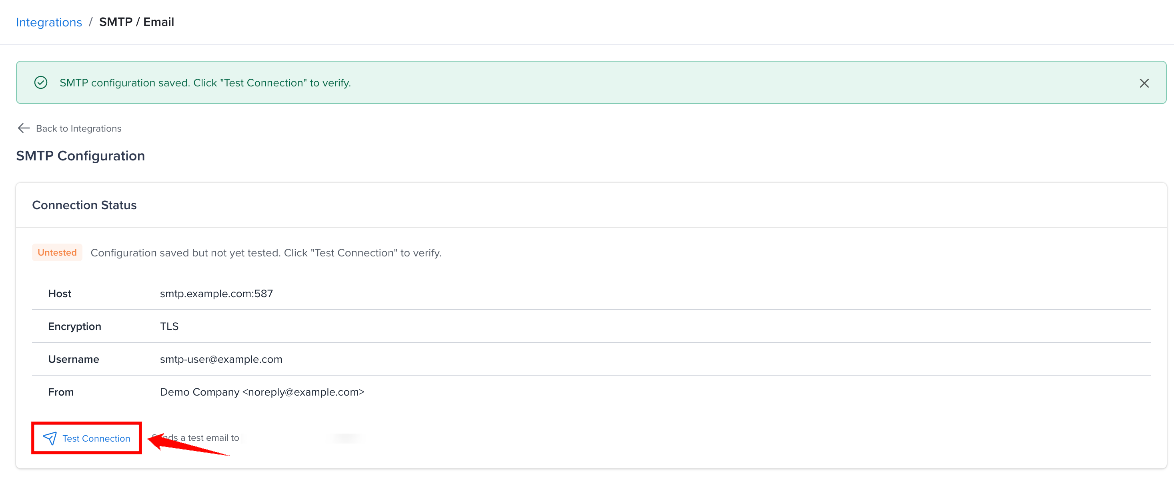
Connection Status
After saving, the SMTP settings page shows one of three statuses:
| Status | Meaning |
|---|---|
| Untested | Configuration saved but not yet verified |
| Connected | Test email sent successfully - SMTP is working |
| Failed | Test failed - check credentials and server settings. The error message is shown below the status. |
How Emails Are Sent
All outgoing emails are processed asynchronously through a background queue. When an email is triggered (e.g., a build upload notification), it is placed in the queue and delivered shortly after. If delivery fails, the system retries up to 3 times with exponential backoff before marking it as failed.
This means email sending never blocks the UI or API — uploads and other actions complete immediately while notifications are delivered in the background. The test email is the exception: it is sent immediately, while all other emails are queued.
Per-Organization SMTP
Each organization can configure its own SMTP server. When sending an email, the system follows this resolution order:
- Organization SMTP - if the organization has saved an SMTP configuration, use it.
- Global SMTP - fall back to the platform-wide SMTP configuration.
- Default mailer - if no SMTP is configured at any level, use the platform default.
This allows different organizations to send emails from their own domains (e.g., noreply@company-a.com vs noreply@company-b.com) while sharing the same platform.
Once organization SMTP is saved, all organization email is sent through it, even if the test failed. There is no fallback, so test your settings before saving.
Security
SMTP passwords are encrypted at rest using libsodium (XSalsa20-Poly1305). They are never stored in plain text, never logged, and never displayed in the UI after saving. Only the mail-sending service decrypts them at the moment of delivery.
Common SMTP Providers
| Provider | Host | Port | Encryption |
|---|---|---|---|
| Amazon SES | email-smtp.{region}.amazonaws.com | 587 | TLS |
| SendGrid | smtp.sendgrid.net | 587 | TLS |
| Mailgun | smtp.mailgun.org | 587 | TLS |
| Gmail / Google Workspace | smtp.gmail.com | 587 | TLS |
| Microsoft 365 | smtp.office365.com | 587 | TLS |
Disconnecting
Click Remove Configuration on the SMTP settings page to remove the configuration. Emails will fall back to the global SMTP or the platform default.
Custom Email Templates
Create fully custom HTML email templates for every type of email your organization sends. Replace the default system templates with your own branded, custom-designed emails using simple {variable} placeholders.
Email templates are available after you configure organization SMTP. Account Owners and Org Admins manage them in the Email Templates section at the bottom of the SMTP page. If you remove the SMTP configuration, custom templates stop being used.
How It Works
Once organization SMTP is configured, you can override the default system emails with your own complete HTML body. Each template type has its own set of variables that get replaced with real values when the email is sent.
Variables use the {variable_name} syntax - just place them anywhere in your HTML subject line or body and they'll be substituted automatically.
Template Types
| Type | When It's Sent |
|---|---|
| Build Notification | When a new build is uploaded and testers are notified |
| Member Invitation | When a new member (non-tester) is invited to the organization |
| Tester Invitation | When a new tester is invited to the organization or added to a group |
| App Assignment | When testers in a group are notified about a newly assigned app |
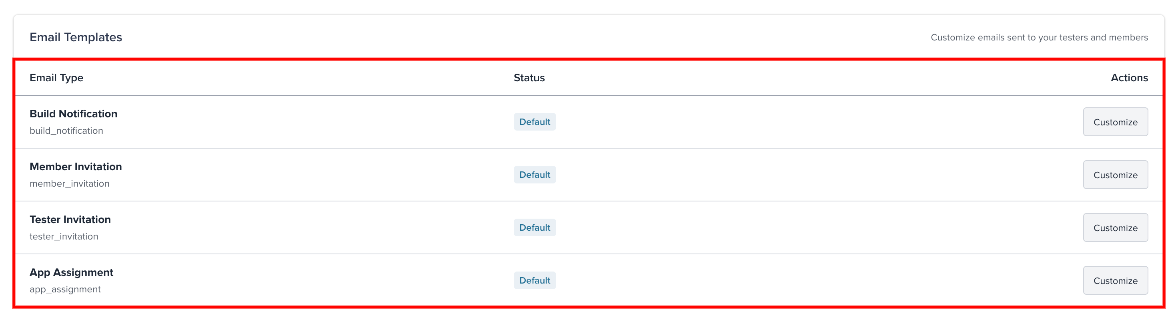
Available Variables
Each template type has its own set of variables:
Build Notification
| Variable | Description |
|---|---|
{app_name} | App's display name |
{version} | Build version number |
{build_number} | Build code / number |
{platform} | Platform (iOS or Android) |
{install_url} | Download / install URL |
{tester_name} | Tester's first name |
{tester_email} | Tester's email address |
{release_notes} | Build release notes |
{organization_name} | Organization name |
{package_name} | App's package name or bundle ID |
{file_size} | Build file size |
{tags} | Build tags |
{organization_subdomain} | Organization subdomain |
{login_url} | Login URL |
{unsubscribe_url} | Unsubscribe URL |
Member Invitation
| Variable | Description |
|---|---|
{organization_name} | Organization name |
{role_name} | Assigned role name |
{accept_url} | Invitation acceptance URL |
Tester Invitation
| Variable | Description |
|---|---|
{organization_name} | Organization name |
{accept_url} | Invitation acceptance URL |
{developer_email} | Email address of the person sending the invitation |
{tester_email} | Tester's email address |
{organization_subdomain} | Organization subdomain |
{login_url} | Login URL |
App Assignment
| Variable | Description |
|---|---|
{app_name} | App's display name |
{organization_name} | Organization name |
{tester_name} | Tester's first name |
{install_url} | Install URL |
Managing Templates
- Go to Profile menu → Integrations → SMTP, and scroll to Email Templates.
- Click Customize on the template type you want to change. Once a custom template exists, the button reads Edit.
- Edit the Subject Line and HTML Body. Click variables in the right panel to insert them at your cursor position.
- Use the Preview button to see a live preview with sample data.
- Click Save Template when you're happy with the result.
Tips
- Use Load Default to start from the system default template and customize from there.
- You can Pause a template to temporarily revert to the system default without deleting your work, and Activate to use it again.
- Use Delete Template to permanently remove the custom template and revert to the system default.
- Templates are complete HTML documents — include your own
<style>tags, inline CSS, and full email-safe HTML. - Test your templates across email clients, as CSS support varies between Gmail, Outlook, and Apple Mail.
Availability
Custom email templates become available as soon as your organization has an SMTP configuration. Removing that configuration stops custom templates from being used, and emails fall back to the system defaults.